

First dot, Server/Internet connection
The first dot indicates the server/internet connection. A green dot signifies a healthy connection, while red indicates that the screen is not connected to the internet.Second dot, Content downloading
The second dot represents content downloading. A yellow dot means content is being retrieved from the server, turning green once it’s ready for display.Third dot, Device date and time
The third dot reflects the device’s date and time. If the device’s date/time is inaccurate due to an unstable internet connection, this dot turns red; otherwise, it remains green.How do I turn off the three dots (health indicators) in Pickcel?
The three dots in the corner of your screen are called health indicators, and they’re controlled by a Device Profile, a set of device-level settings you create once and assign to one or many screens. To turn the dots off, you create (or edit) a profile with the Screen Health Indicator turned off, then assign that profile to the screens where you want the dots hidden.1
Open the Device Profile tab
In the Pickcel console, go to the Settings module and open the Device Profile tab. Click Add Profile in the top-right corner.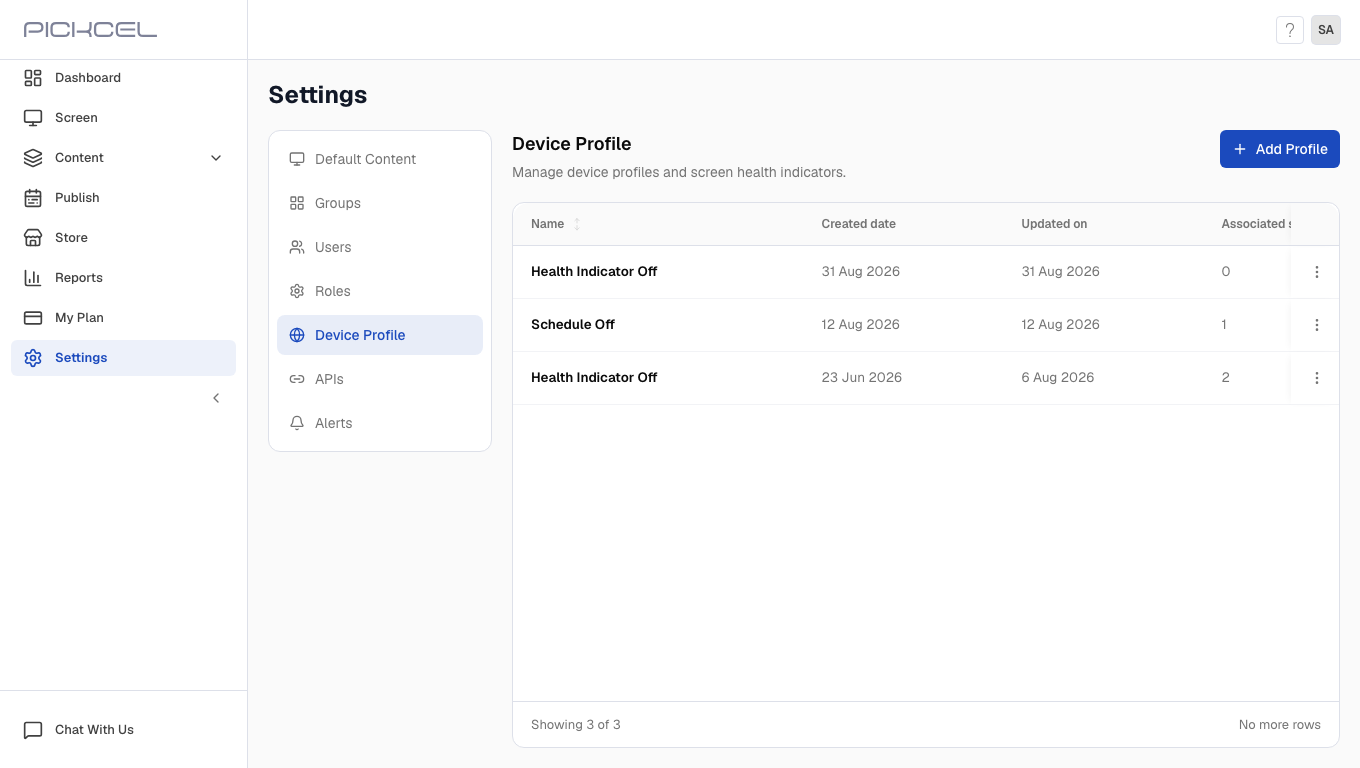
2
Name the profile and turn off the health indicator
Enter a unique Profile Name so you can identify the profile later (for example, “Health Indicator Off”). Then find the Screen Health Indicator toggle and switch it off.The toggle decides whether the three dots show on the device’s screen: when it is on, the dots appear; when it is off, they stay hidden. For a clean screen with no dots, leave this toggle off.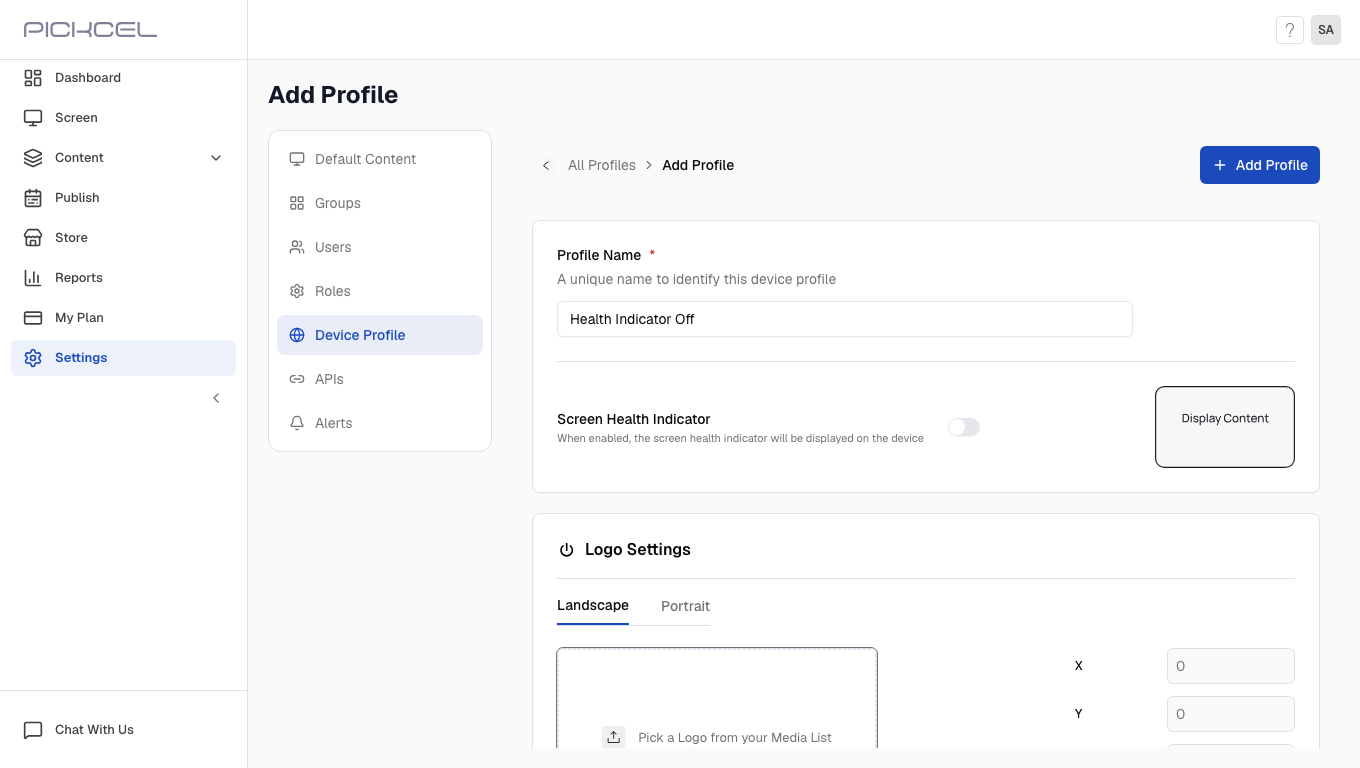
3
Save the profile
Click Add Profile to save. You’ll see a Profile created successfully message, and the new profile appears in your Device Profile list with 0 associated screens for now.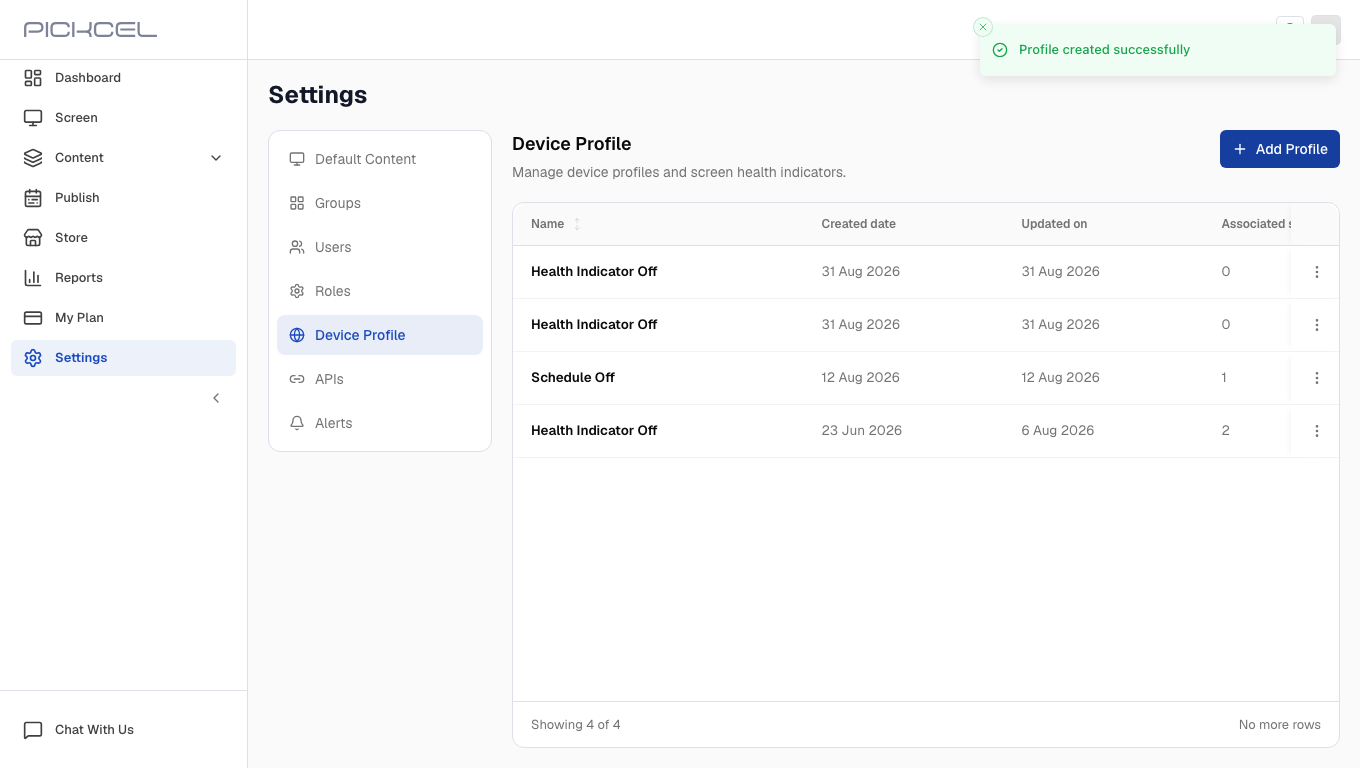
4
Open Assign Screens
The profile only takes effect once it’s applied to a screen. Click the three-dot (…) menu on the right of the profile row and choose Assign Screens.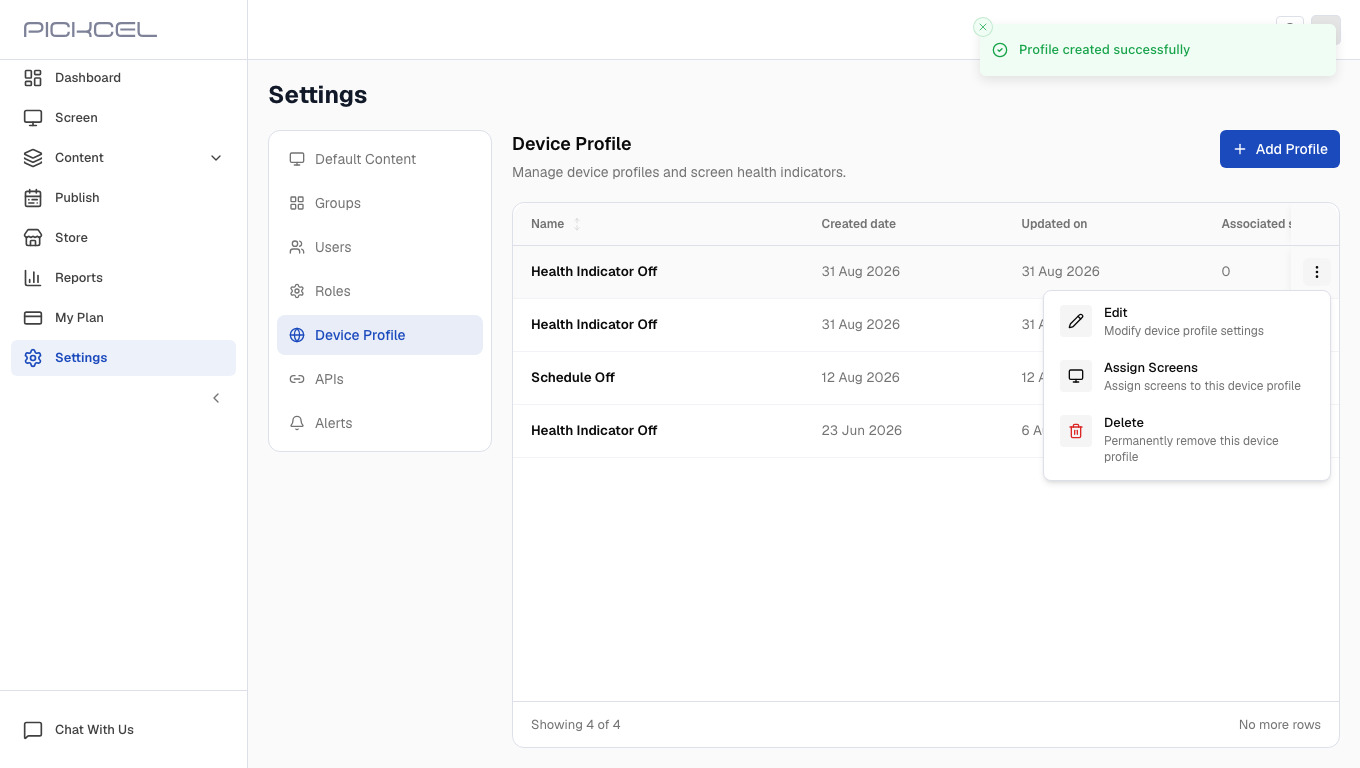
5
Select the screens and assign
Tick the screens where you want the dots hidden, then click Save in the bottom-right corner. You can use the search box to find specific screens.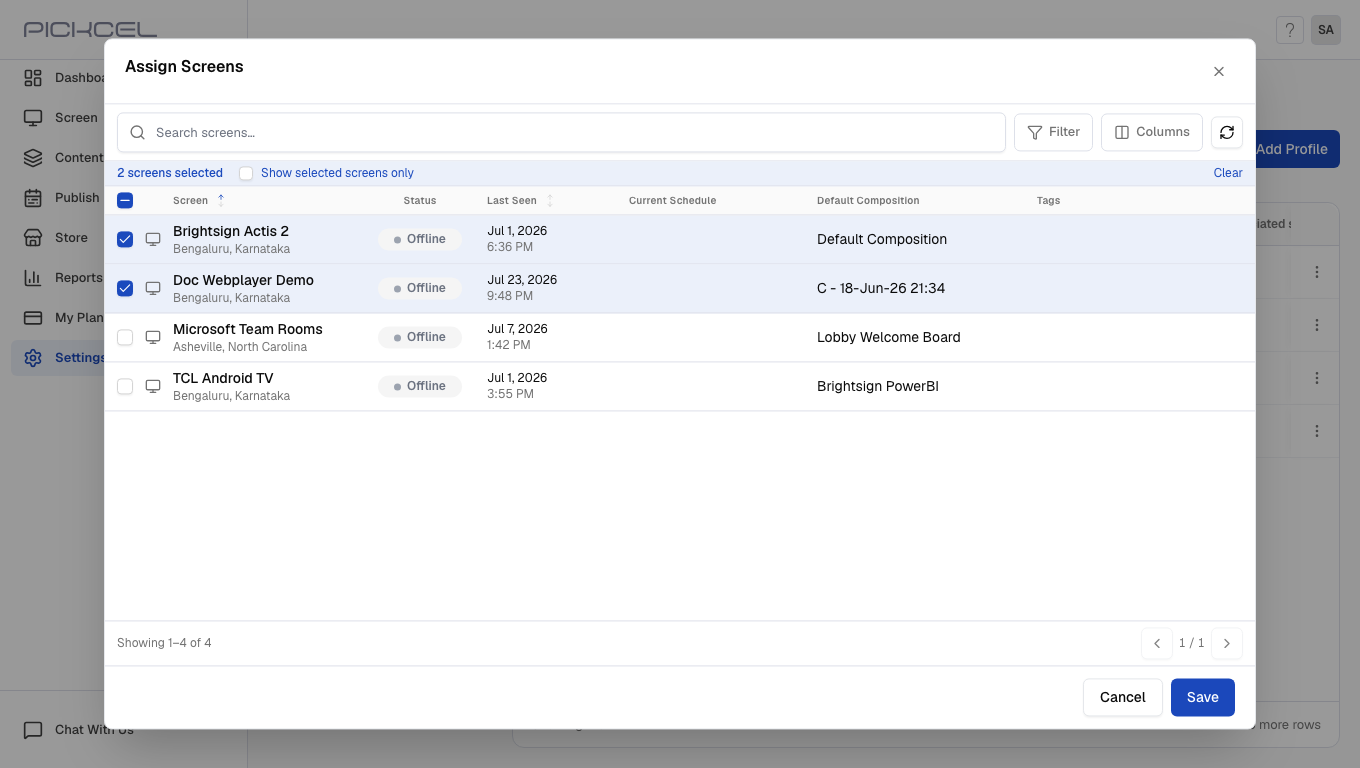
6
Confirm the screens are linked
You’ll see an Updated Successfully message, and the Associated screens count for the profile now reflects the screens you picked.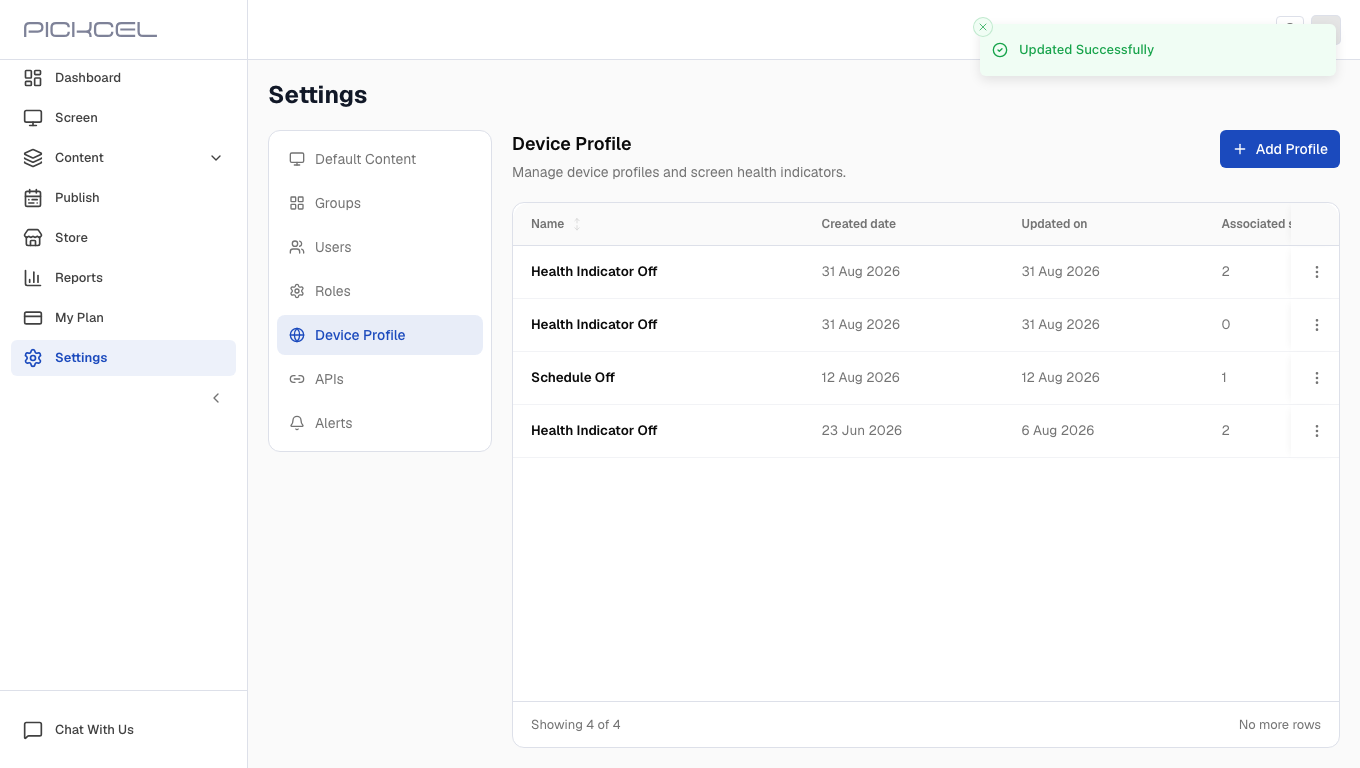
- Restart the screen: switch the display off and then on again.
- Clear the cache from the console: open the Screen module, click the screen to open its details, click the three-dot (…) menu in the top-right, and choose Clear Cache. This re-fetches the latest settings and reloads the screen.
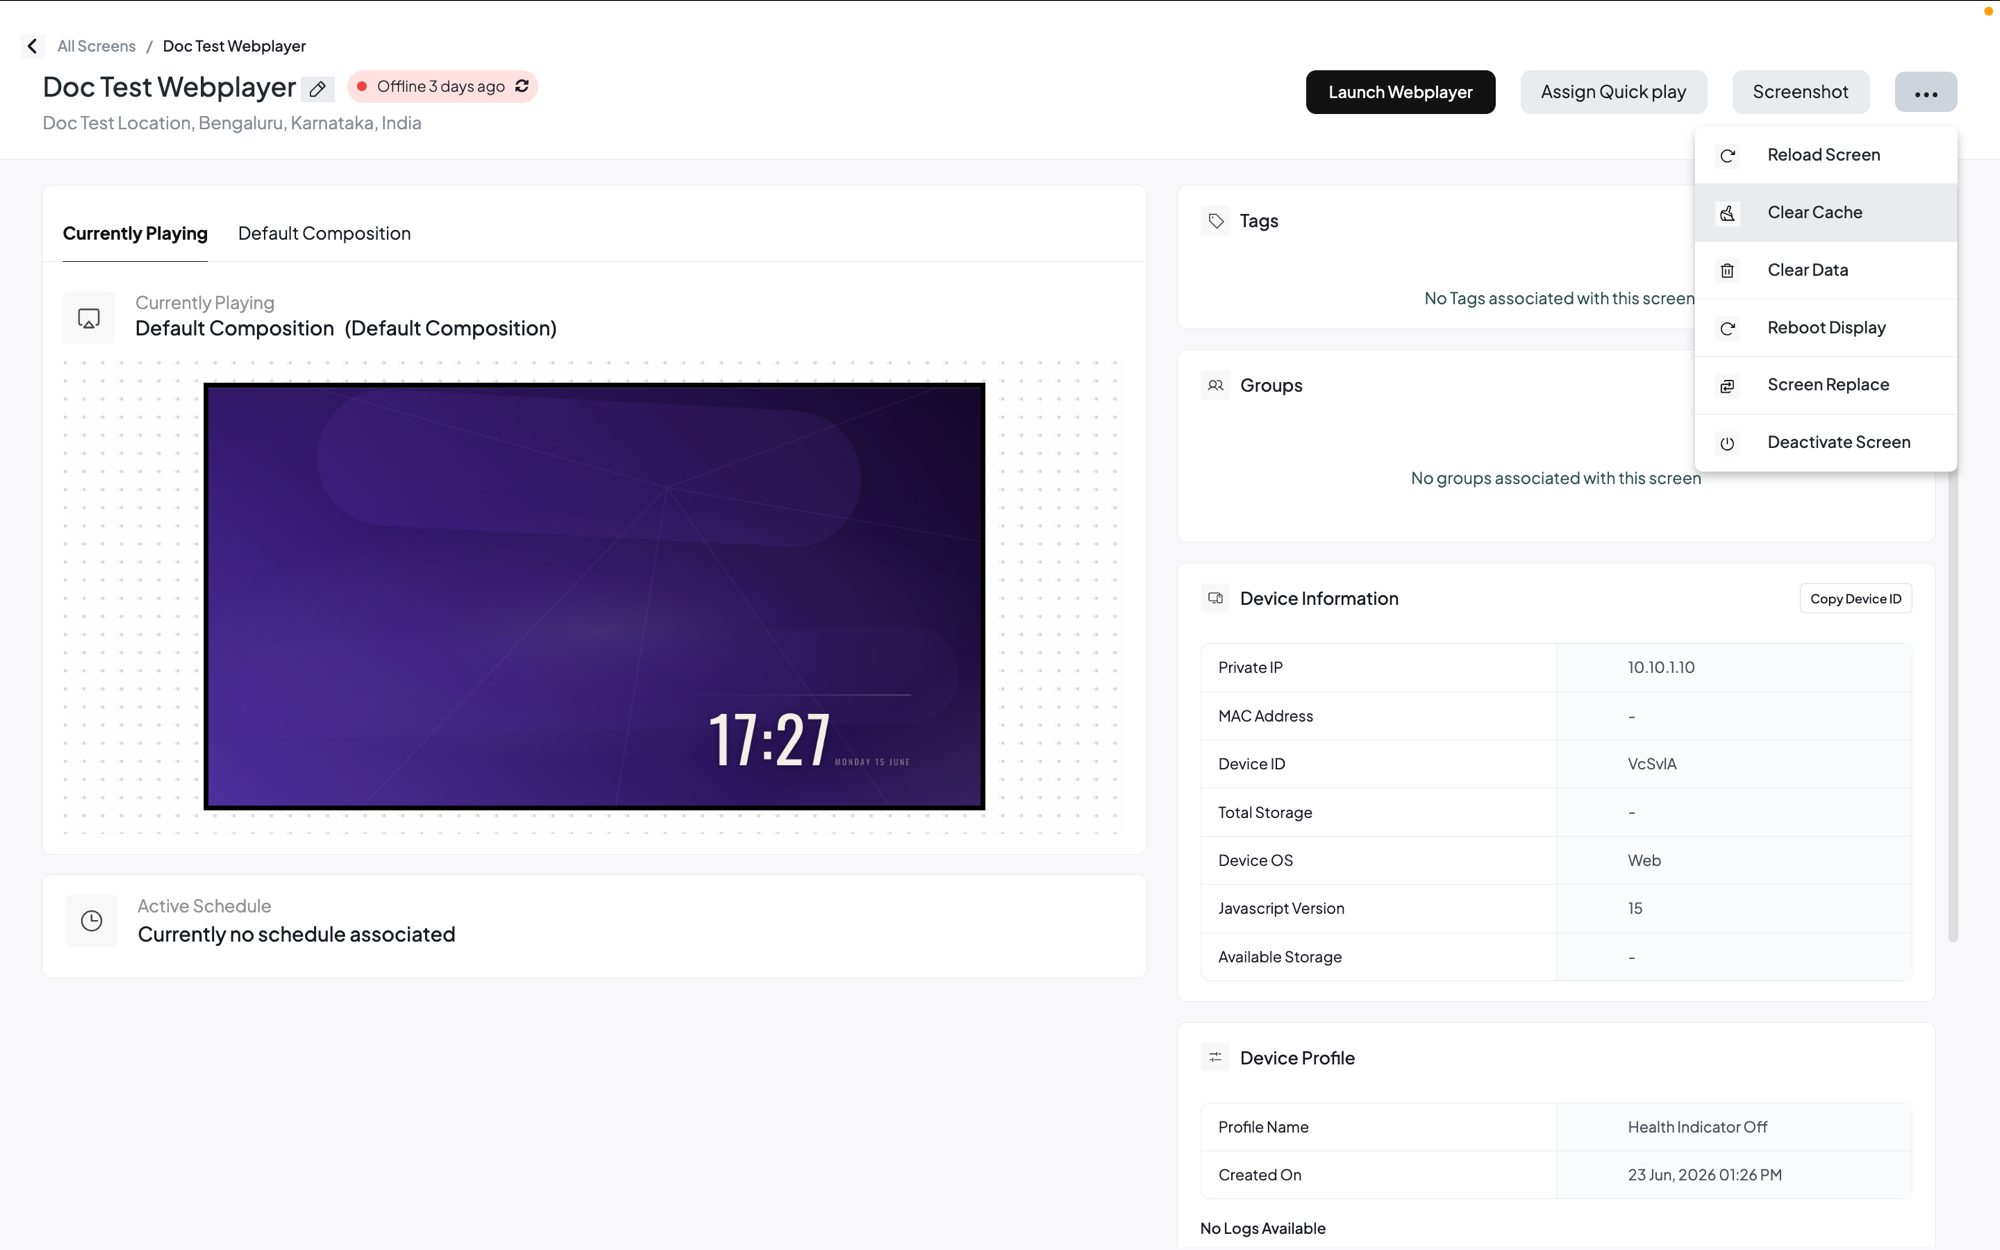
Want the dots back later? Edit the profile, switch Screen Health Indicator back on, and refresh the screen (restart it or clear its cache). For more on profiles, see What is a device profile, and how do I create one?.
Need assistance?
For assistance with any issues related to these health indicators, please reach out to our support team.Related Articles
Screen Registration
Learn how to register and configure your display
Back to FAQs
Browse more troubleshooting guides and FAQs