

Before you begin, you’ll need:
- A screen to display content on: either a smart TV (such as Samsung Tizen or LG webOS) or any monitor/TV connected to a media player (an Android box, Windows PC, Fire TV stick, Raspberry Pi, and so on).
- An active internet connection on that device.
- The Pickcel app installed on the smart TV or player.
1
Install Pickcel Player App
Before registering your screen, ensure you have installed the Pickcel digital signage application on your player device.
2
Launch the app to get your registration code
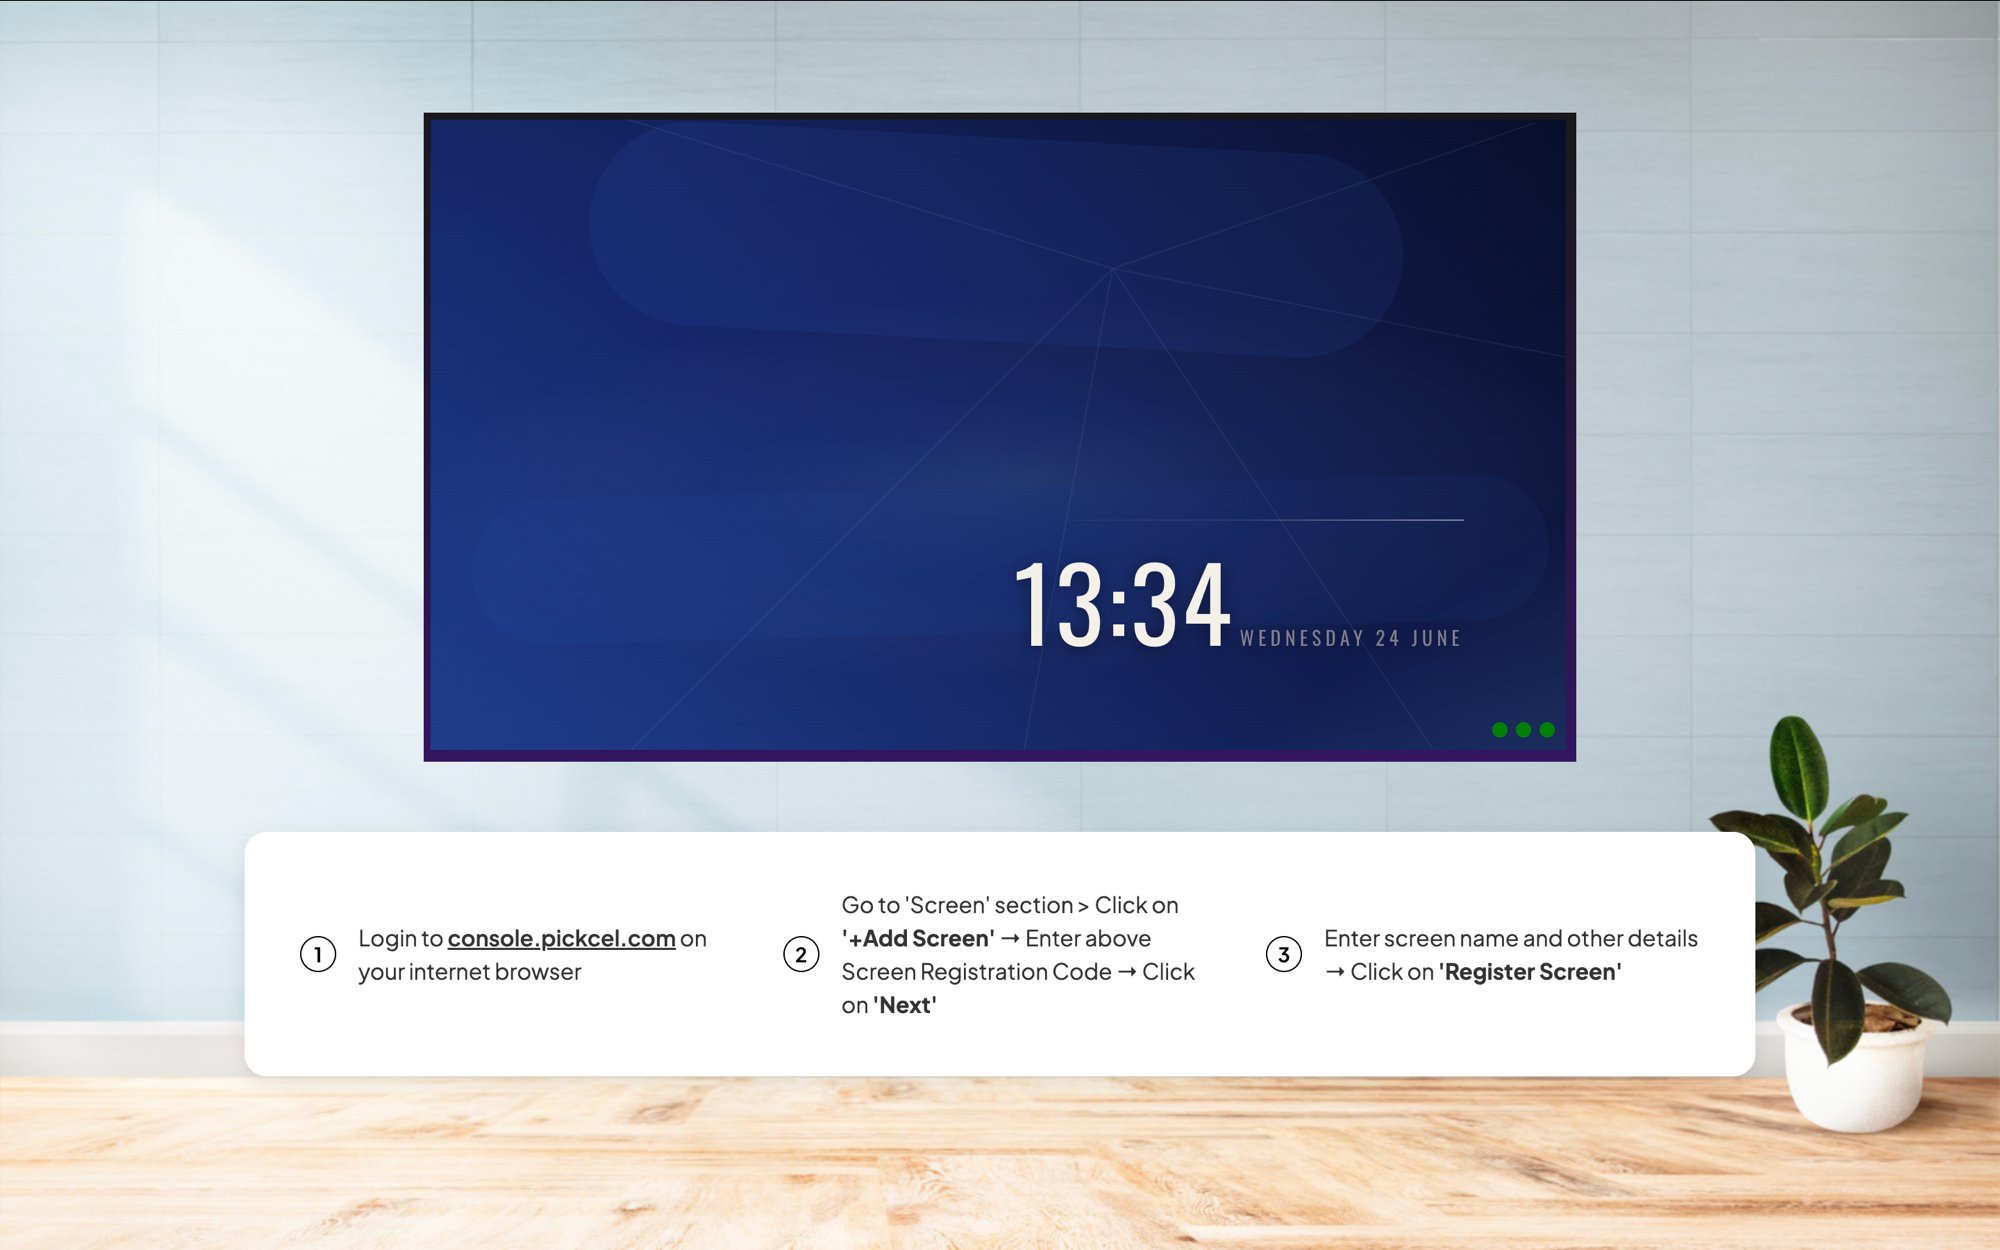
Once installed, launch the Pickcel app on your smart TV or player. It displays a unique 6-character registration code, as shown in the image below.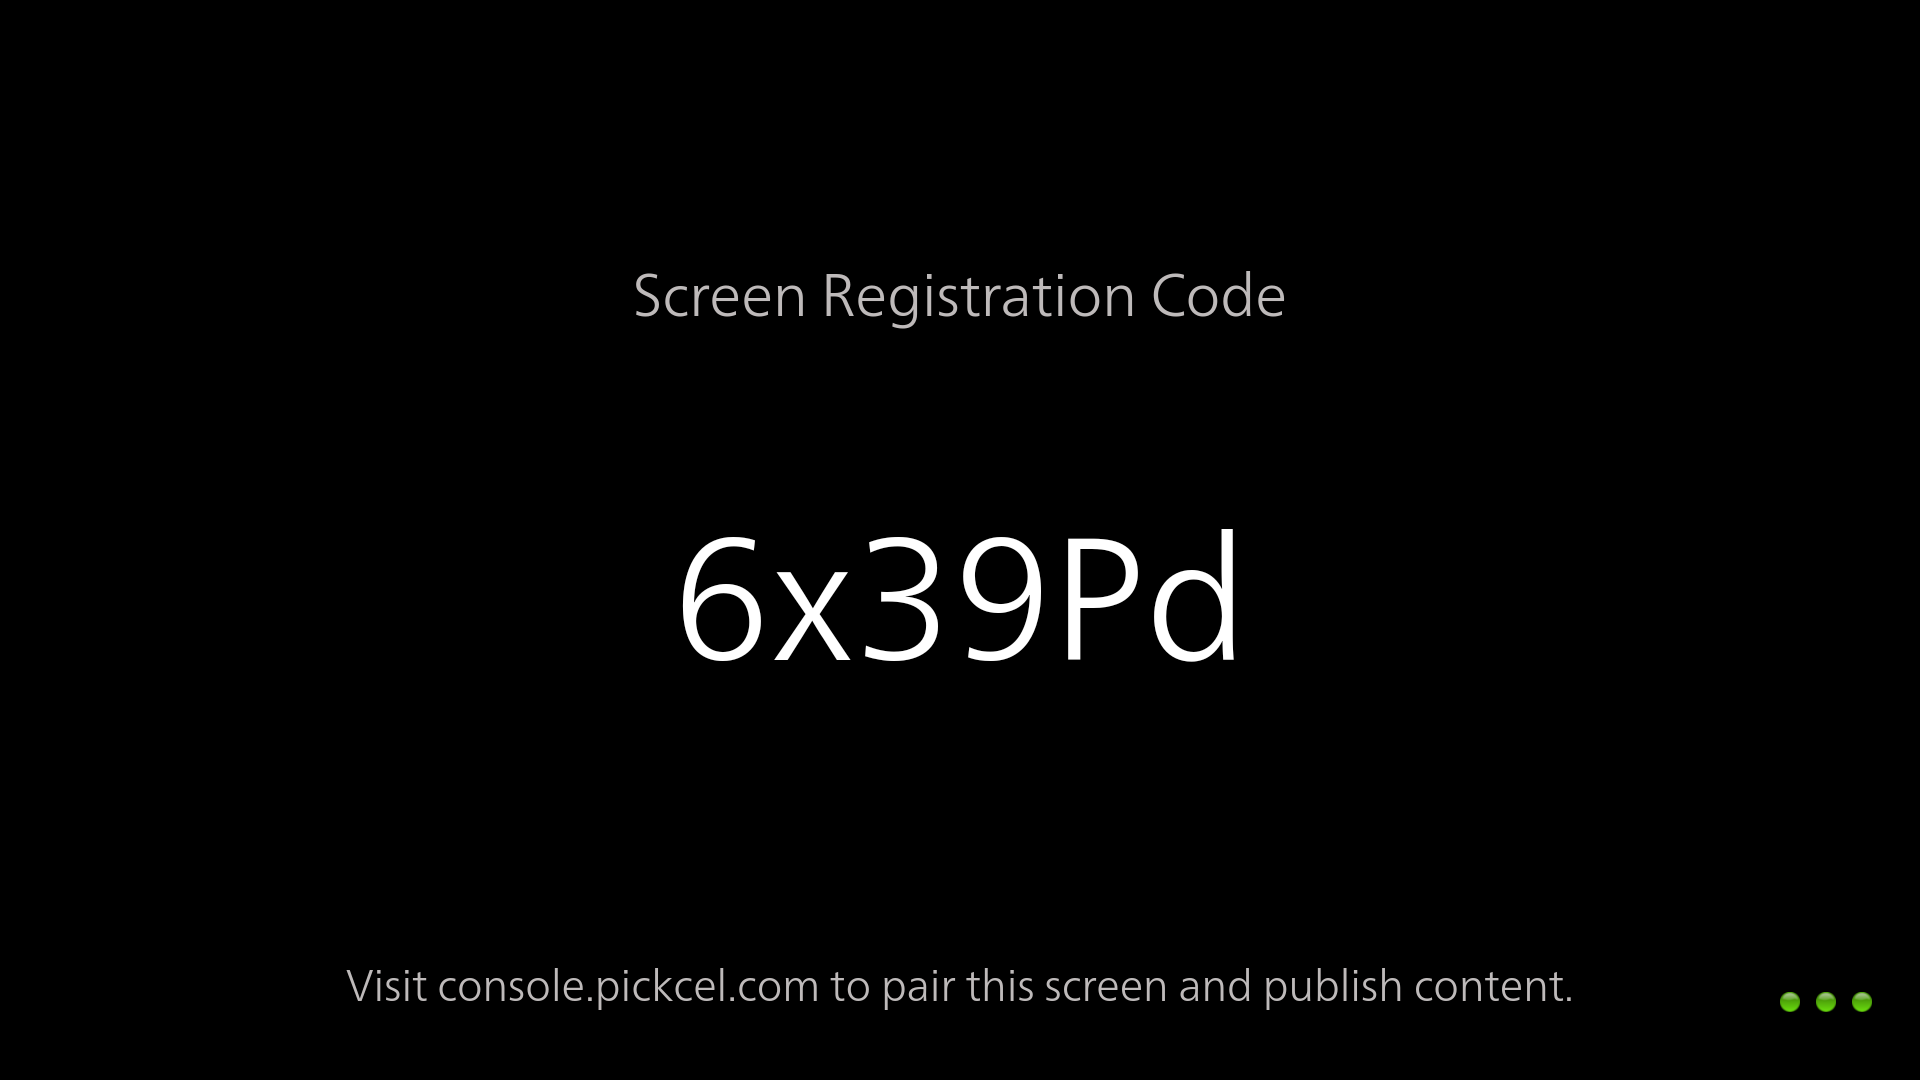
Keep this code handy: you’ll need it in a moment to pair your device with the Pickcel console.
3
Log in to the console and open the Screen module
With your registration code ready, switch to a computer and log in to the Pickcel Console. In the left menu, select Screen to open the Screens page, then click Add Screen in the top-right corner.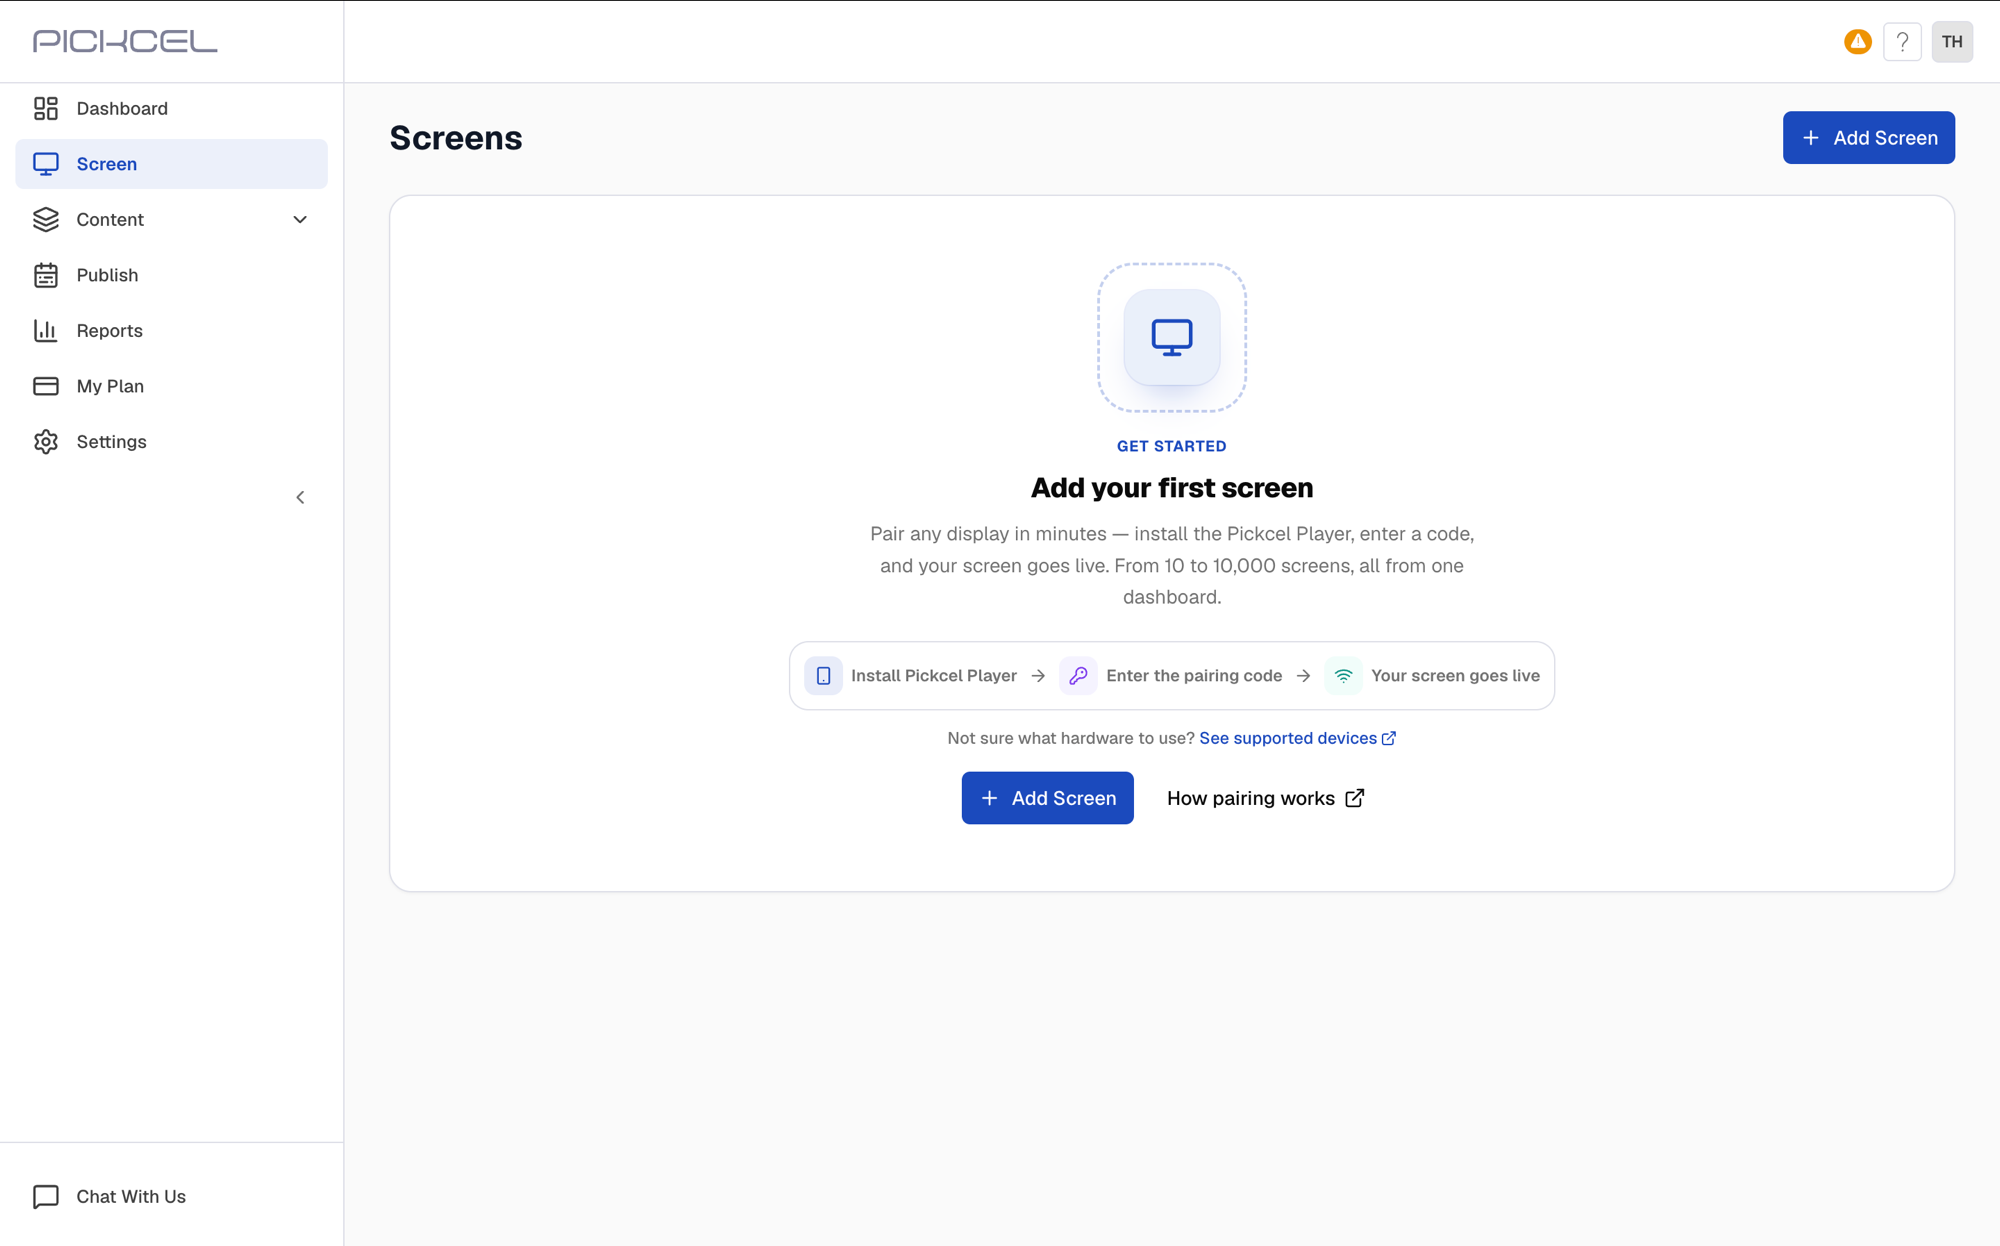
4
Enter your registration code
The Add Screen window opens as a two-step setup. On Enter Registration Code, type the 6-character code your device showed back in Step 2 into the Screen Registration Code field, then click Continue.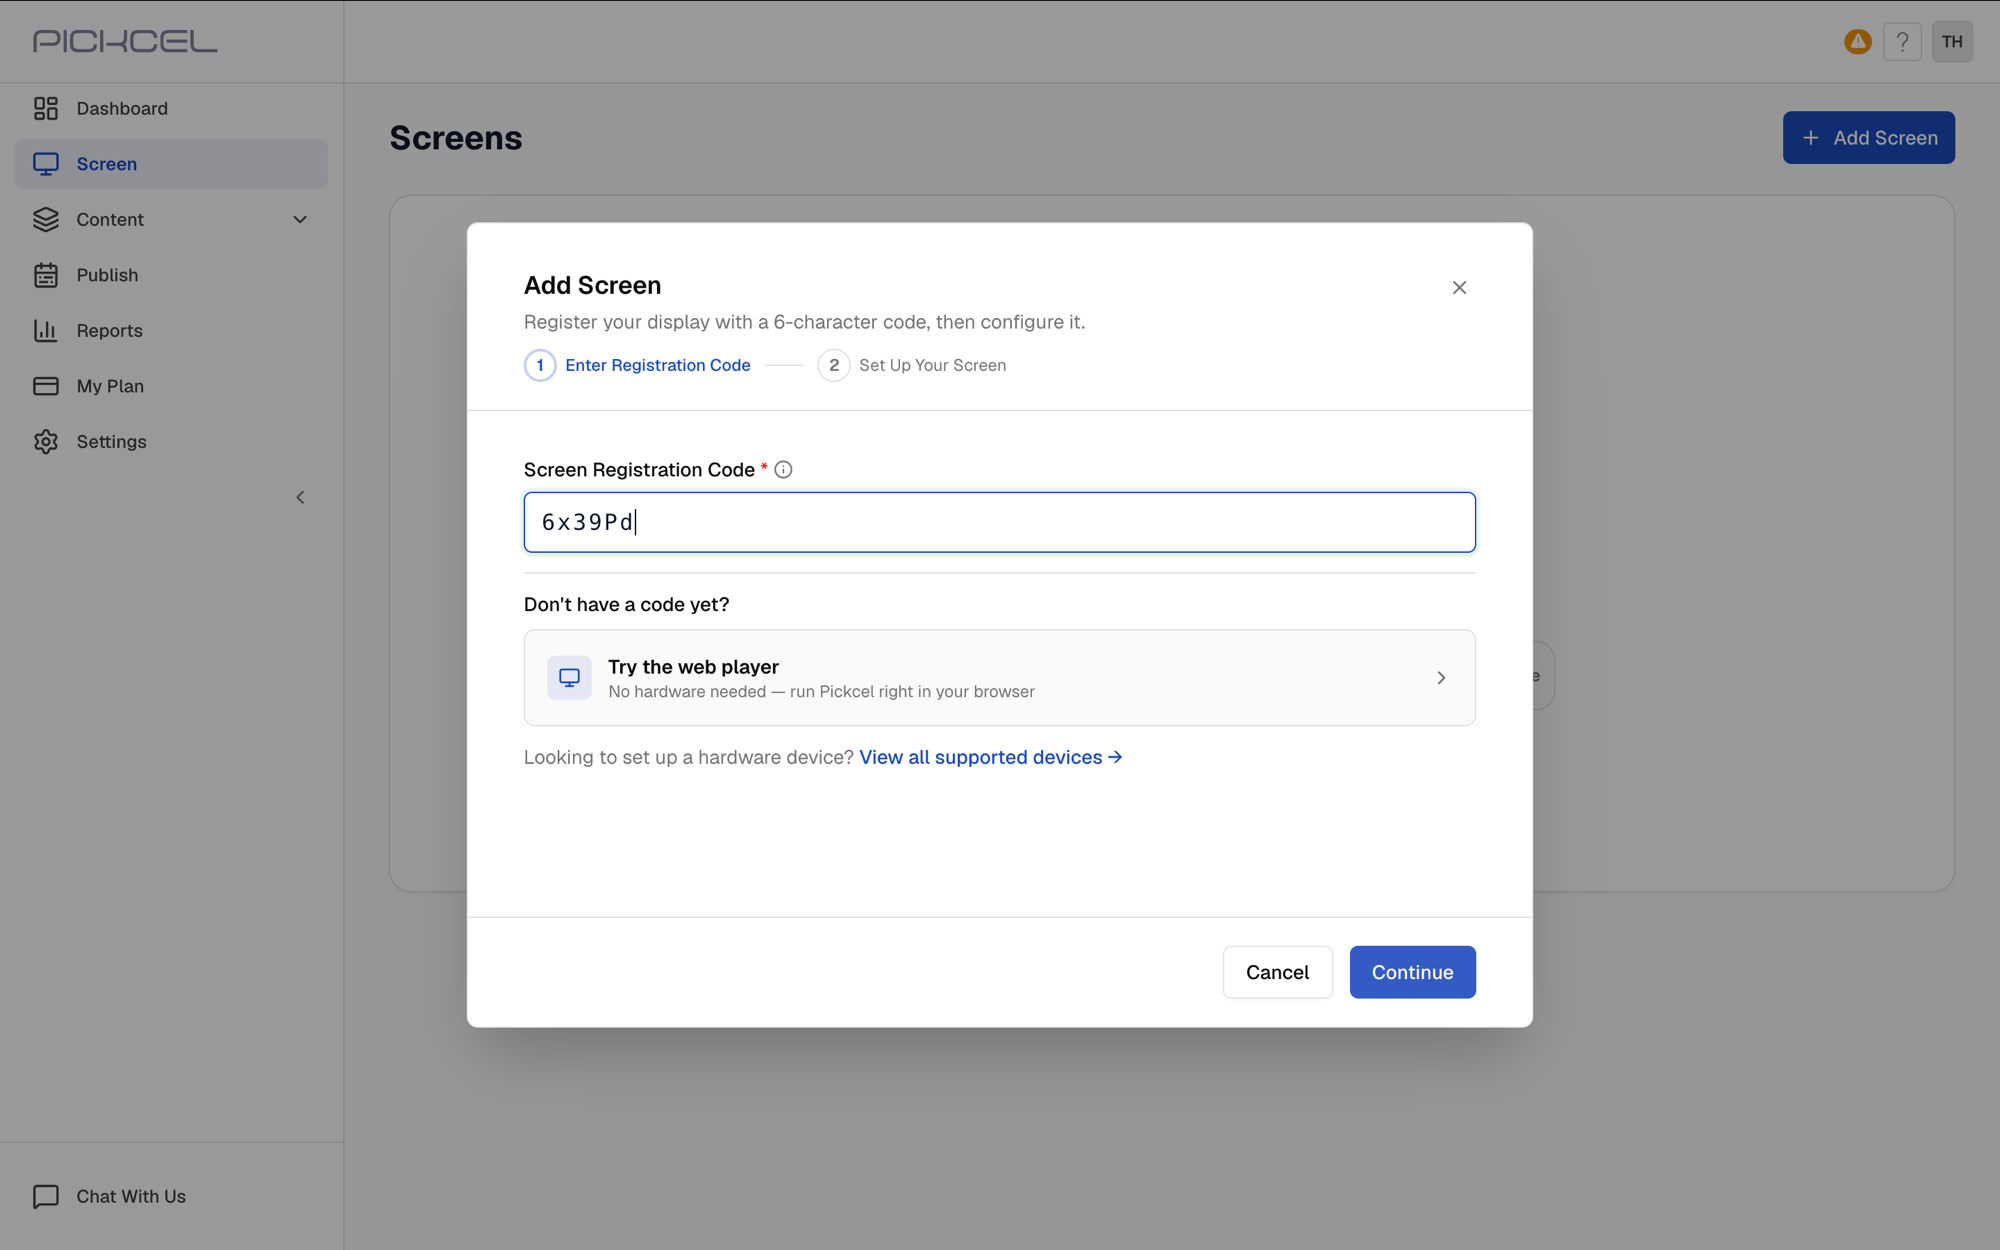
Don’t have a TV or player on hand but want to see how Pickcel works? Use the web player to run a screen right inside your browser, no hardware needed. See Add a web player.
5
Set up your screen
On Set Up Your Screen, fill in the details: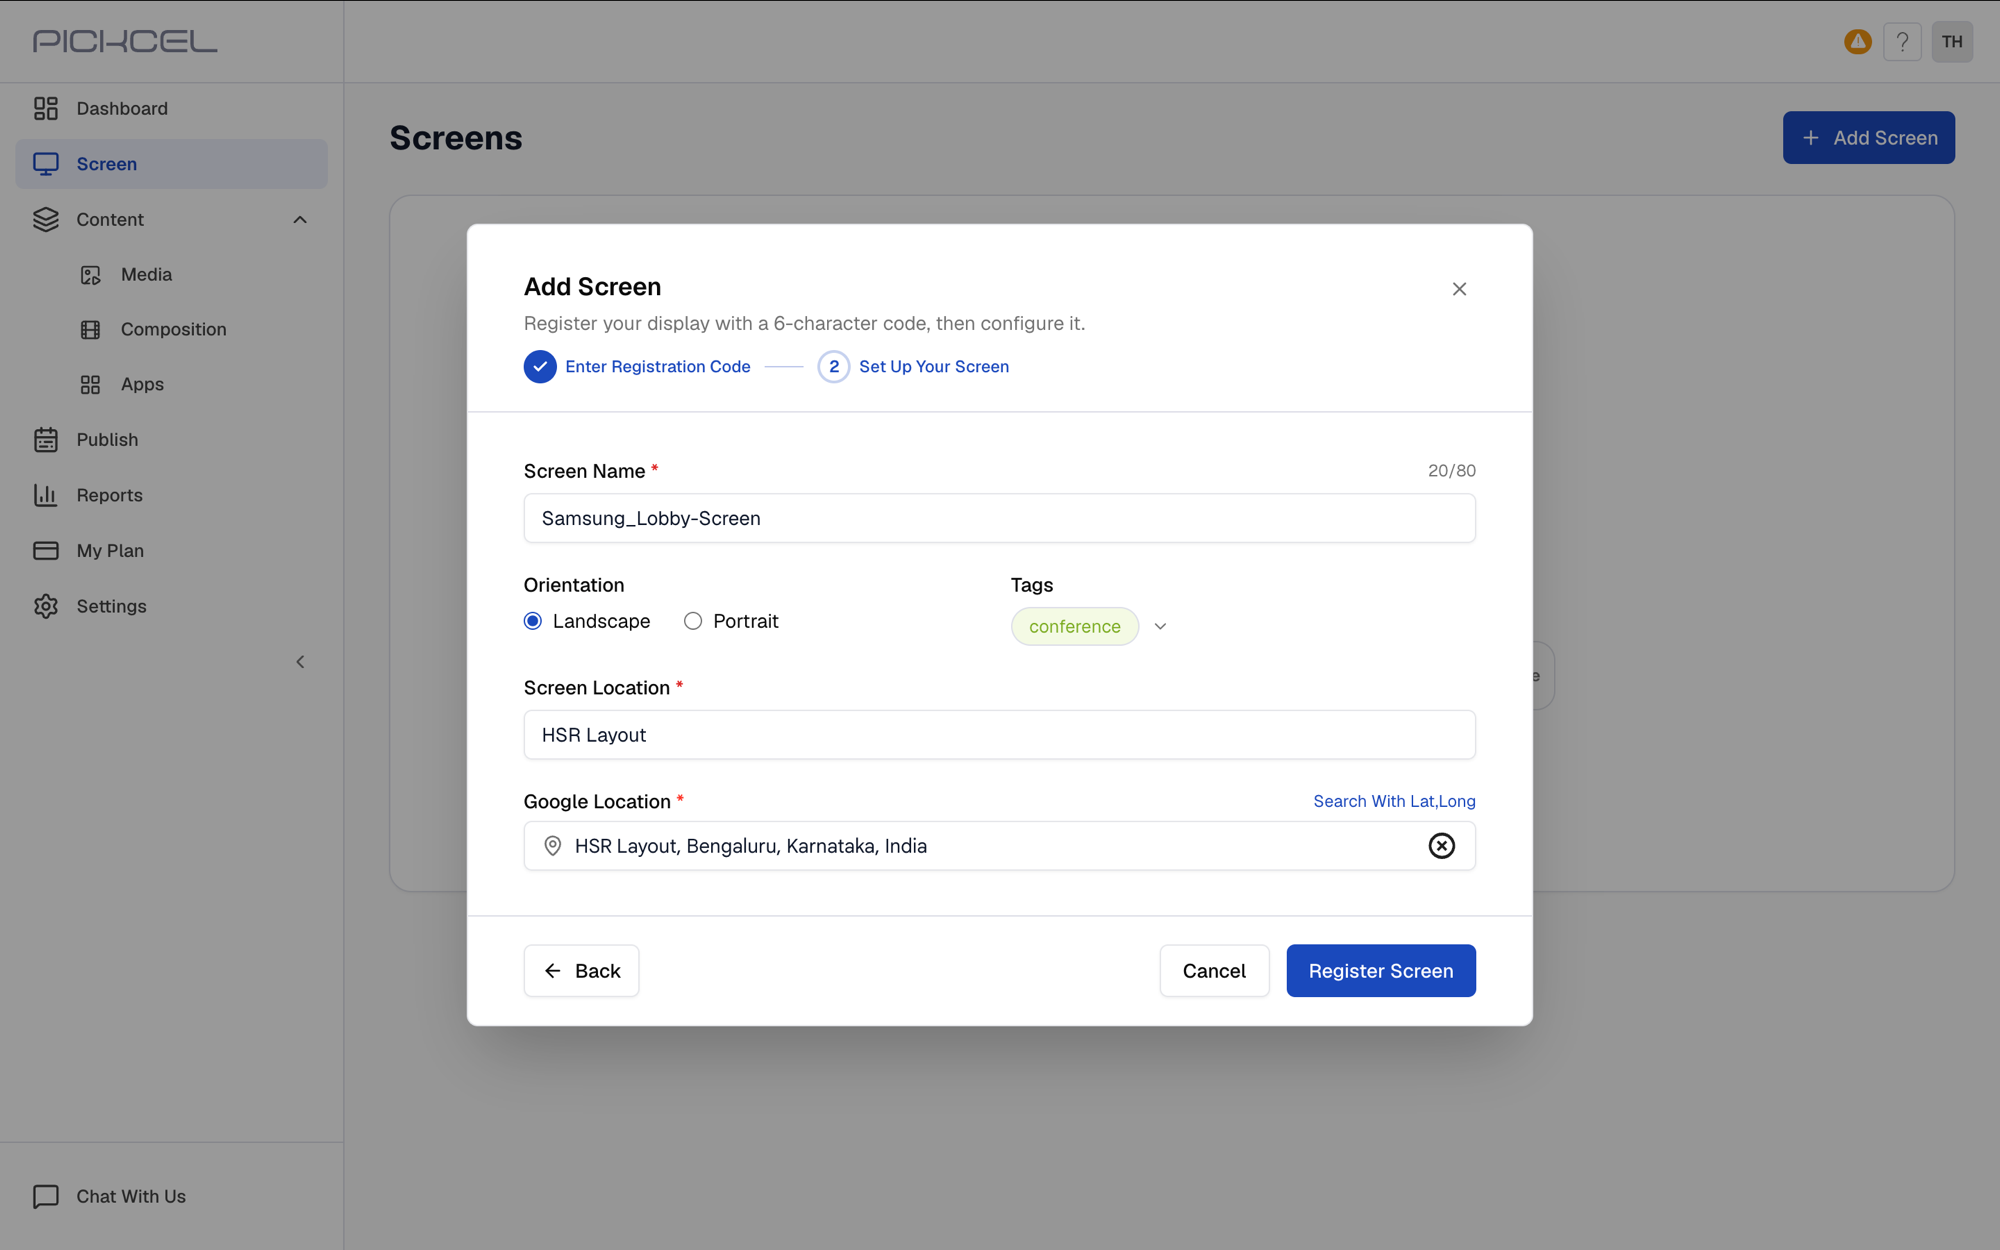
- Screen Name (required): a descriptive name, for example “Lobby Display” or “Store Entrance”.
- Orientation: choose Landscape or Portrait to match how the display is mounted.
- Tags (optional): add tags to group and filter screens.
- Screen Location (required): where the screen is physically located.
- Google Location (required): search for the address, or use Search With Lat,Long to enter coordinates.
New to tags?
- What they are: labels you attach to a screen, like “lobby” or “store-front”.
- Why they help: publish content to a whole group of screens at once, instead of one by one.
- Don’t worry now: tags are optional here, and you can add them anytime later.
6
Confirm the screen is registered
You’ll see a Screen added successfully message, and your new screen appears in the Screens list with its status, last seen time, current schedule, default composition, and tags.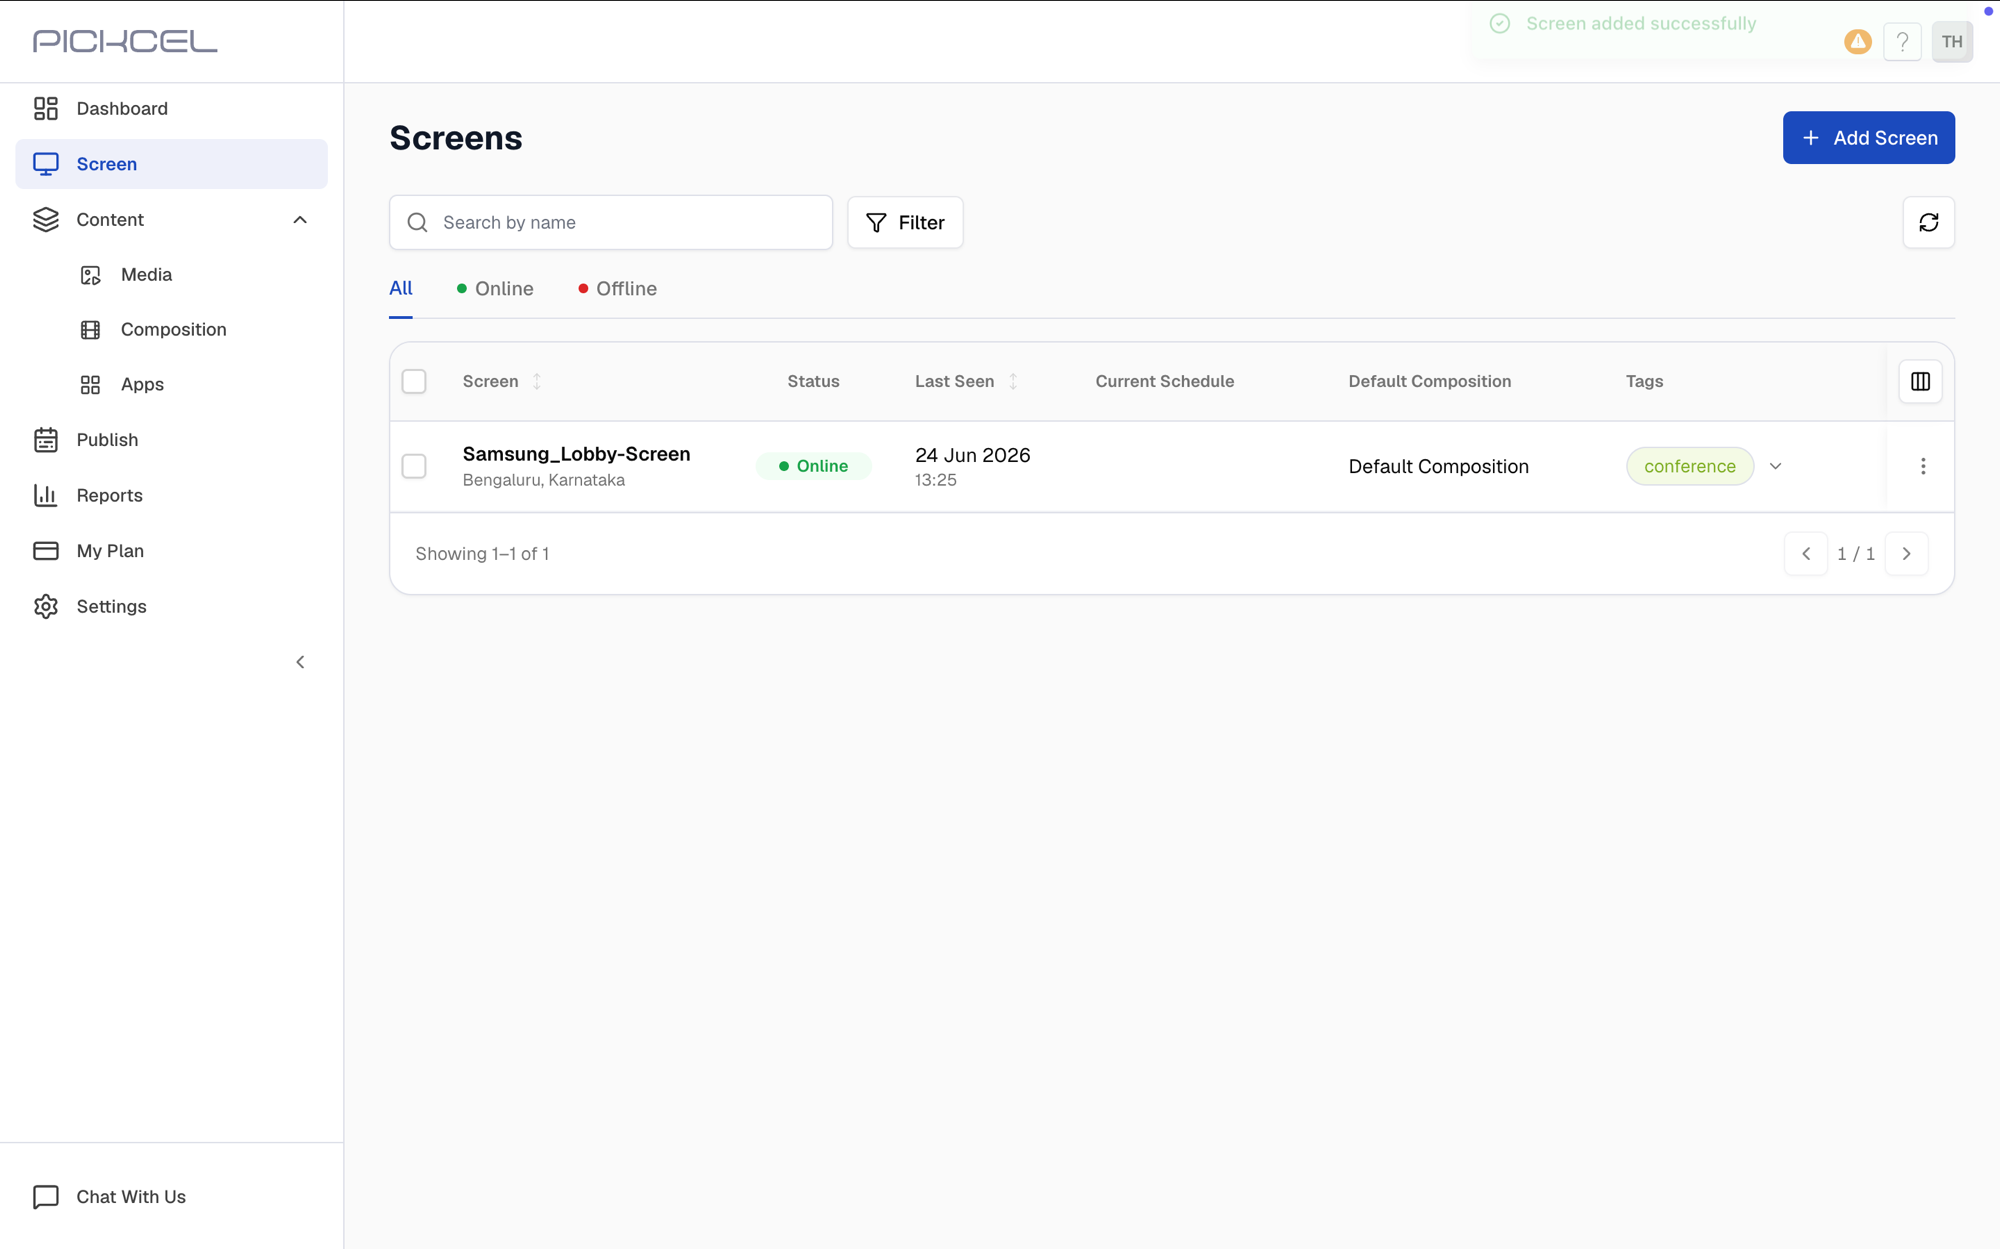 On the device itself, the screen immediately starts playing the default composition, so you can confirm everything worked just by looking at the display.
What’s Next?Now that your screen is registered, start creating and publishing content:
- Learn how to Upload Media to your library
- Create your first Composition with zones and layouts
- Set up Schedules to automate content playback
If you encounter any issues during registration, please contact our support team for assistance.