Prerequisites
- Google Workspace (formerly G Suite) domain with administrator credentials
- Chrome Enterprise or Chrome Kiosk licenses for the devices you plan to enroll
- Access to the Google Admin console and Chrome Device Management (CDM)
- ChromeOS Flex device (new or factory reset) with keyboard, mouse, and internet connectivity
This guide is organized into three parts. If you already have Google Workspace set up with the required Chrome licenses, skip to Part 2.
Part 1: Set up G Suite and purchase Chrome licenses
Set up Google G Suite with at least 1 user account for administrator purposes
To set up Google G Suite, you first need to have a domain that you will link to your G Suite account. During the setup process, you will be prompted to create at least one user account to serve as the administrator. This administrator account will allow you to manage the G Suite settings and users for your domain.
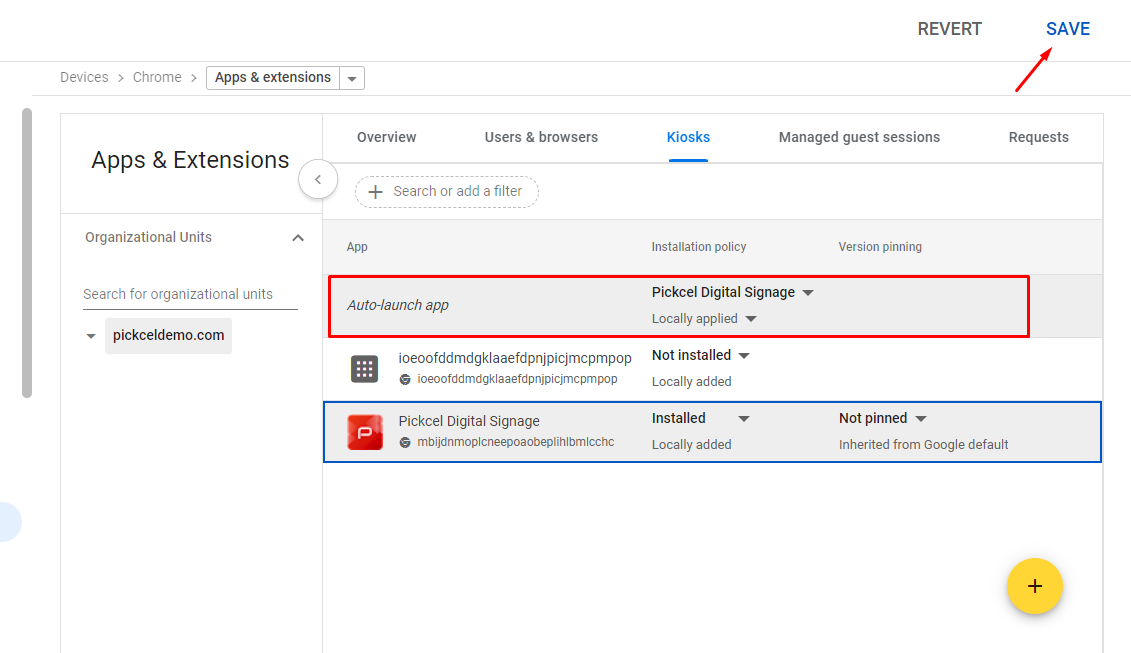
Part 2: Set up the Pickcel app in CDM
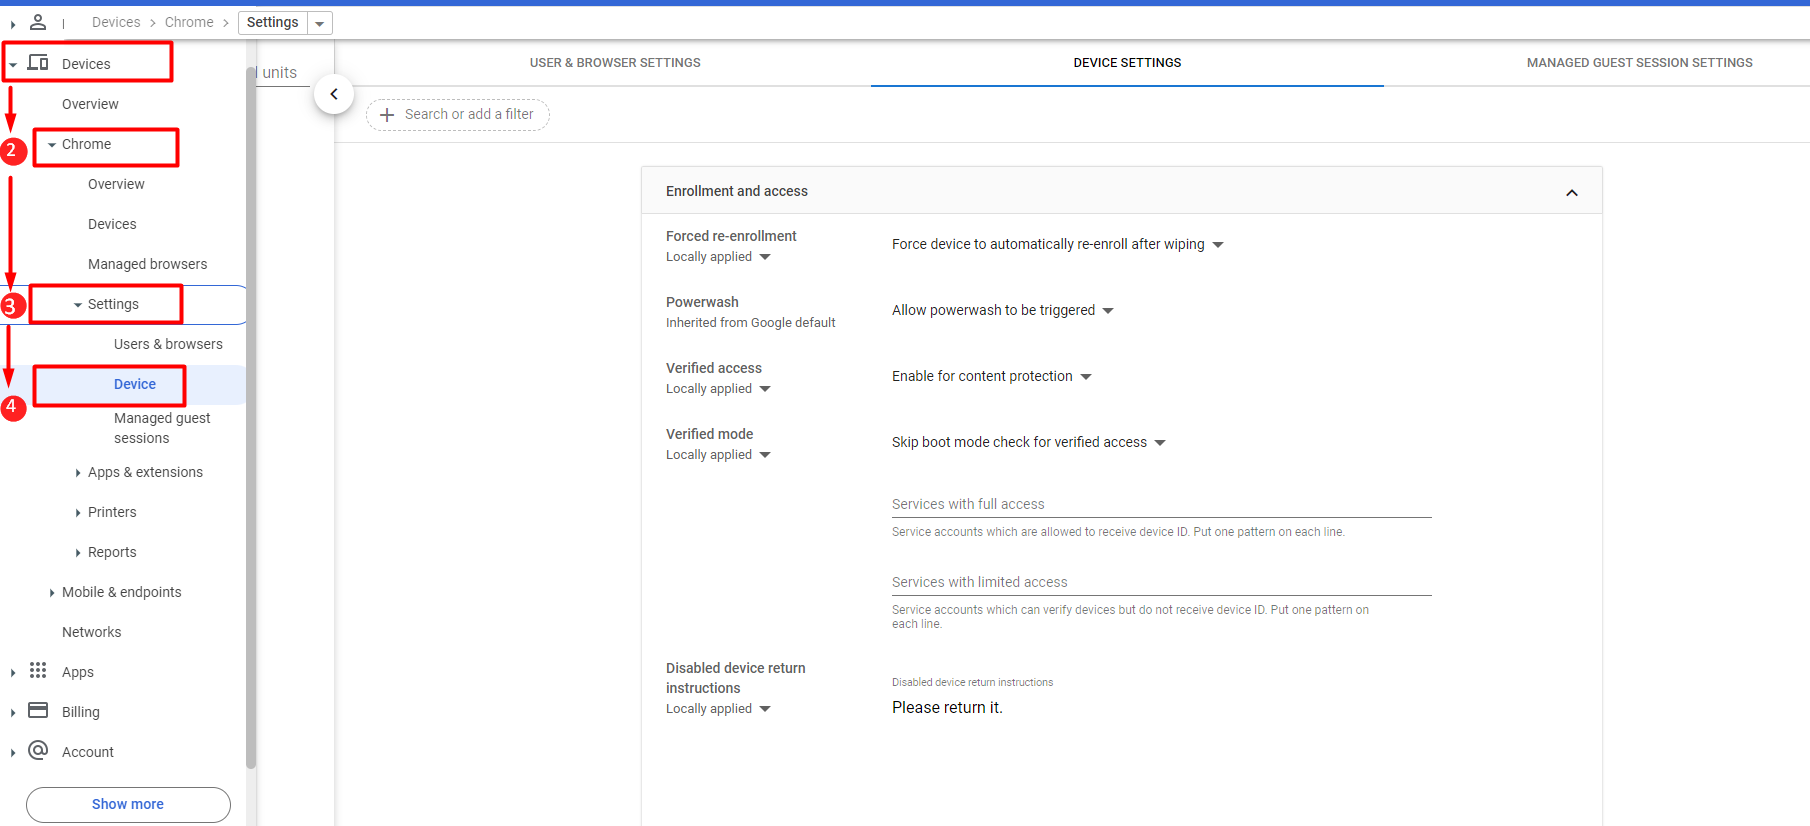
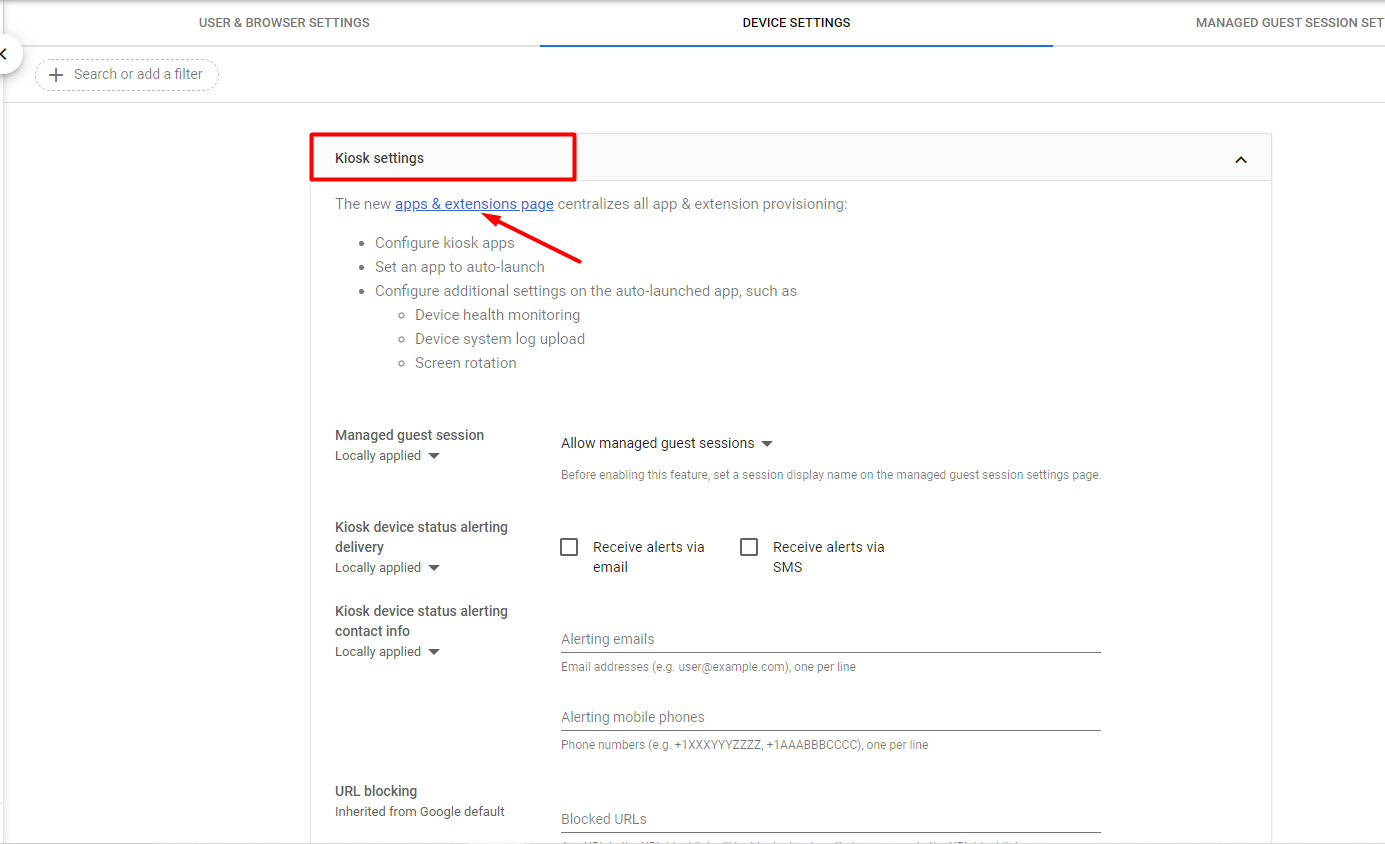
Once you have set up G Suite, have access to Google Admin, and have purchased Chrome licenses, you need to go to the Chrome Device Management (CDM) section of Google Admin and add Pickcel as the kiosk app for the devices you want to enroll. By doing so, the Pickcel player app will be automatically installed on the devices you enroll and set to automatically launch & run in kiosk mode when the devices are turned on.Log in to the Google Admin console
Log in at the Google Admin console.
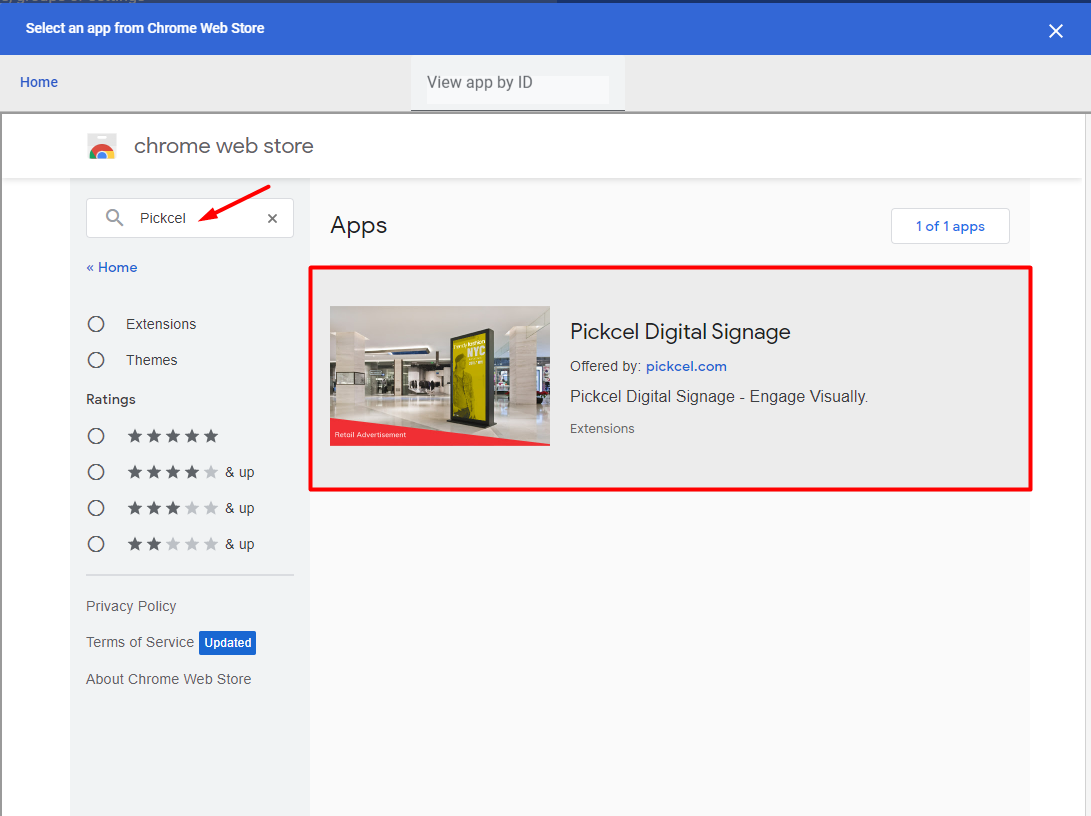
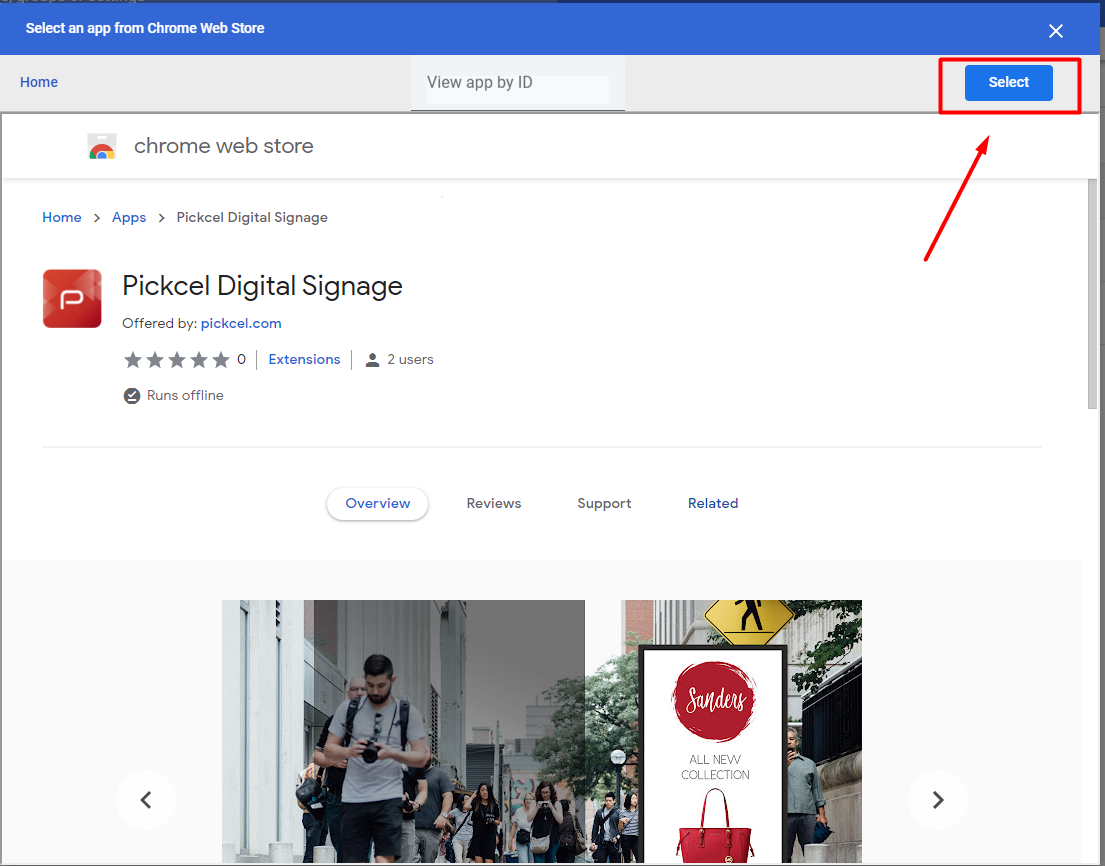
Add Pickcel from the Chrome Web Store
Hover over the yellow circle on the bottom right corner and click the Add from Chrome Web Store icon.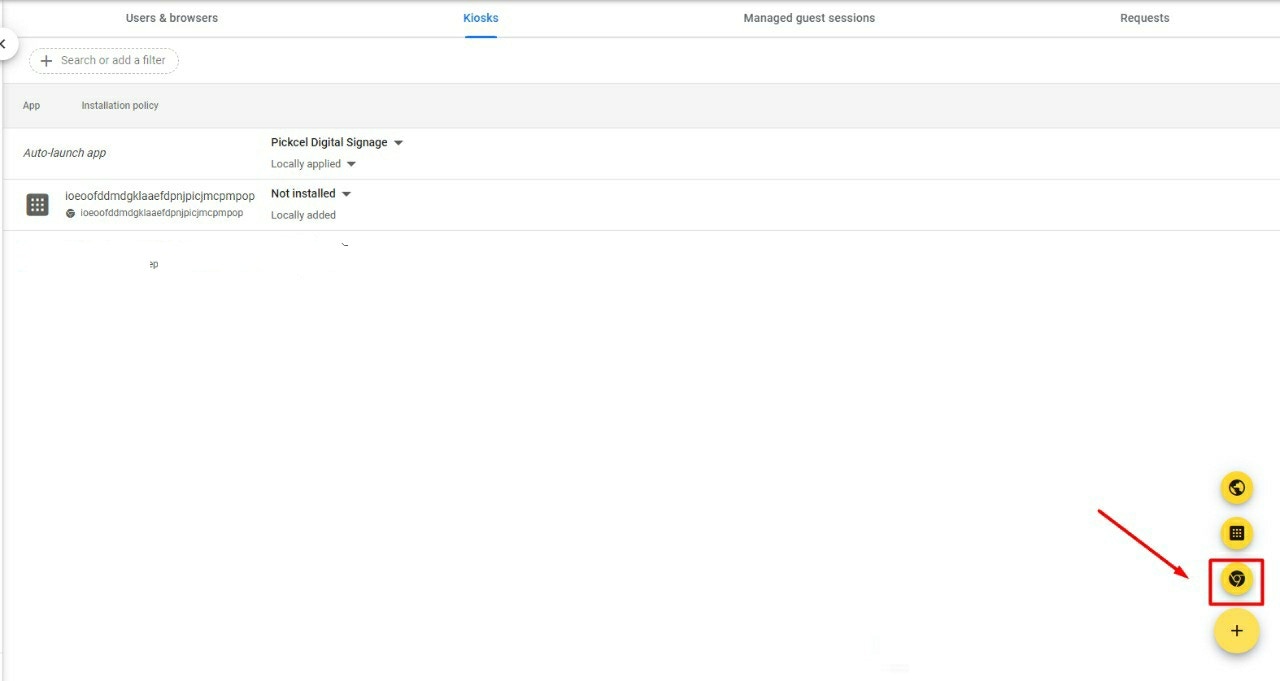
Part 3: Enrolling & setting up Chrome devices
Now that the Pickcel Digital Signage Player app has been added as the kiosk app for the devices in your account, you can start enrolling and setting up your Chrome devices.Wipe the device if required
If your Chrome device has been used before this setup, you will need to wipe your device. If this is a new device, you can go to the next step.
Enroll the device
- Turn on the Chrome device and follow the on-screen instructions until you see the sign-in screen. Don’t sign in yet.
- Before signing in to the Chrome device, press Ctrl + Alt + E to go to the enrollment screen.
- Enter the username and password from your Google admin welcome letter, or the username and password for an existing G Suite user on your account that has eligibility to enroll.
- Click on Enroll device. You’ll receive a confirmation message that the device has been successfully enrolled.
Complete registration in the Pickcel console
Once the app is launched, it will take a couple of minutes to connect to the internet. After the internet is connected, it will show a 6-digit unique Screen Registration Code. Enter this code on your Pickcel console to complete the pairing of your screen.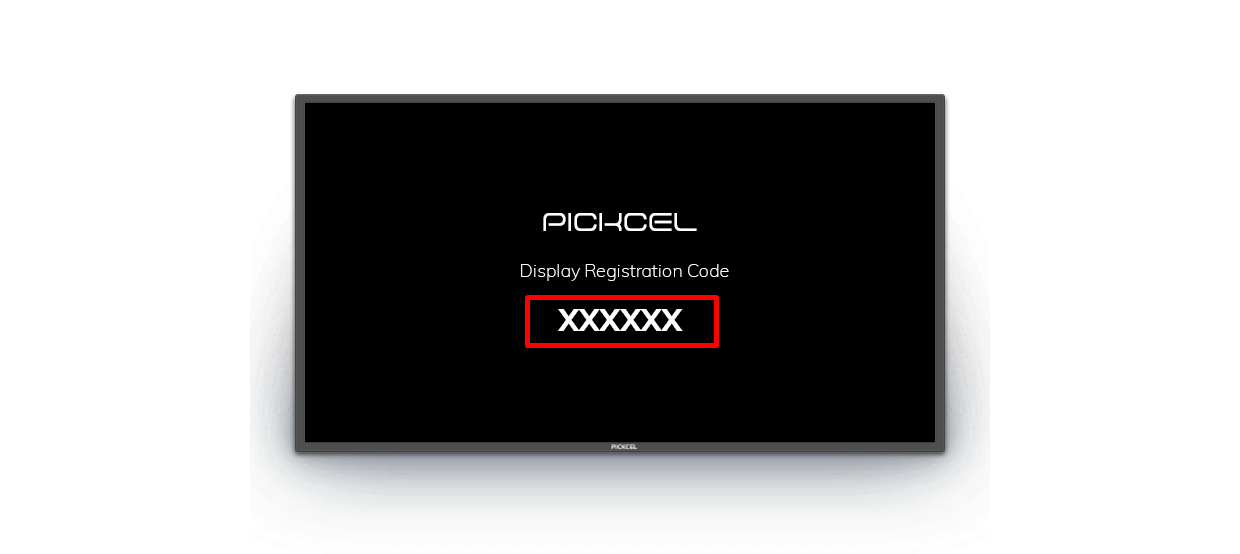
To learn how to pair your device with the Pickcel console, see the Screen Registration guide.