The Webplayer is for testing and preview only. Playback may differ slightly from real hardware depending on the device and player software you deploy to later.
Add a Webplayer screen
Open Screen module and click Add Screen
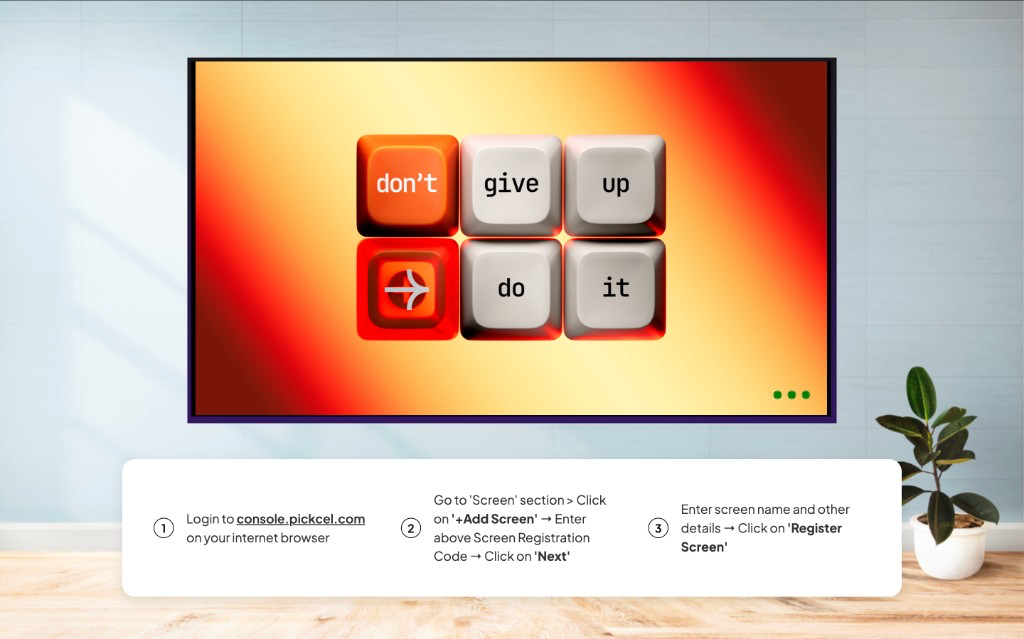
Log in to the Pickcel console and go to the Screen module. Click Add Screen.
Click Try alternate options
In the Connect Your Screen dialog, click Try alternate options under “Don’t have a display screen ready?”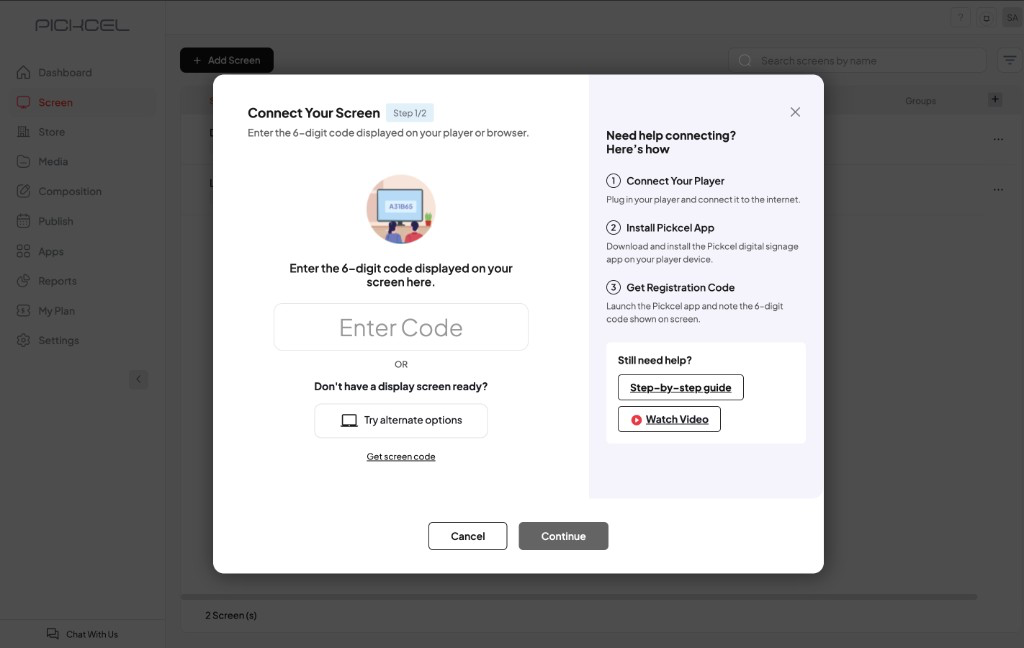
Select the Web Player and click Try Now
On the No Display Ready? screen, choose Try it on your browser using the Web Player, then click Try Now. This opens the Webplayer in a new browser tab, no software installation required.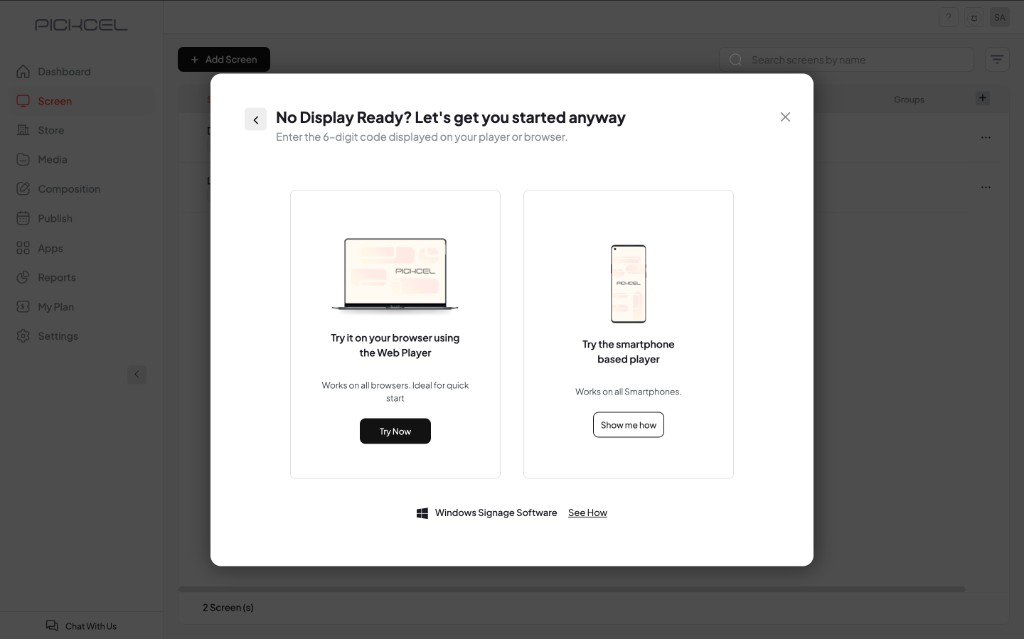
You can also use Try the smartphone based player if you prefer testing on a mobile device.
Copy the code from the Webplayer tab
Switch to the Web Player tab. Copy the screen pairing code shown on the display.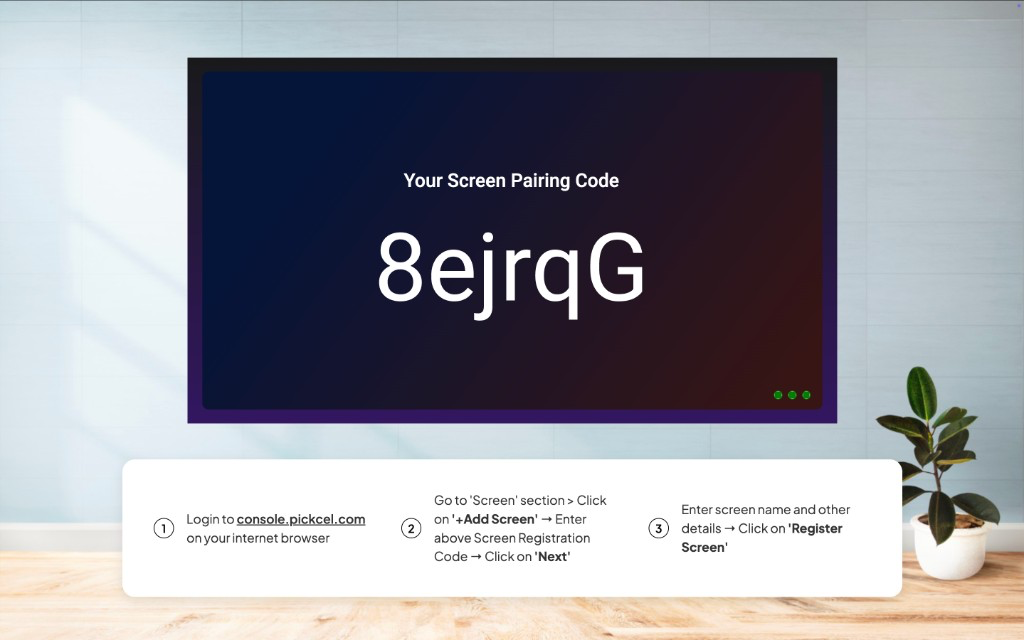
Paste the code and click Continue
Return to the Pickcel console tab. Paste the code into the Enter Code field (or click Get screen code if the Webplayer tab is still open), then click Continue.
Configure screen details and click Save and Continue
On Set Up Your Screen (Step 2/2), enter the Screen Name, Orientation, Screen Location, and Screen’s Google Location, then click Save and Continue.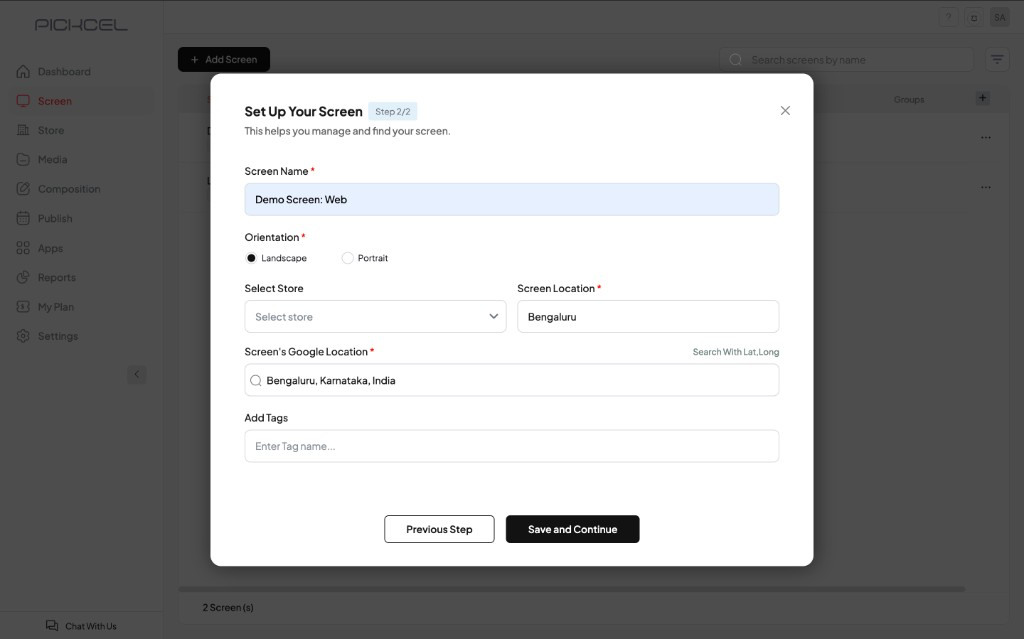
Screen registered successfully
Your virtual screen is added to the Screen list. A confirmation appears when registration completes.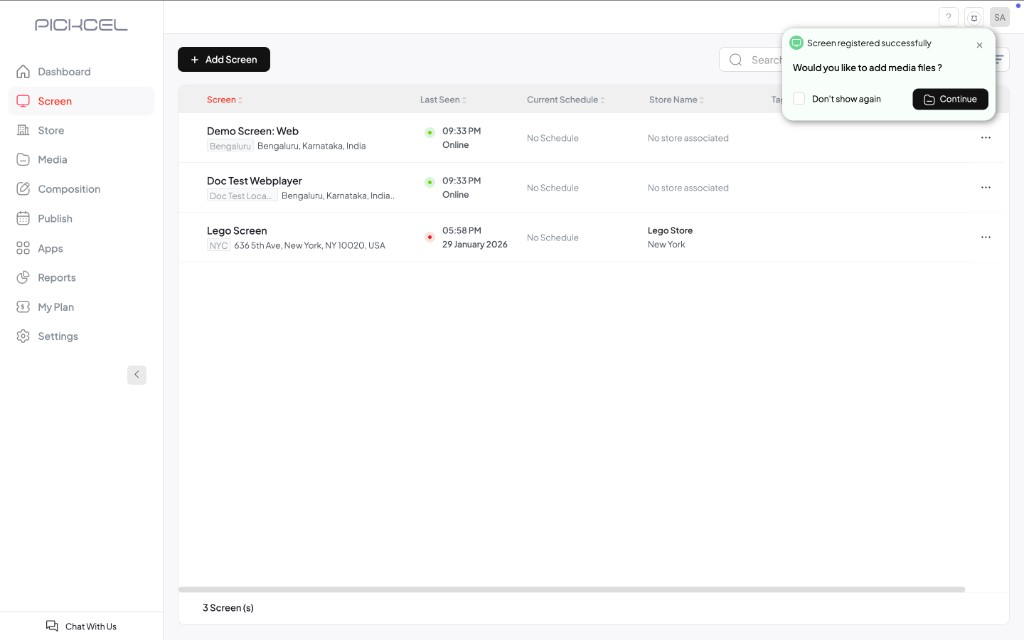
Related guides
Screen Registration
Register a physical player with a display registration code.
Default Composition
Set the content that plays on your Webplayer when no schedule is active.
Publish Content
Schedule and publish compositions to your screens.
Create a Composition
Build the layout and content you want to preview on the Webplayer.