The supported version of the LG WebOS Display is WebOS 4.0 and above.
- To begin, ensure that your display is connected to the internet.
- Open General and click on the Time & Date option, and set the Date & Time and Time Zone.
1
Access the Setup Menu
Press Setup on your remote control or find the settings button and click OK on your remote.
2
Open EZ Setting
Select the SI SERVER SETTING under the EZ Setting menu.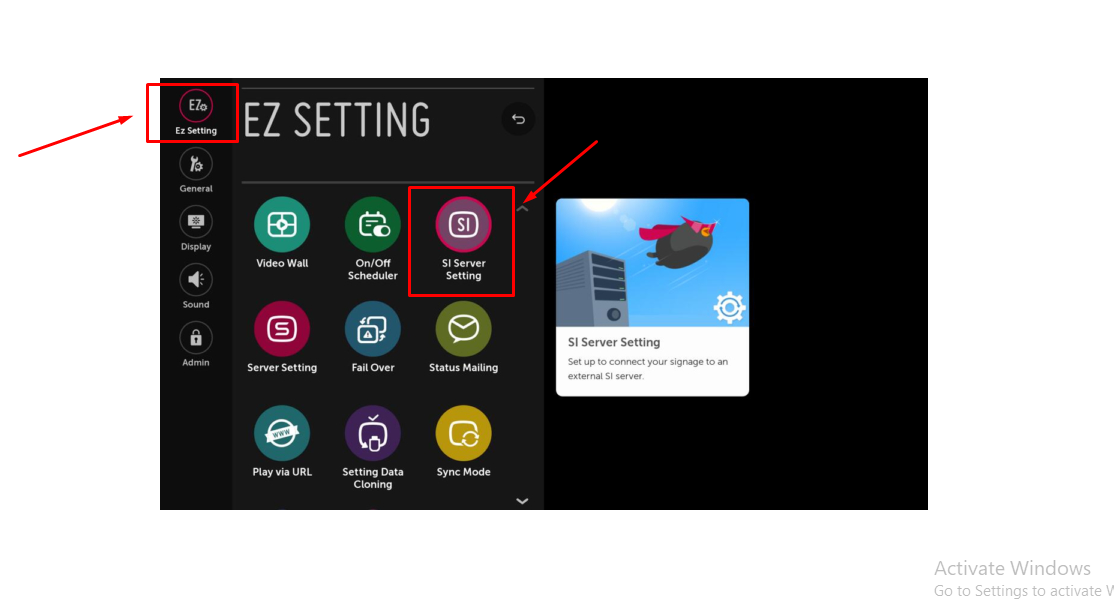
3
Enter SI Server Setting
On the SI SERVER SETTING screen, select the SI Server Setting option.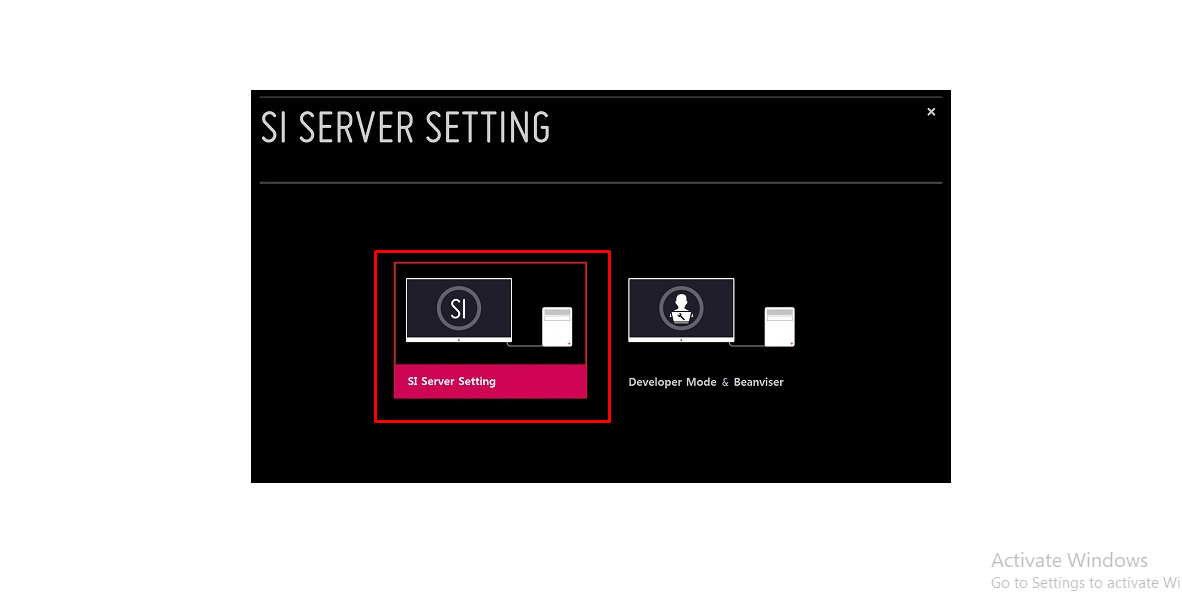
4
Enable FQDN and provide the application URL
Turn on the fully qualified domain name and type the following URL using the keyboard or remote: 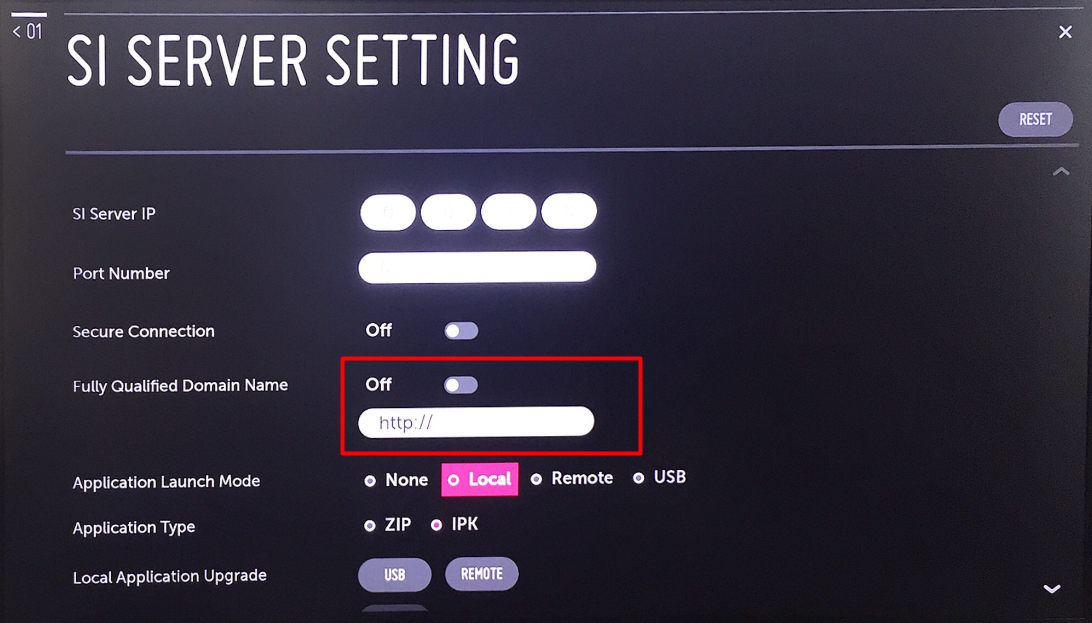
https://console.pickcel.com/players/lg/com.lg.app.signage.ipk5
Configure SI Server
On the settings menu, set the following fields with the values shown in the screenshot below: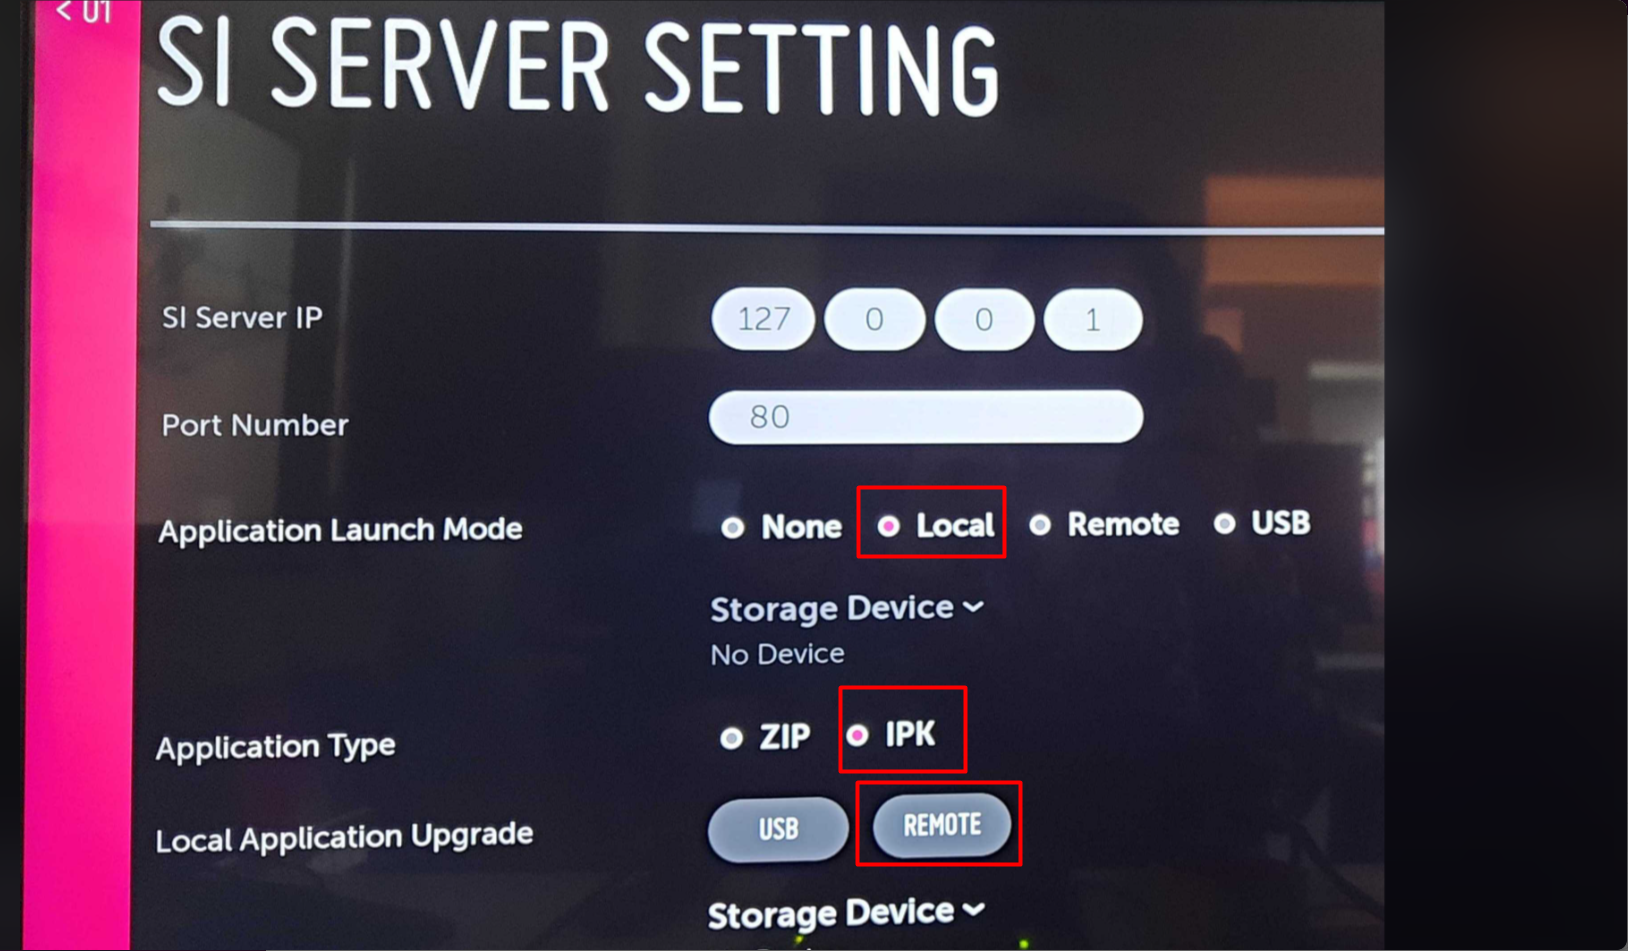
- Application Launch Mode: Local
- Application Type: IPK
- Local Application Upgrade: Remote
6
Confirm remote upgrade
After clicking REMOTE, an Application Upgrade confirmation pop-up appears. Click CONFIRM.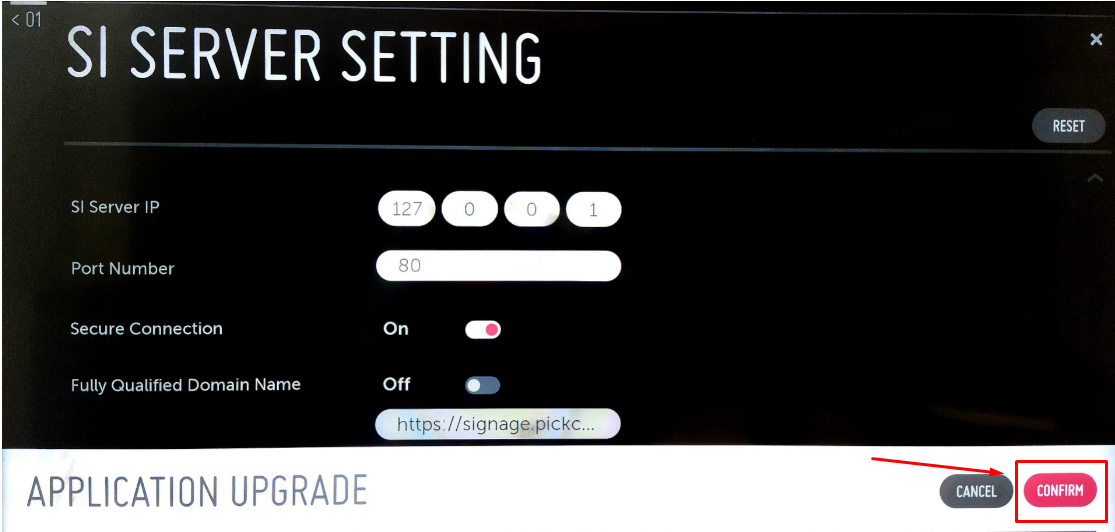
7
Complete installation
A success message appears once installation finishes. Click OK and reboot the device.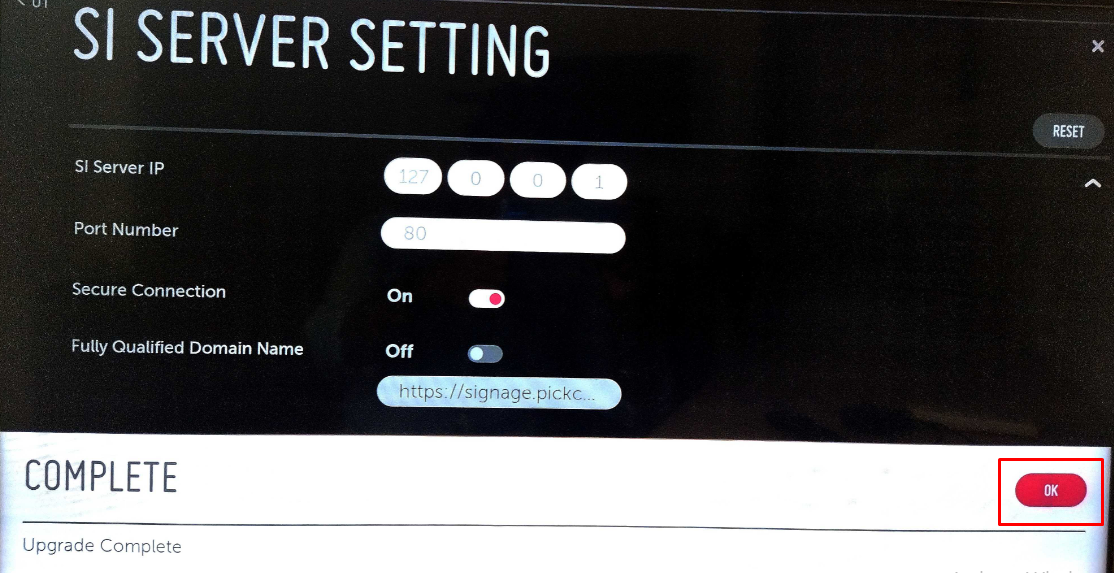
8
Verify the Pickcel Player
The Pickcel LG webOS signage Player should now appear in your display home menu.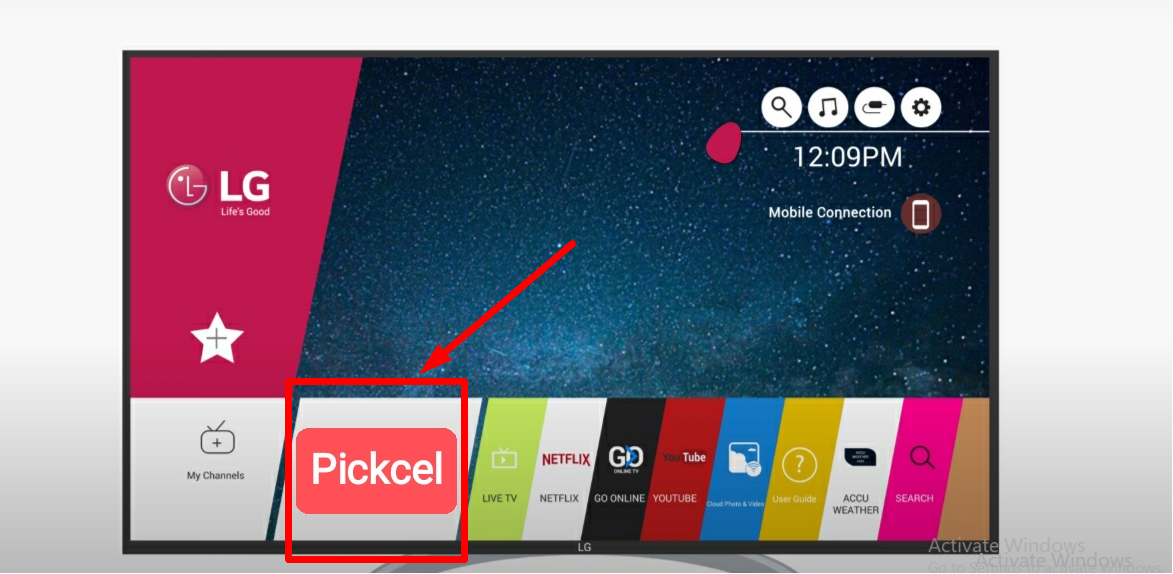
9
Launch the Pickcel App
Press the Home button to see the Pickcel app on the home screen and select it. Press OK on the remote to launch the app.
10
View the Registration Code
Once the app is launched, it takes a couple of minutes to connect to the internet. After it connects, a six-digit unique Screen Registration Code appears, which you’ll use to pair this device with the Pickcel console.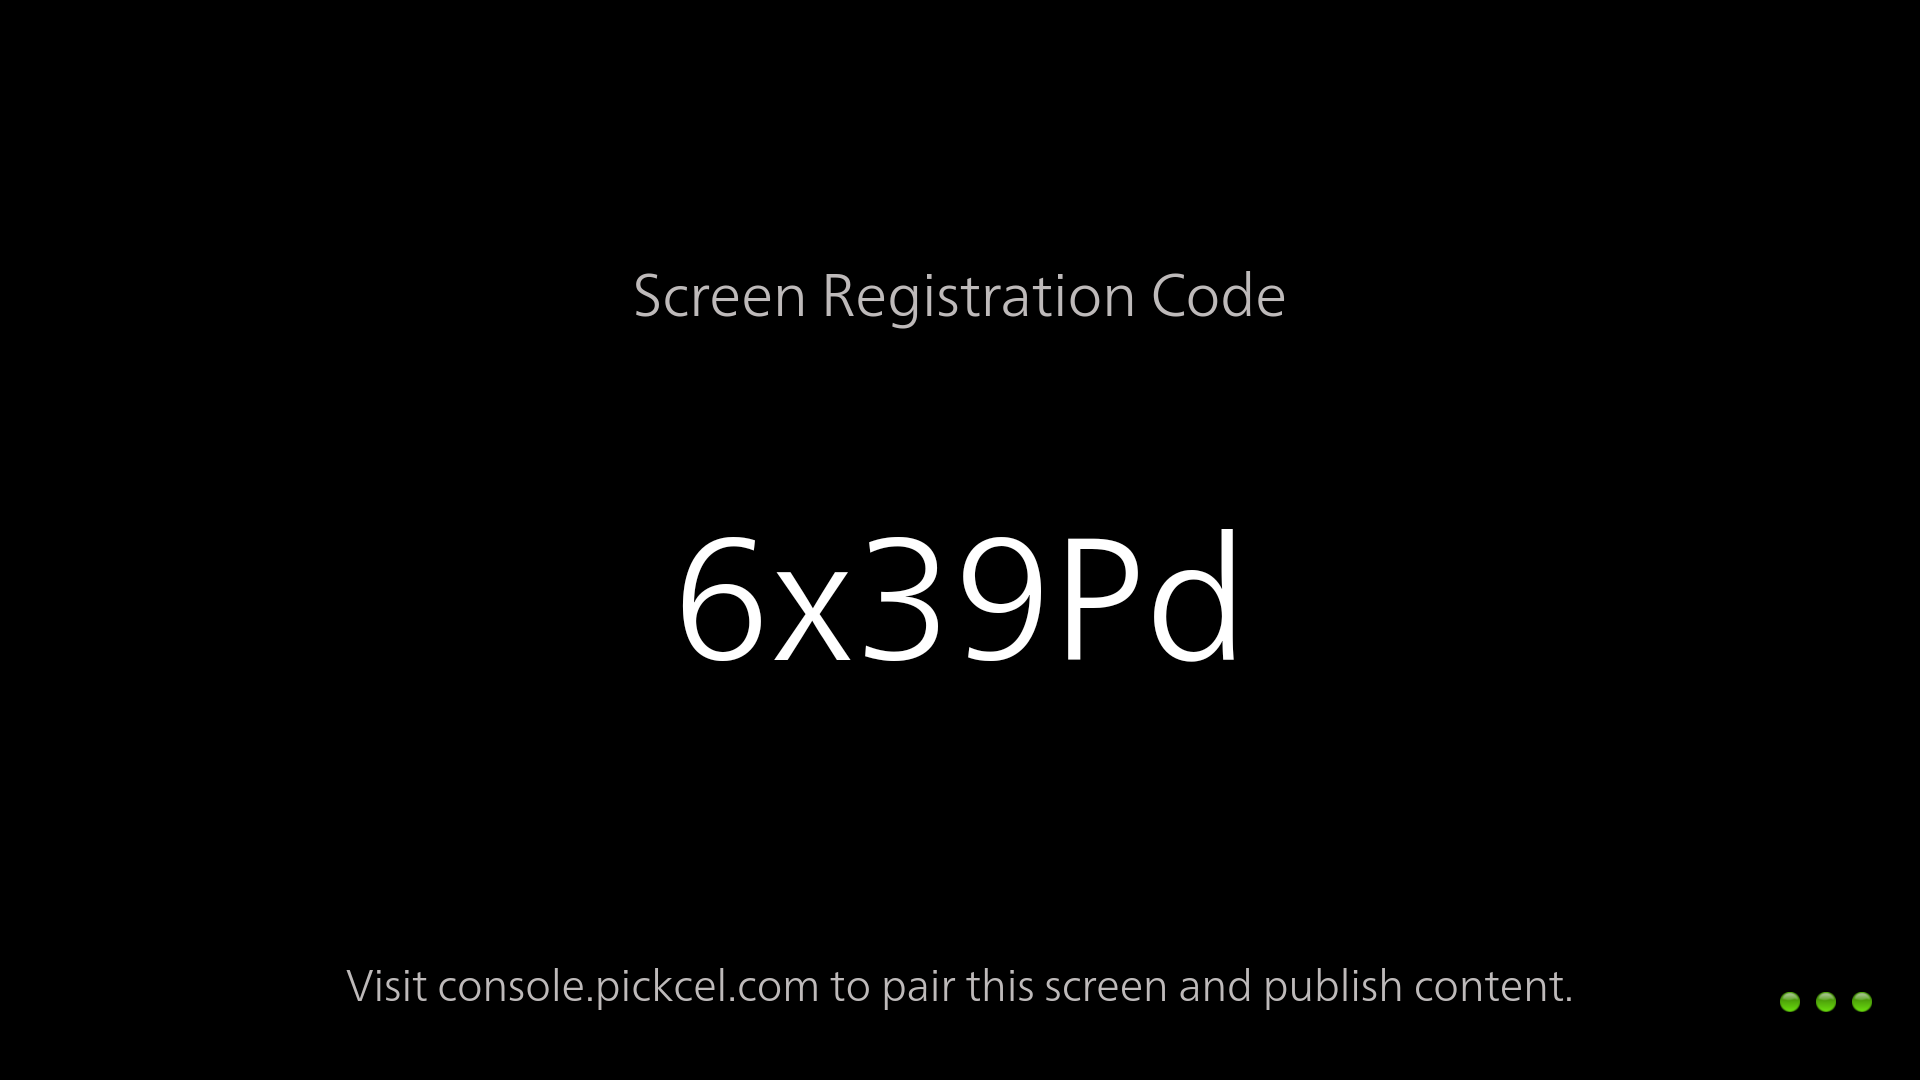
To learn how to pair your LG device with the Pickcel console, see the Screen Registration guide.
What’s Next?
- Start Uploading Media to your library
- Create your first Composition and publish content