> ## Documentation Index
> Fetch the complete documentation index at: https://docs.pickcel.com/llms.txt
> Use this file to discover all available pages before exploring further.
# How to Create a Store for Location-Based Screen Management
> Learn how to create a store in Pickcel to group and manage digital signage screens based on actual business locations
The **Store** allows you to organize digital signage screens based on their physical business locations. A Store acts as a logical container for your screens, making it easier to manage content, apply schedules, and monitor devices at specific locations.
**Who is this for?**
The Store Module is designed for enterprise customers managing multiple outlets or locations with numerous screens.
**Feature Availability**
This feature is not available by default. If you need this feature, please reach out to [contact@pickcel.com](mailto:contact@pickcel.com) and they can make this feature available for you.
## Creating a New Store
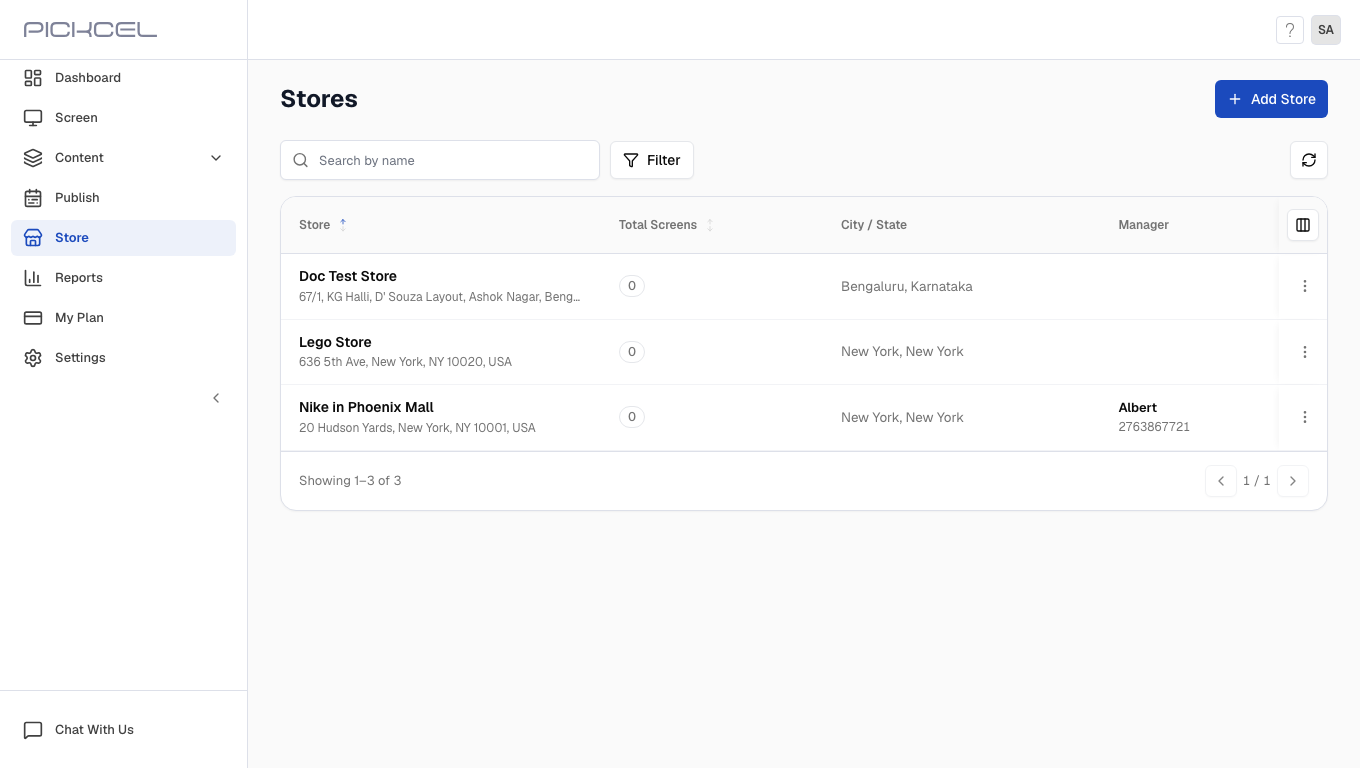
Log in to the [Pickcel Console](https://console.pickcel.com). From the left navigation menu, click on **Store**, then click the **+ Add Store** button at the top of the page.
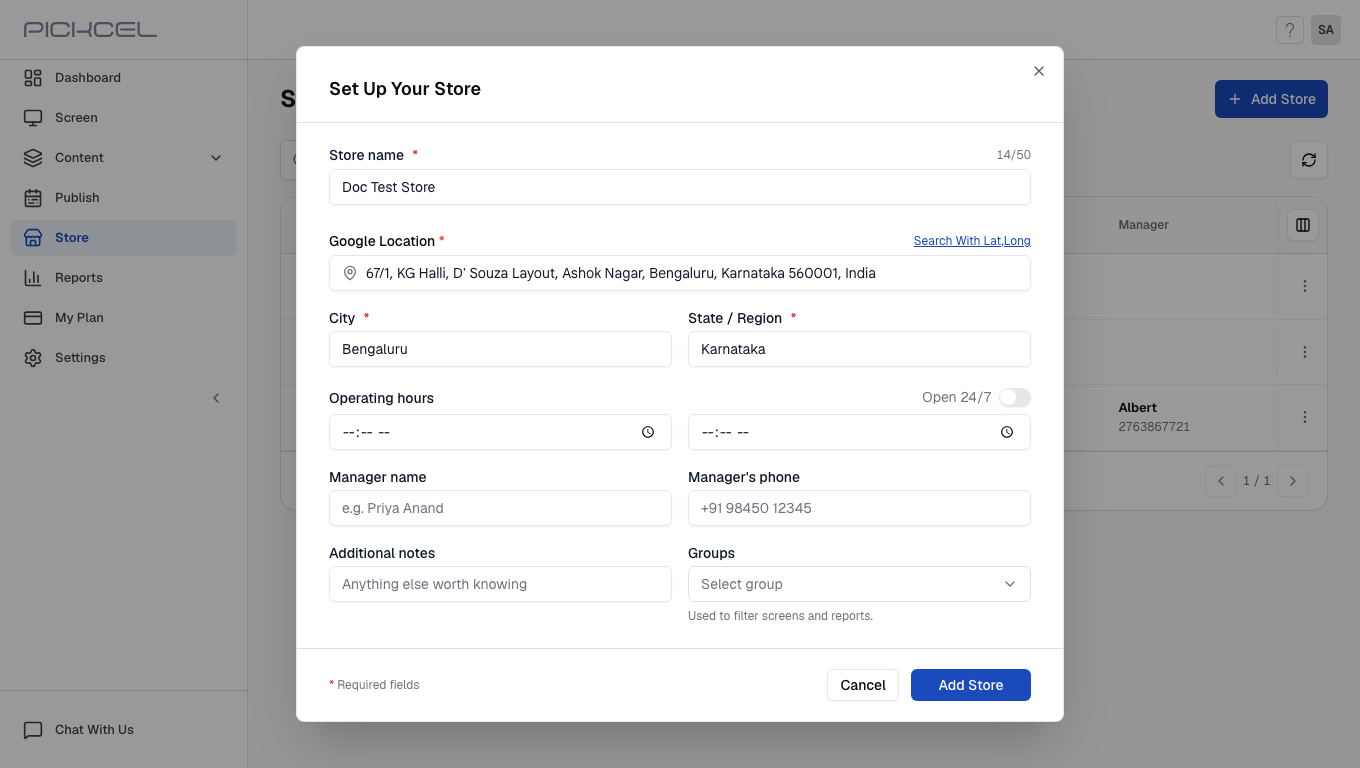
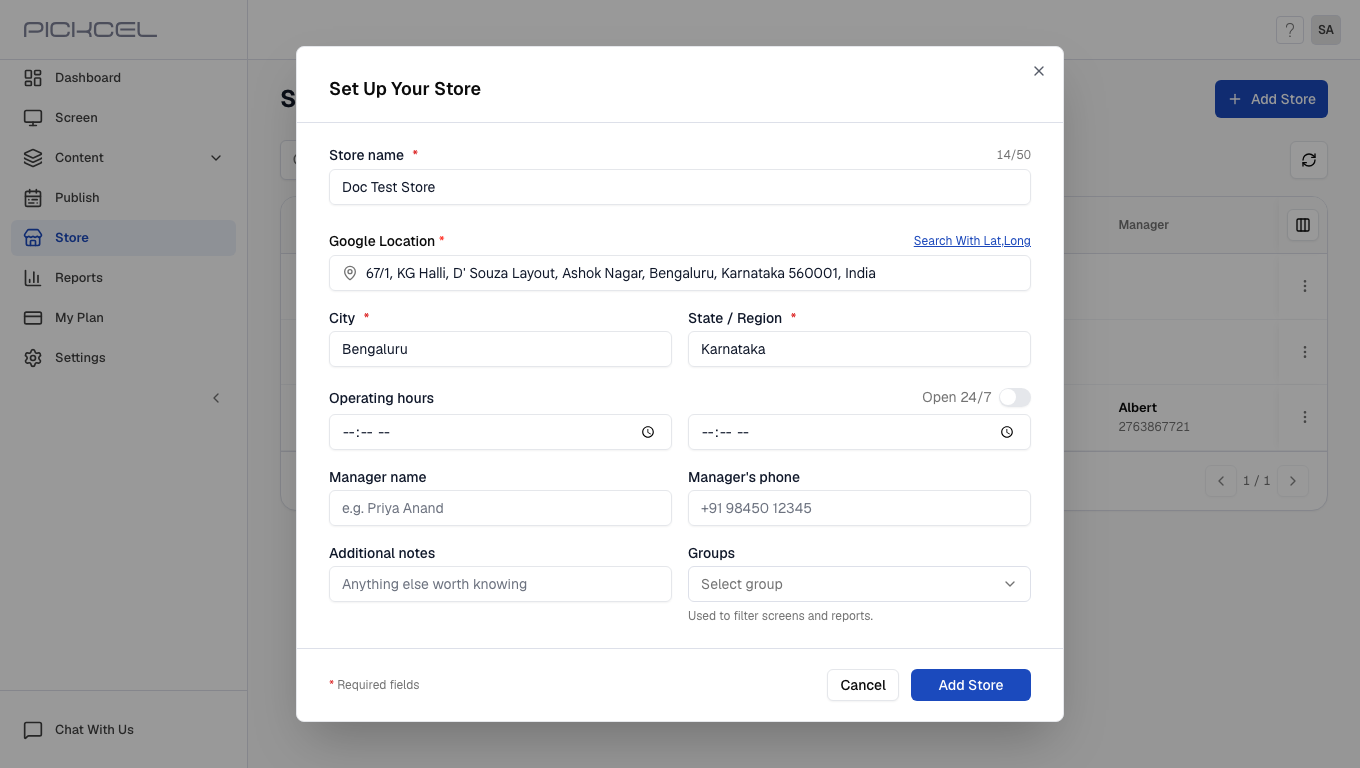
 The **Set Up Your Store** modal will appear. Fill in the fields below. Those marked with \* are required.
 | Property | Description |
| -------------------------- | ------------------------------------------------------------------------------------------------------------------------------------------------------------------------------------------- |
| **Name** \* | A unique identifier for the store (e.g., *Nike in Phoenix Mall*) |
| **Google Location** \* | Search for the physical address, or use **Search With Lat,Long** to look up by coordinates. This auto-populates data for map views. |
| **City** \* | The city where the store is located |
| **State/Region** \* | The state or region for geographic filtering |
| **Operating Hours** | Toggle **24/7** for round-the-clock operation, or set a start time and end time (e.g., 10:00 AM – 11:00 PM) |
| **Manager Name** | Name of the on-site point of contact |
| **Manager's Phone Number** | Phone number for the store manager |
| **Additional Notes** | Free-form notes about the store (e.g., floor, wing, special instructions, or custom tags). Use this to add searchable details so you can filter and find stores when your list grows large. |
| **Groups** | Associate the store with device groups for bulk management. Shows *No groups associated* until you add groups. |
**Groups** help you control access to screens, media, and schedules. Learn more in [Groups](/settings/groups).
**Add Custom Fields.** If you need additional fields to configure your stores (e.g., category, type, region), request them and we can add them for you. Custom fields help you segment and filter stores based on your business needs, and are account-wide, once added, they appear for all stores in your account.
Click **Add Store** to create your store. Your store is now ready for screen association.
| Property | Description |
| -------------------------- | ------------------------------------------------------------------------------------------------------------------------------------------------------------------------------------------- |
| **Name** \* | A unique identifier for the store (e.g., *Nike in Phoenix Mall*) |
| **Google Location** \* | Search for the physical address, or use **Search With Lat,Long** to look up by coordinates. This auto-populates data for map views. |
| **City** \* | The city where the store is located |
| **State/Region** \* | The state or region for geographic filtering |
| **Operating Hours** | Toggle **24/7** for round-the-clock operation, or set a start time and end time (e.g., 10:00 AM – 11:00 PM) |
| **Manager Name** | Name of the on-site point of contact |
| **Manager's Phone Number** | Phone number for the store manager |
| **Additional Notes** | Free-form notes about the store (e.g., floor, wing, special instructions, or custom tags). Use this to add searchable details so you can filter and find stores when your list grows large. |
| **Groups** | Associate the store with device groups for bulk management. Shows *No groups associated* until you add groups. |
**Groups** help you control access to screens, media, and schedules. Learn more in [Groups](/settings/groups).
**Add Custom Fields.** If you need additional fields to configure your stores (e.g., category, type, region), request them and we can add them for you. Custom fields help you segment and filter stores based on your business needs, and are account-wide, once added, they appear for all stores in your account.
Click **Add Store** to create your store. Your store is now ready for screen association.
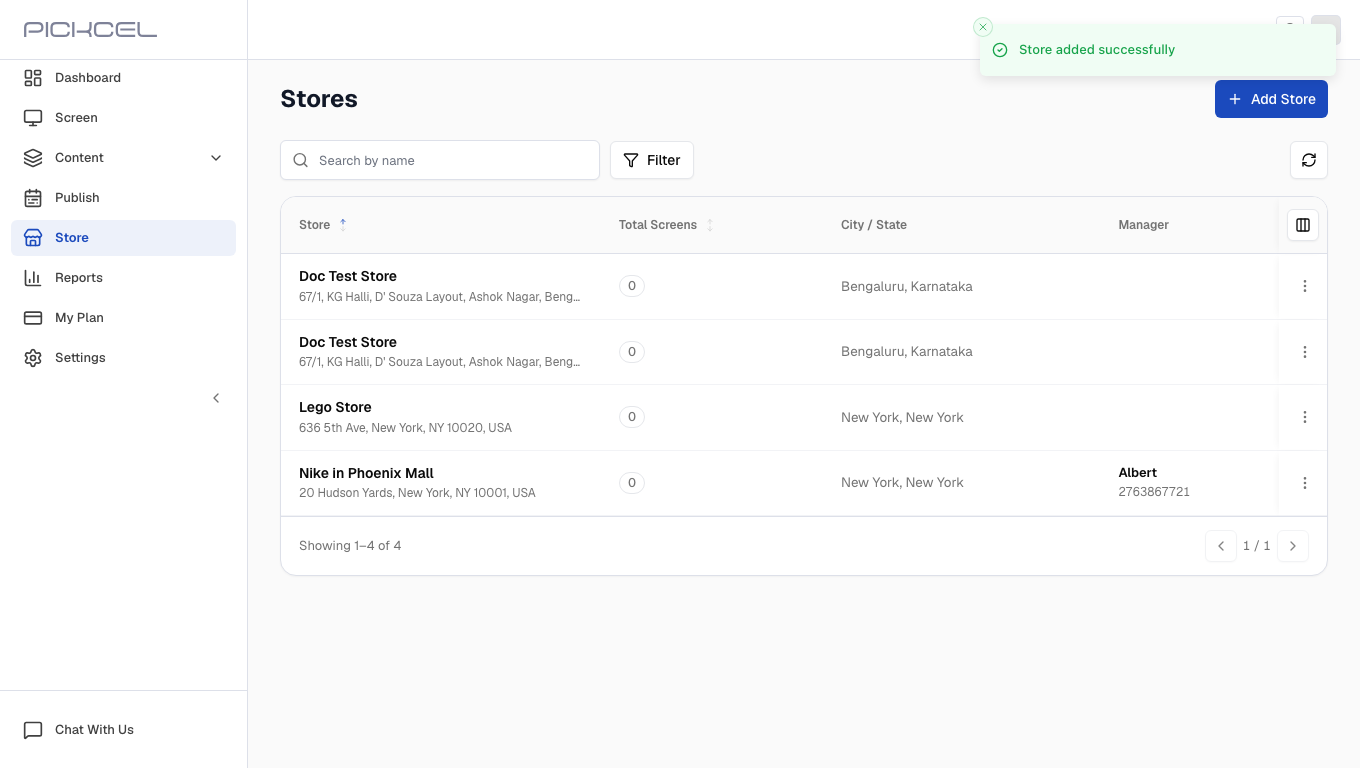
 The list of stores that you added will look like this:
 ## What's Next?
Now that your store is created, you can start adding screens to it:
* Learn how to [Add Screens to Your Store](/store/add-screens)
* Explore [Screen Grouping](/settings/screen-grouping) for advanced organization
## What's Next?
Now that your store is created, you can start adding screens to it:
* Learn how to [Add Screens to Your Store](/store/add-screens)
* Explore [Screen Grouping](/settings/screen-grouping) for advanced organization