> ## Documentation Index
> Fetch the complete documentation index at: https://docs.pickcel.com/llms.txt
> Use this file to discover all available pages before exploring further.
# Who is a Sub user and How do I add sub users in Pickcel?
> Learn about sub-users in Pickcel and how to add them with specific roles and group permissions
A **Sub-User** is any person who is given access to a particular Pickcel account by the Admin user of that account. A sub-user's access can be restricted using roles and permissions.
## Why use sub-users?
Sub-users are meant for teams that need shared access to a Pickcel account without giving everyone full administrative control. Instead of sharing a single login, the Admin can add individual users and restrict their access based on their responsibilities. For example, one user may only manage content, while another may only operate screens assigned to a specific location or department. This is controlled through **roles** and **groups**.
## How sub-users are controlled
### Roles define what a user can do
Pickcel uses roles to define permissions. By default, Pickcel provides four roles: **Admin**, **Manager**, **Editor**, and **Operator**. The first registered user becomes the **Admin** and has full access. The Admin can assign one of the remaining roles to each new user.
### Groups define what a user can access
A **Group** organizes users and controls access to account data. Screens, Media, Compositions, and Schedules are filtered by group, so users in different groups cannot see each other's Screens, Media, Compositions, or Schedules. This makes groups especially useful when managing multiple locations, departments, franchises, or client accounts under one Pickcel account.
Before creating a sub-user, you must create at least **one Group**. Pickcel requires every sub-user to be linked to a group during creation, so user creation is not possible without a group.
Please refer to [What are Roles and how do I set user Roles for a user?](/settings/user-roles) for more details.
**Important Notes:**
* Users belonging to different groups will not be able to see each other's Screens, Media, Composition, and Schedule.
* Please refer to [What is a Group and how do I add a Group?](/settings/groups) to understand the use of groups and how to add one.
* By default only one sub-user can be added. To add more sub-users, please get in touch with Pickcel Support.
Follow the steps below to create sub-users in Pickcel.
A sub-user must belong to a group, so create one if you have not already. In the [Pickcel console](https://console.pickcel.com), open **Settings**, select the **Groups** tab, and click **Add Group**. Enter a **Group Name** and **Description**, then click **Add Group**.
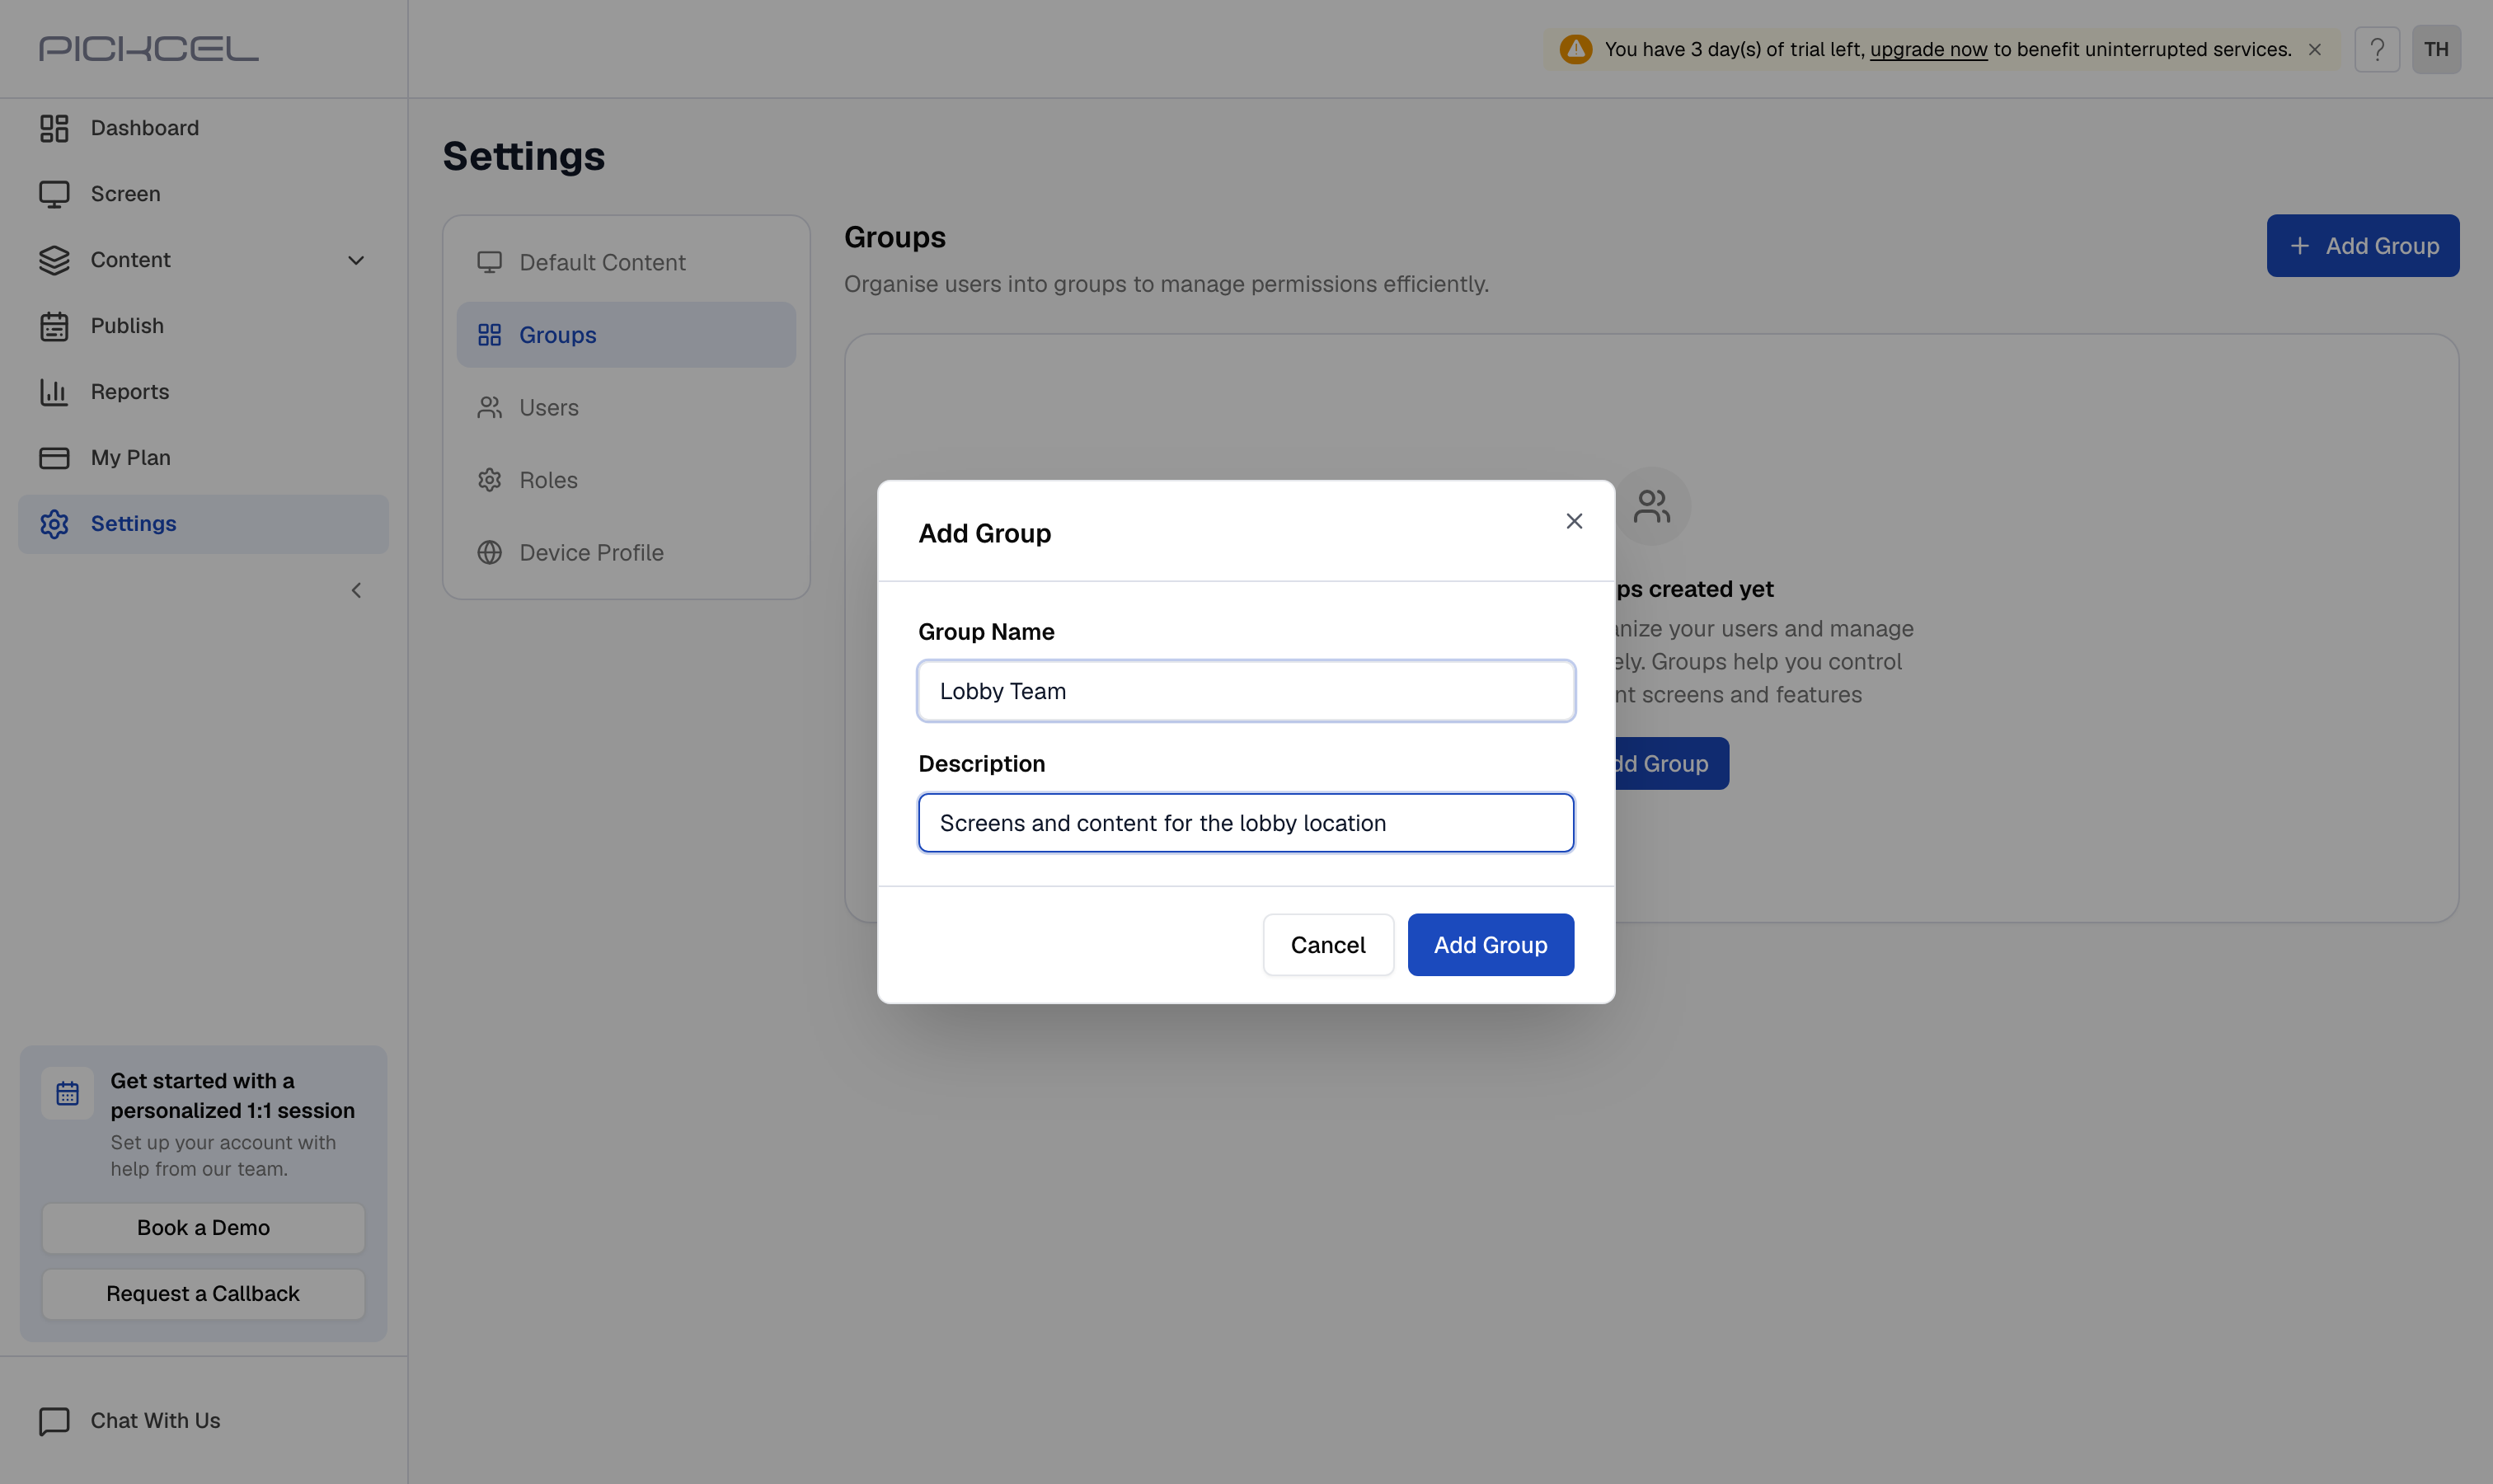 Having a group is mandatory while creating a sub-user. See [Groups](/settings/groups) for more detail.
Switch to the **Users** tab and click the **Add User** button in the top-right.
Having a group is mandatory while creating a sub-user. See [Groups](/settings/groups) for more detail.
Switch to the **Users** tab and click the **Add User** button in the top-right.
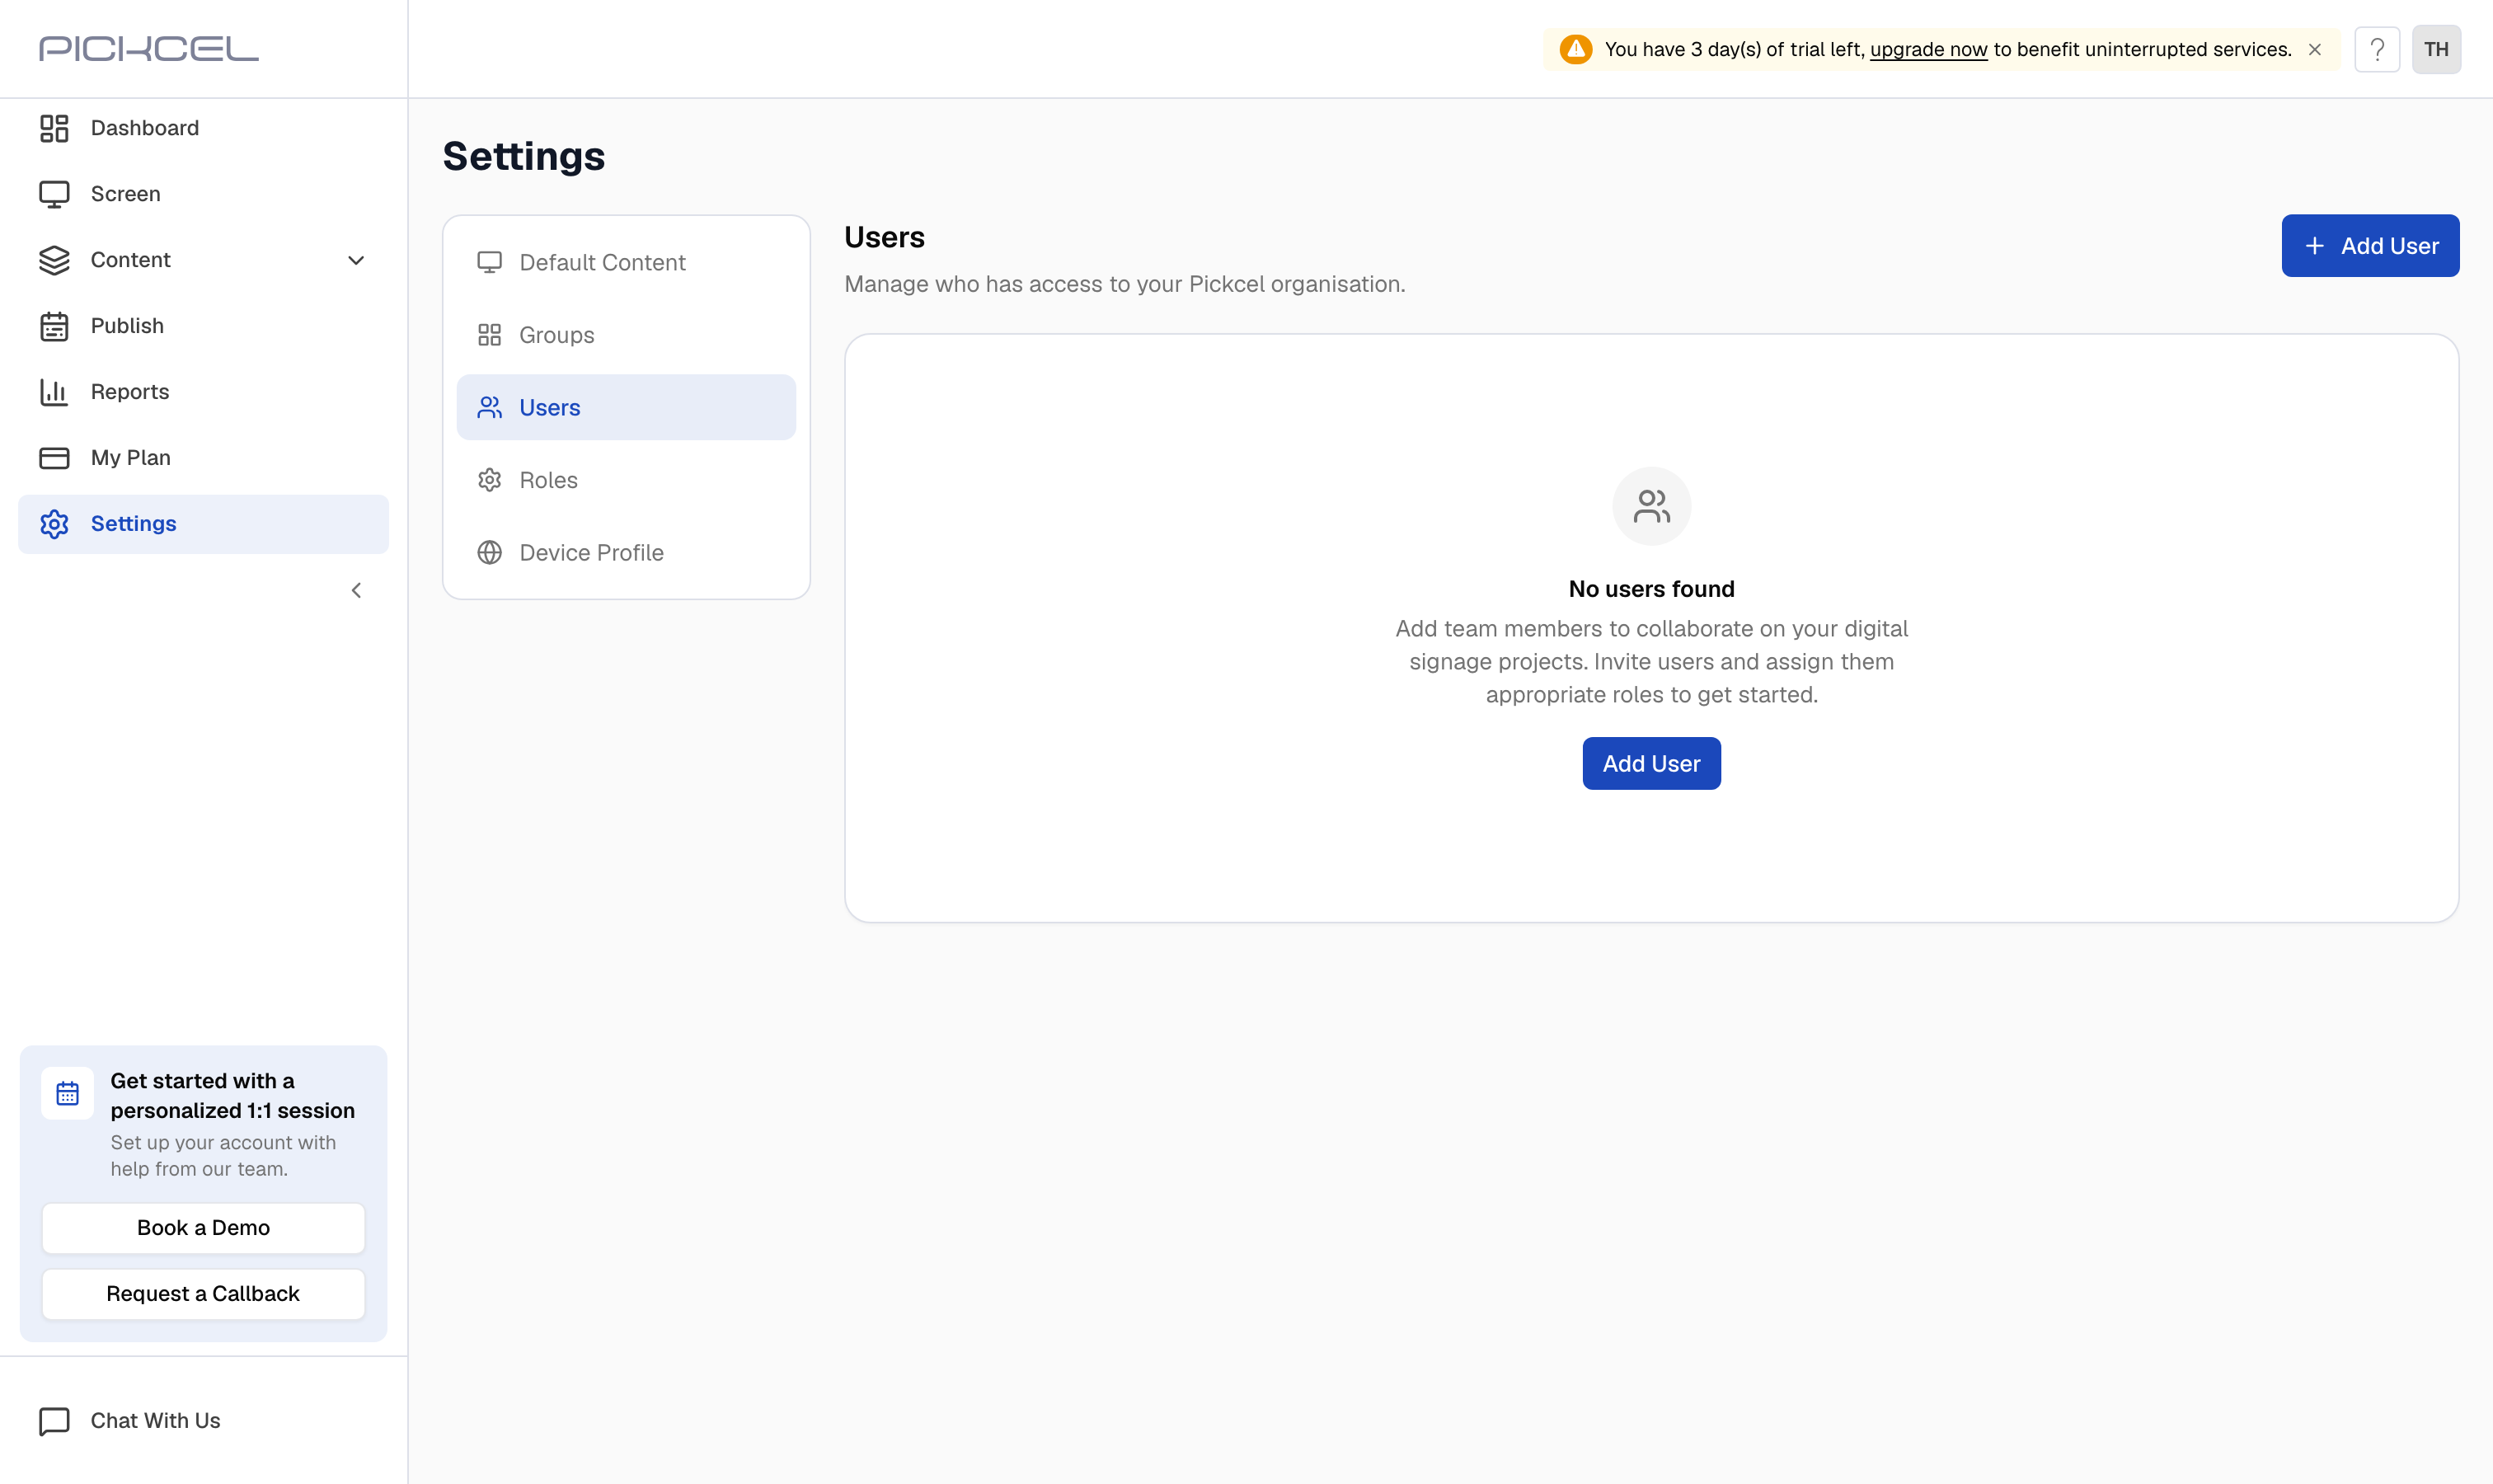 In the **Add User** dialog, fill in the details, all in one place:
* **User name**, **User email**, and a **Password** for the new user
* **Select role** from the dropdown: **Manager**, **Editor**, or **Operator**
* Tick at least one **Group** to give the user access (user creation is not possible without a group)
In the **Add User** dialog, fill in the details, all in one place:
* **User name**, **User email**, and a **Password** for the new user
* **Select role** from the dropdown: **Manager**, **Editor**, or **Operator**
* Tick at least one **Group** to give the user access (user creation is not possible without a group)
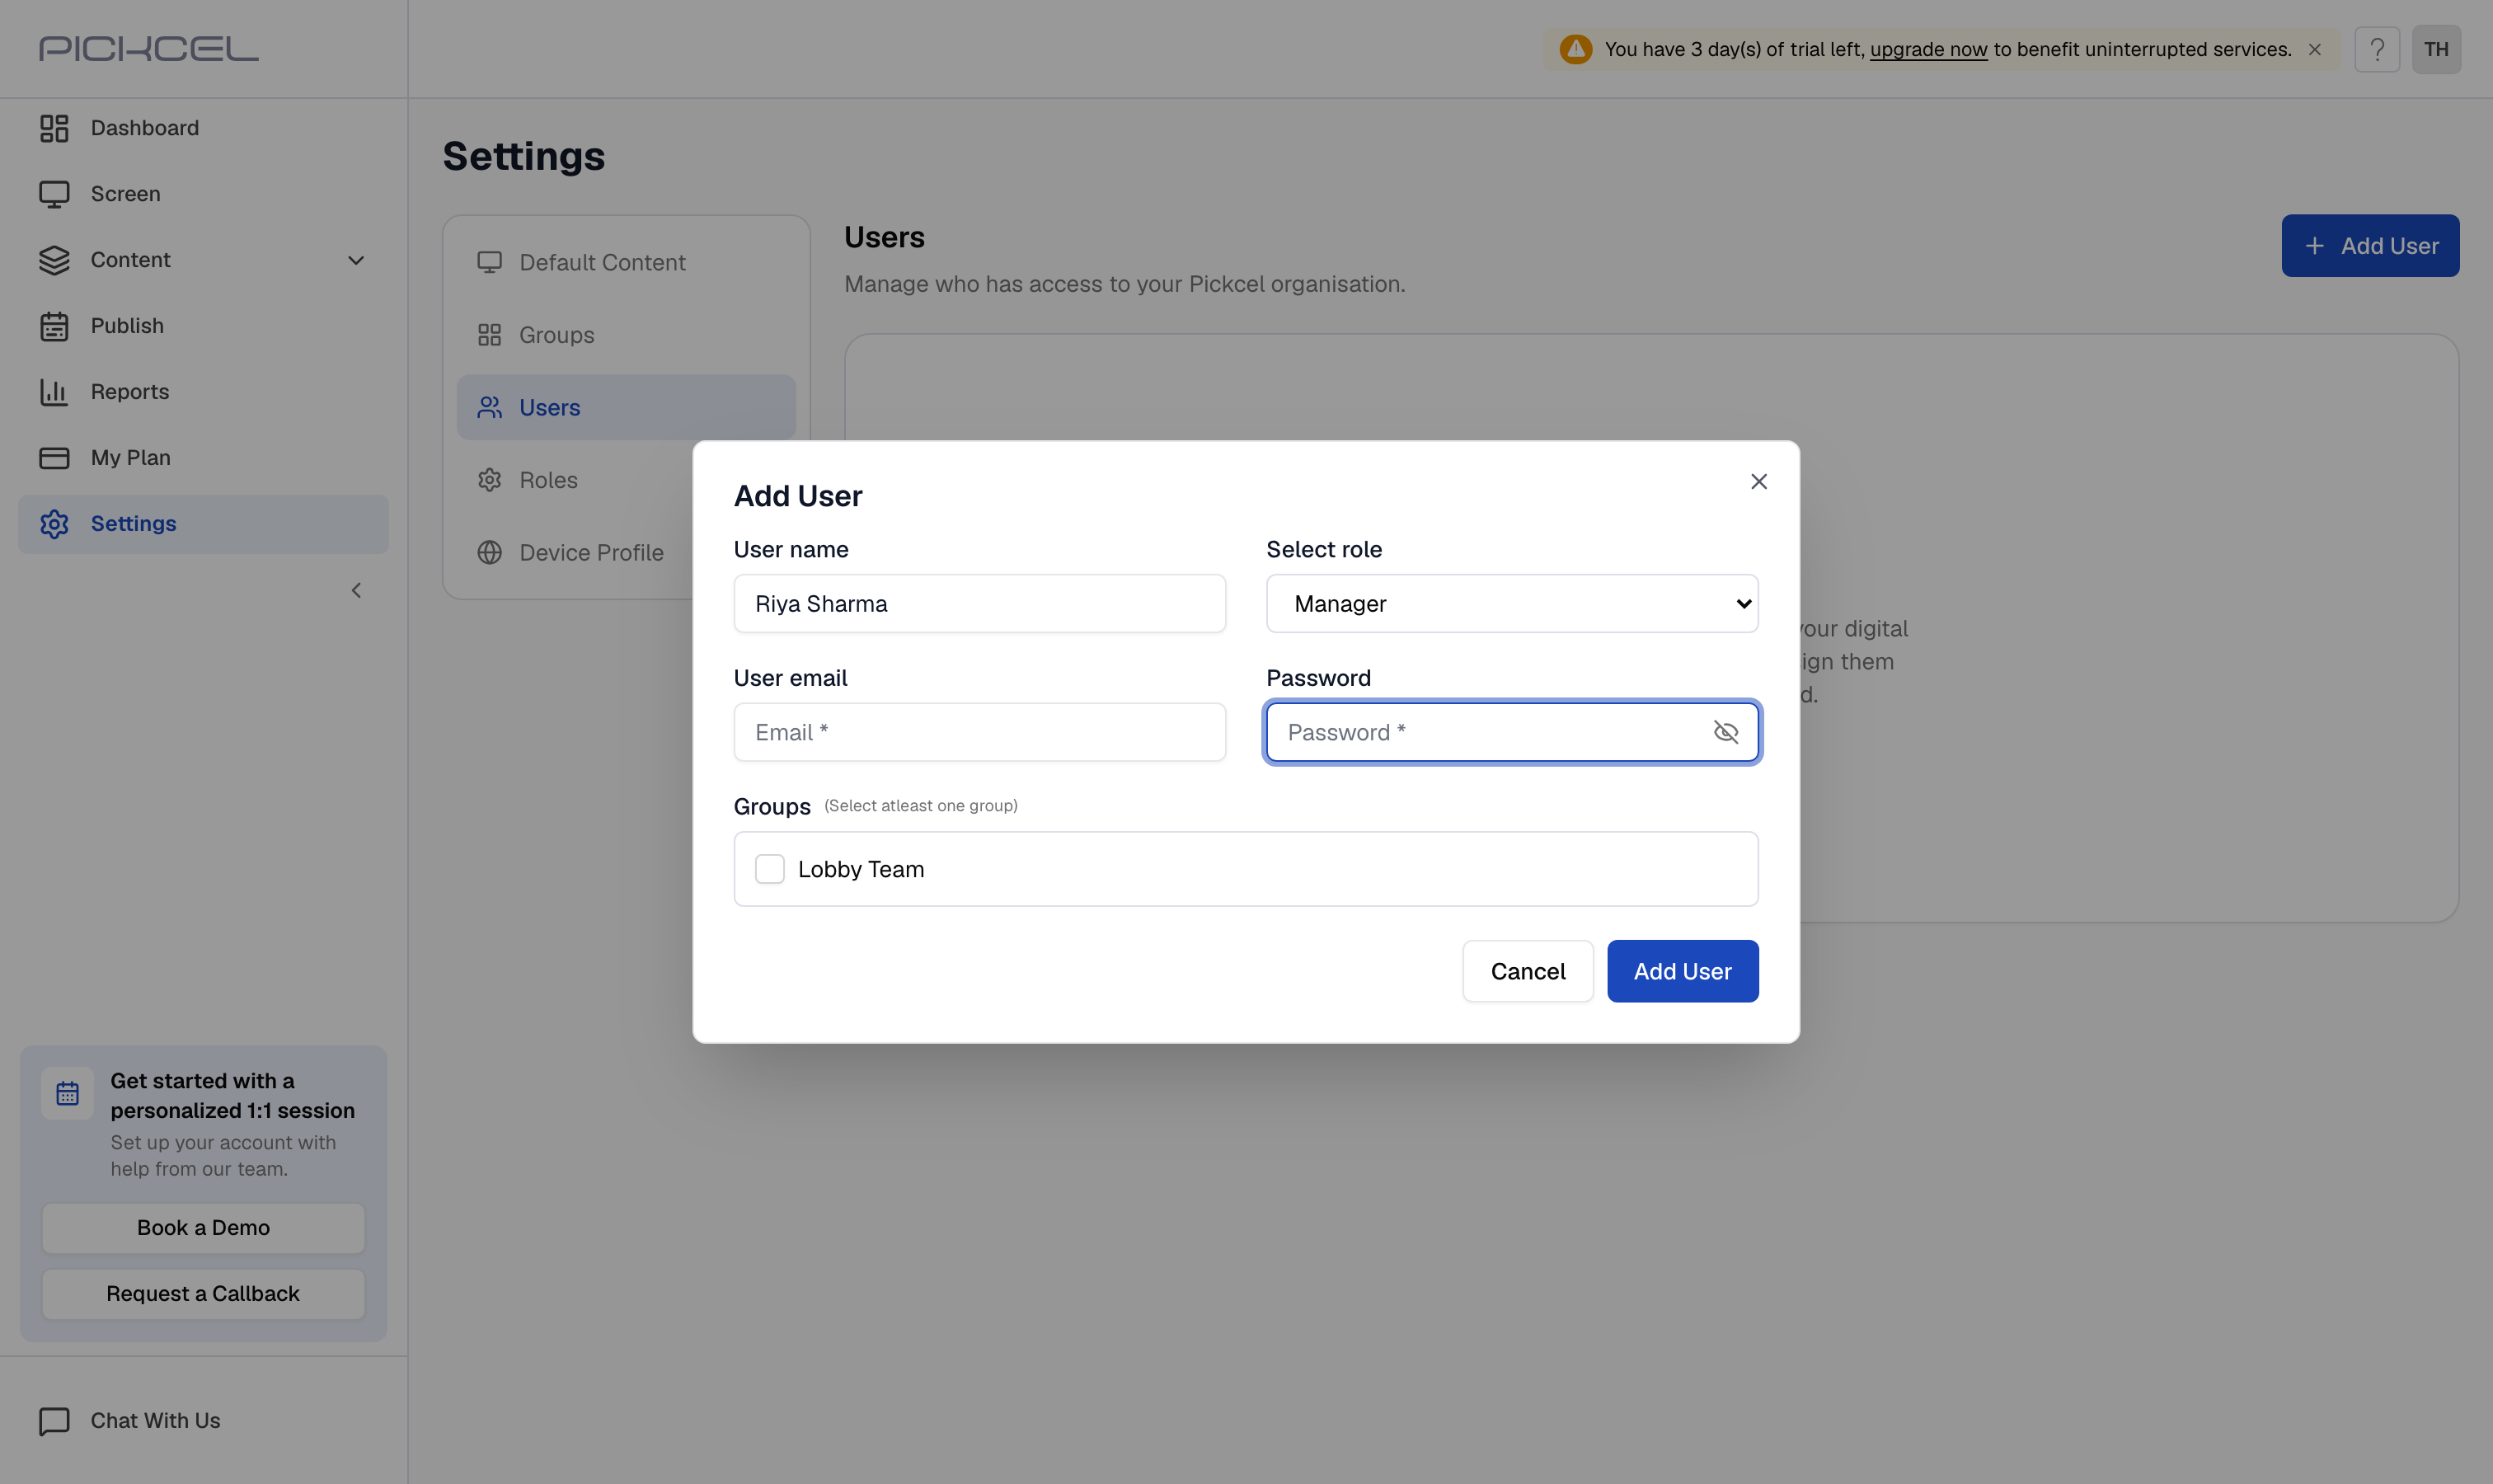 Click **Add User** to create the sub-user. They can now sign in with the email and password you set, limited to the role and group you assigned.
## What's Next?
* Fine-tune what each role can do in [User Roles](/settings/user-roles)
* Organize screens, media, and schedules by location or department in [Groups](/settings/groups)
Click **Add User** to create the sub-user. They can now sign in with the email and password you set, limited to the role and group you assigned.
## What's Next?
* Fine-tune what each role can do in [User Roles](/settings/user-roles)
* Organize screens, media, and schedules by location or department in [Groups](/settings/groups)