> ## Documentation Index
> Fetch the complete documentation index at: https://docs.pickcel.com/llms.txt
> Use this file to discover all available pages before exploring further.
# How to install the Pickcel digital signage software on a Windows player?
> Follow this simple procedure to install the Pickcel Software on your Windows device from the Pickcel Website
Supported on Windows 10 & 11.
**Considerations for Physical setup:**
* Windows system (10 or above).
* Active internet connection.
Go to [https://www.pickcel.com/download/#windows](https://www.pickcel.com/download/#windows) and download the EXE file for your Windows by clicking on the download option.
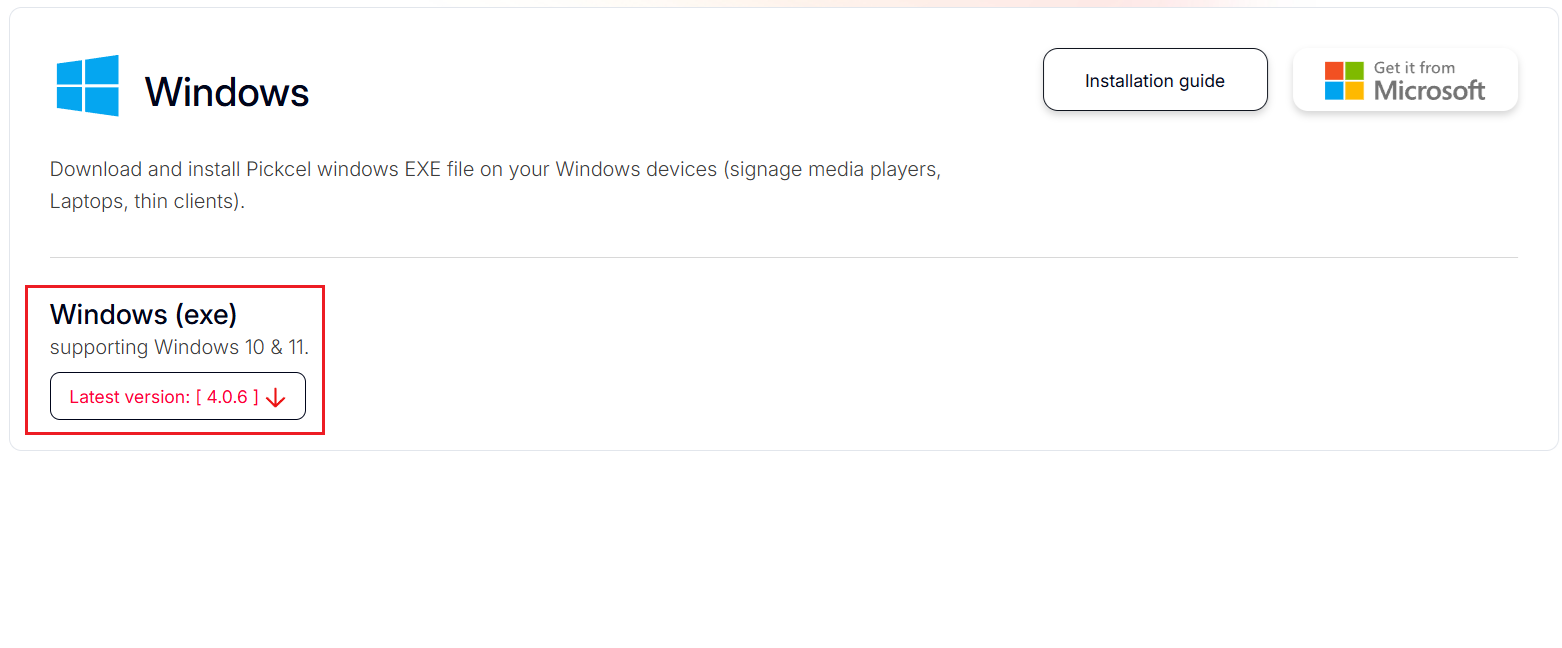 **Direct Download:** [Download Windows Player](https://console.pickcel.com/players/windows/pickcel-digital-signage-v4.0.7.exe)
Now go to **File Explorer** > **Downloads** and double-click the downloaded file.
**Direct Download:** [Download Windows Player](https://console.pickcel.com/players/windows/pickcel-digital-signage-v4.0.7.exe)
Now go to **File Explorer** > **Downloads** and double-click the downloaded file.
 Click **More info**, then click **Run anyway**.
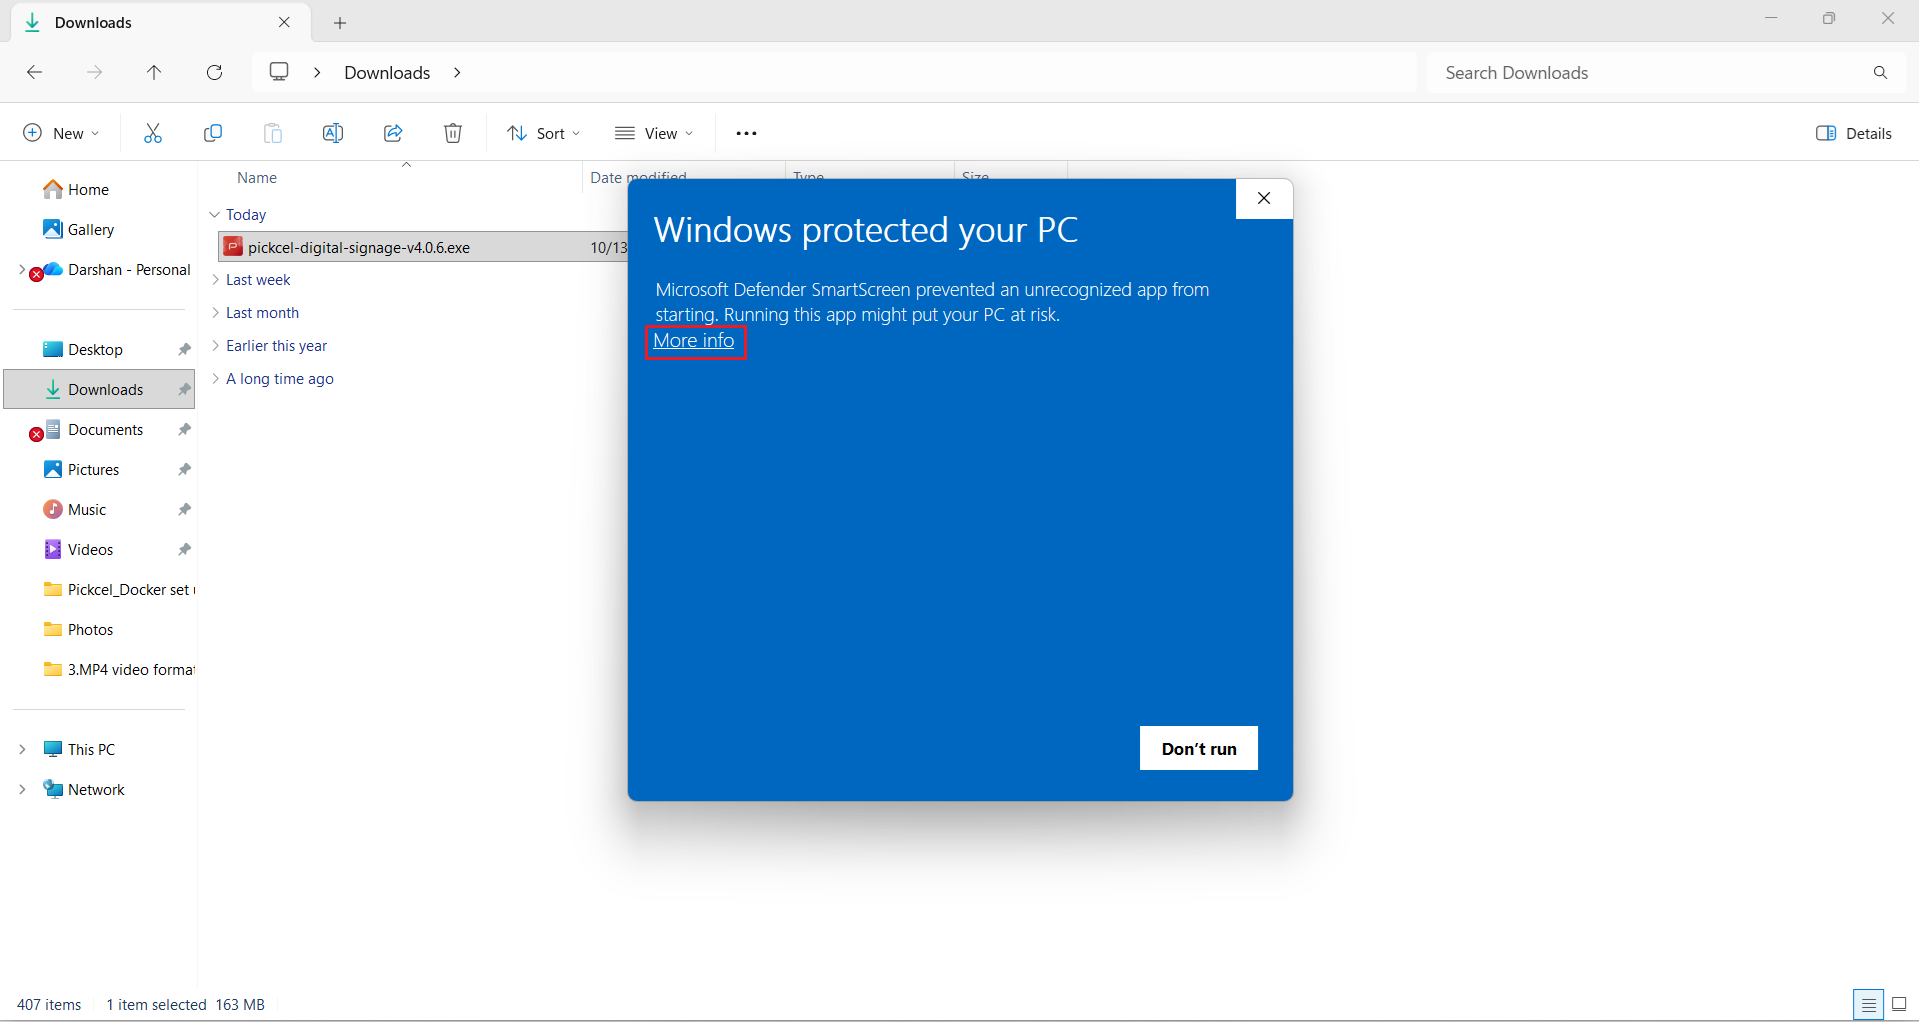
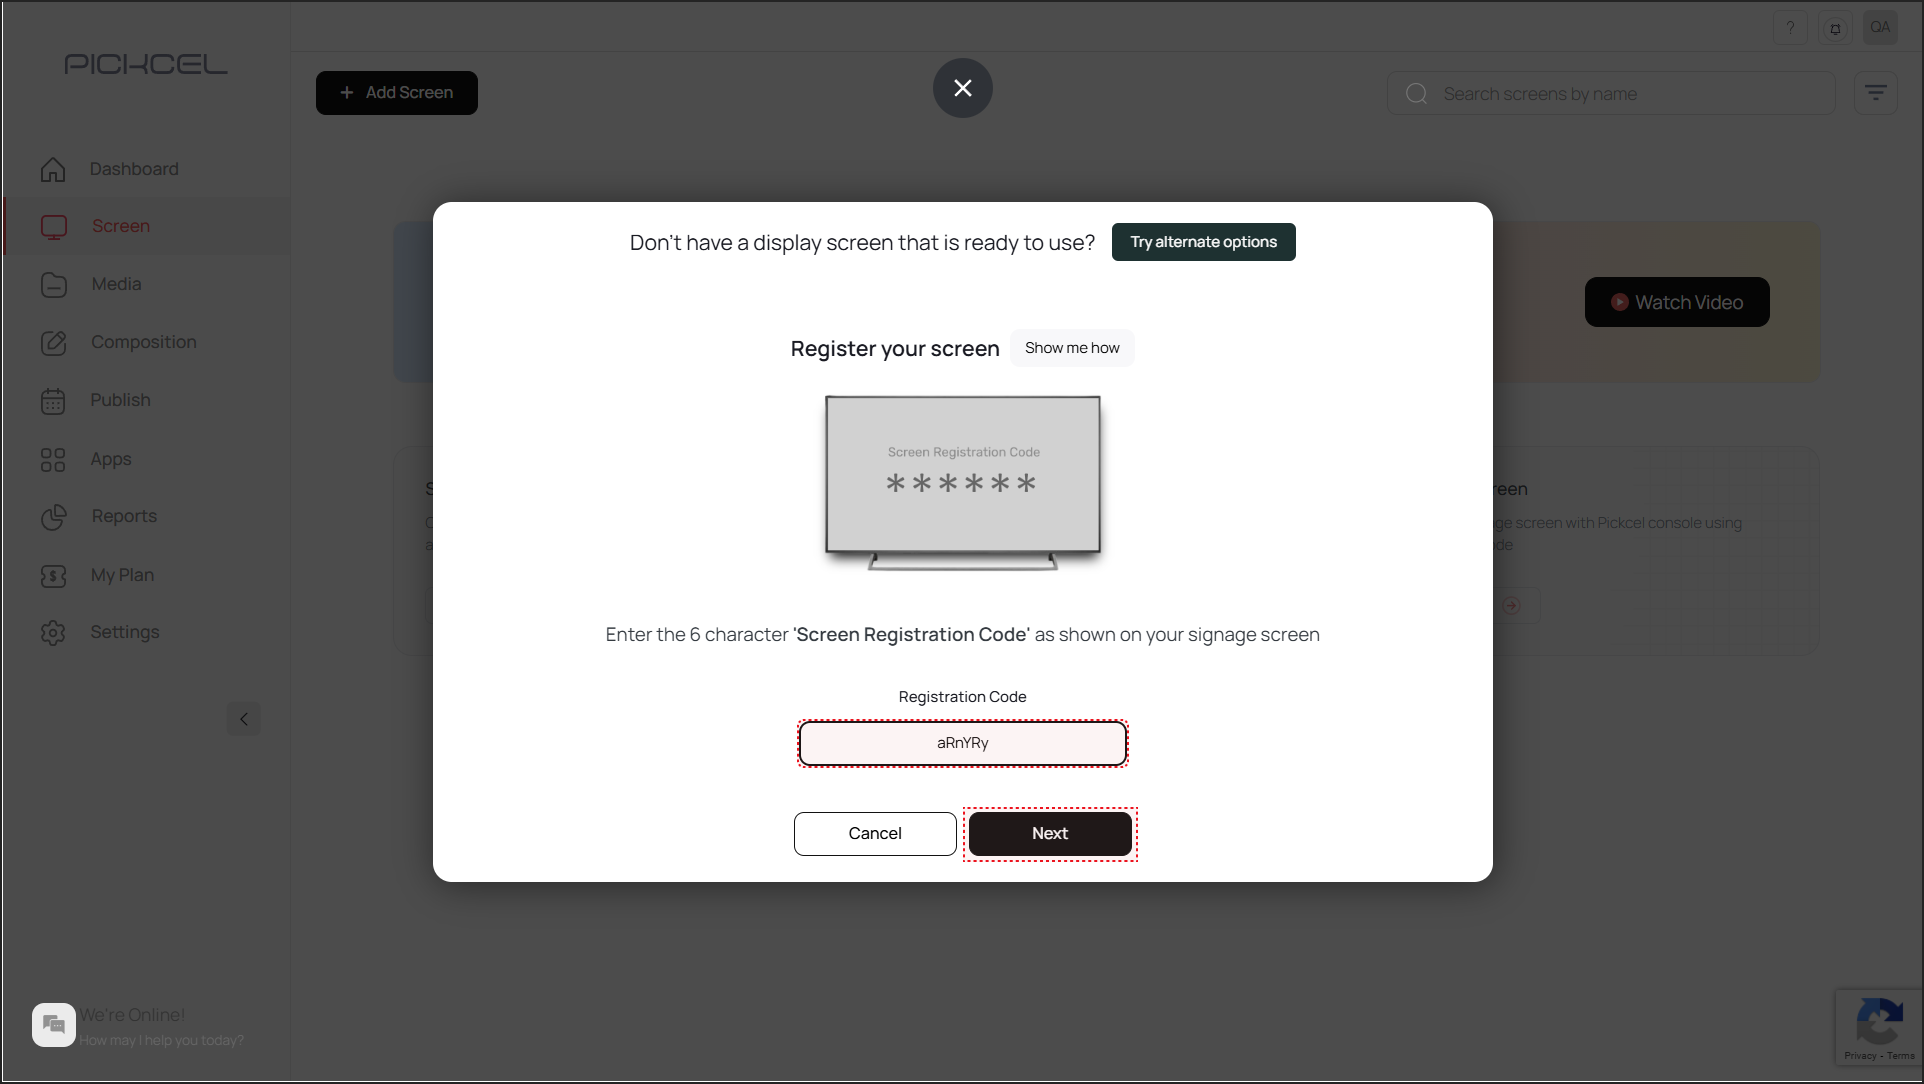
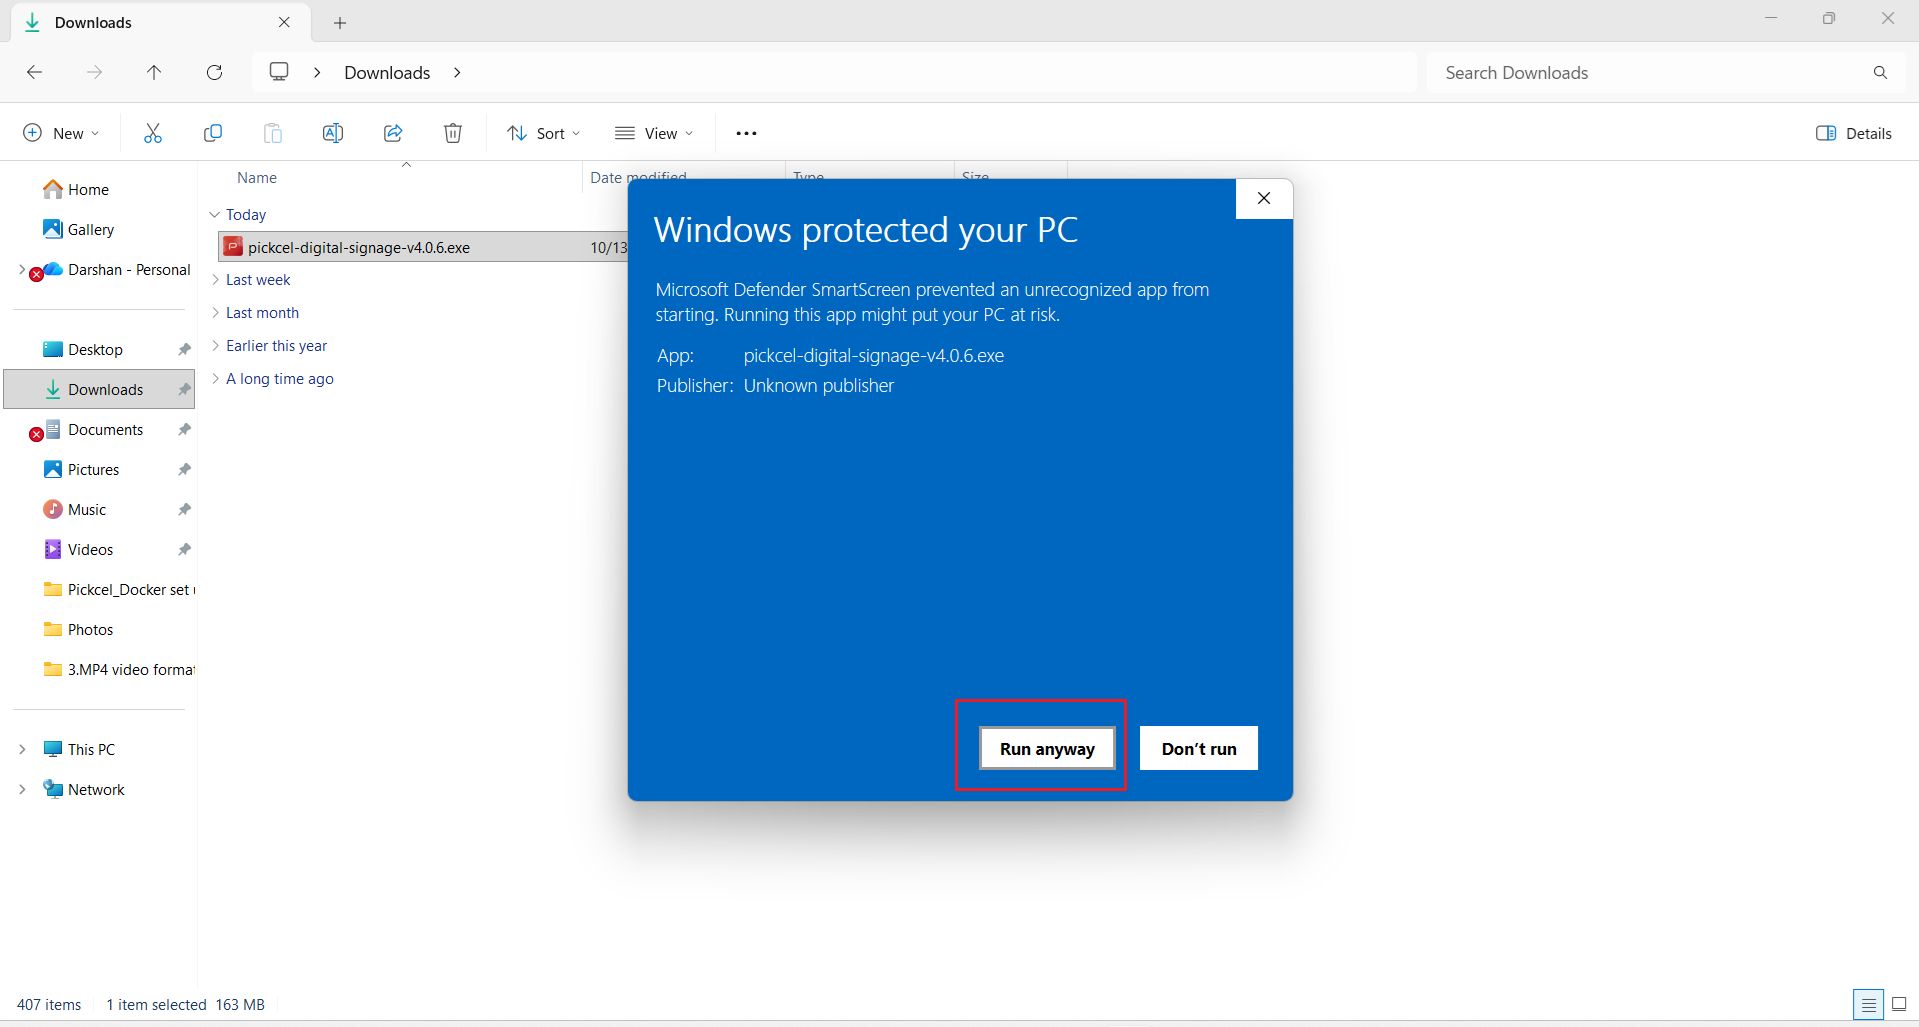 Once the installation is complete, the app will launch automatically and it will show you a unique screen registration code.
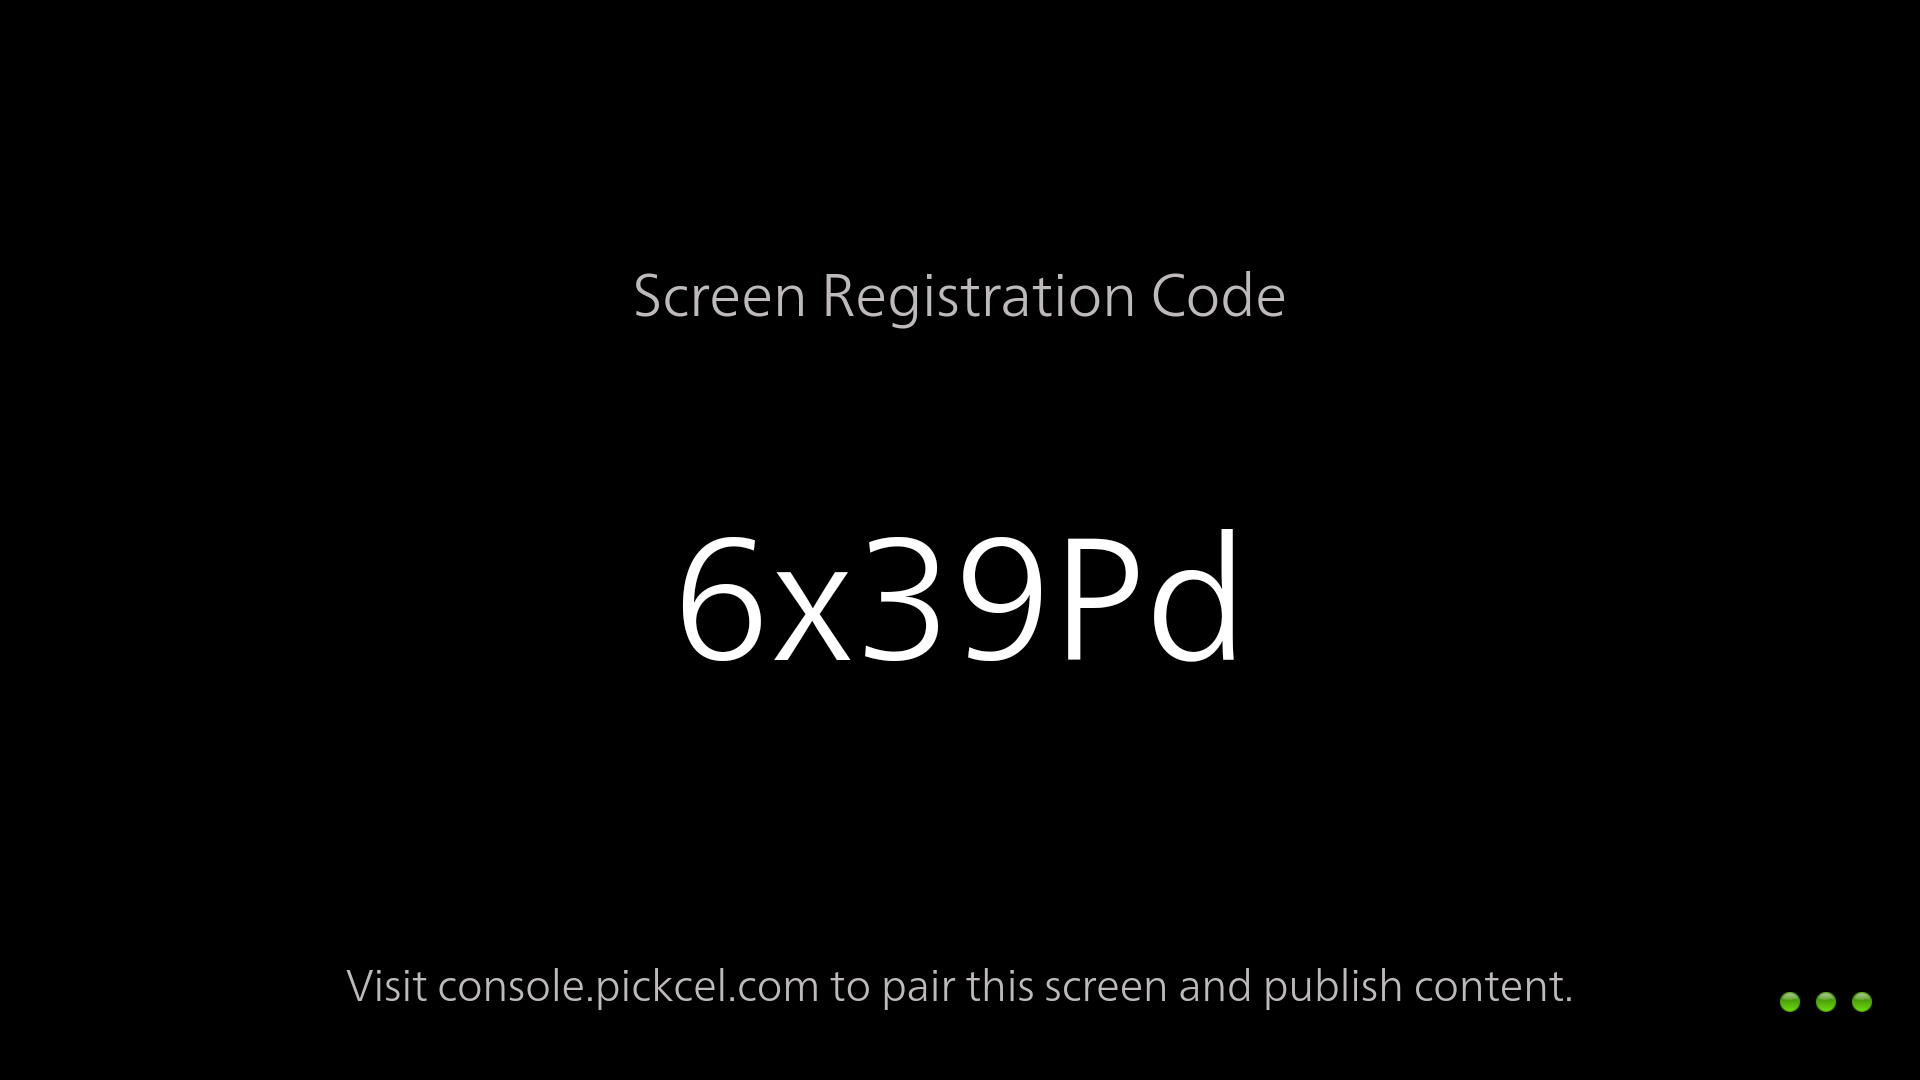 Pair your display with the Pickcel console using the registration code. You will have to enter this code on your [Pickcel console](https://console.pickcel.com/) to complete the pairing of your screen.
To learn how to pair your device with the Pickcel console, see the [Screen Registration guide](/screen-registration/screen-registration).
Pair your display with the Pickcel console using the registration code. You will have to enter this code on your [Pickcel console](https://console.pickcel.com/) to complete the pairing of your screen.
To learn how to pair your device with the Pickcel console, see the [Screen Registration guide](/screen-registration/screen-registration).
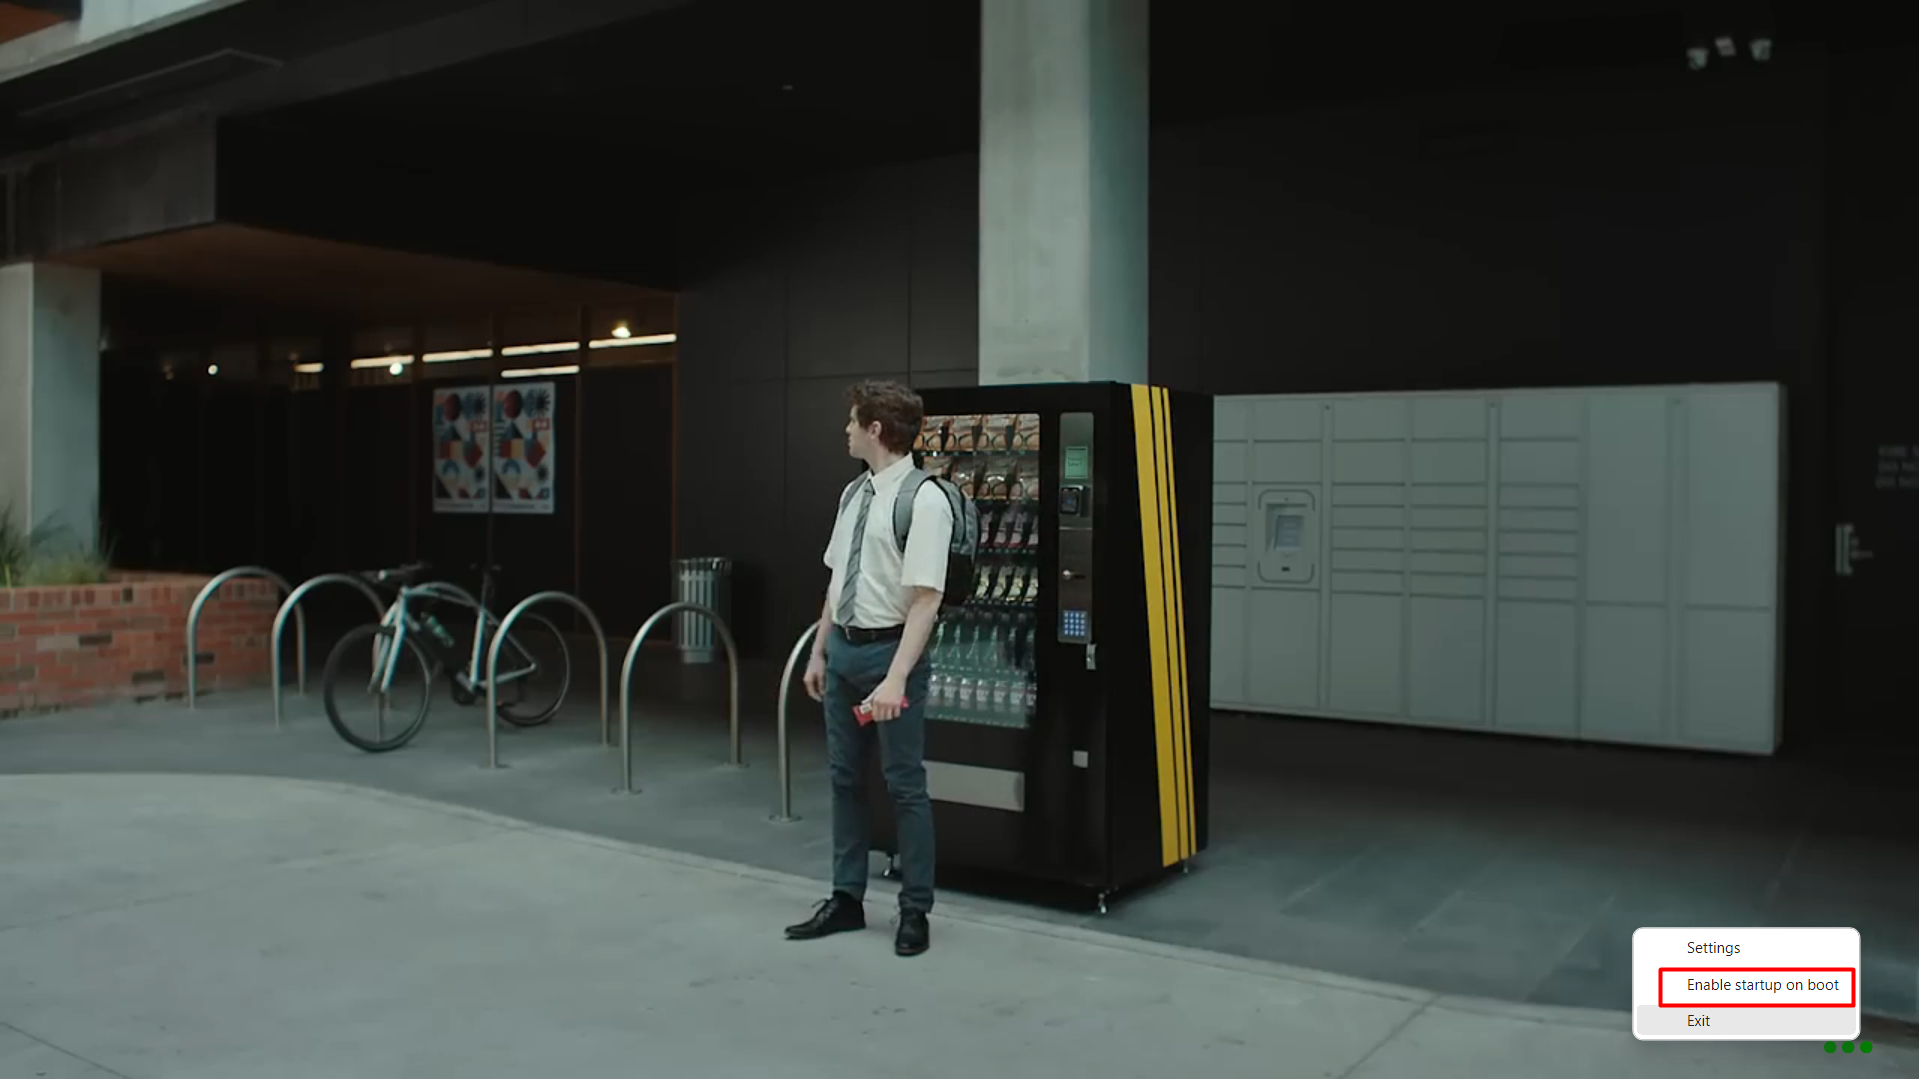
 Right-click the screen and enable **Startup and boot** so the Pickcel app launches automatically every time the system restarts, useful if the player reboots after a power cut.
 Restart the system to confirm. After the boot, the Pickcel app should launch automatically and start playing the content.
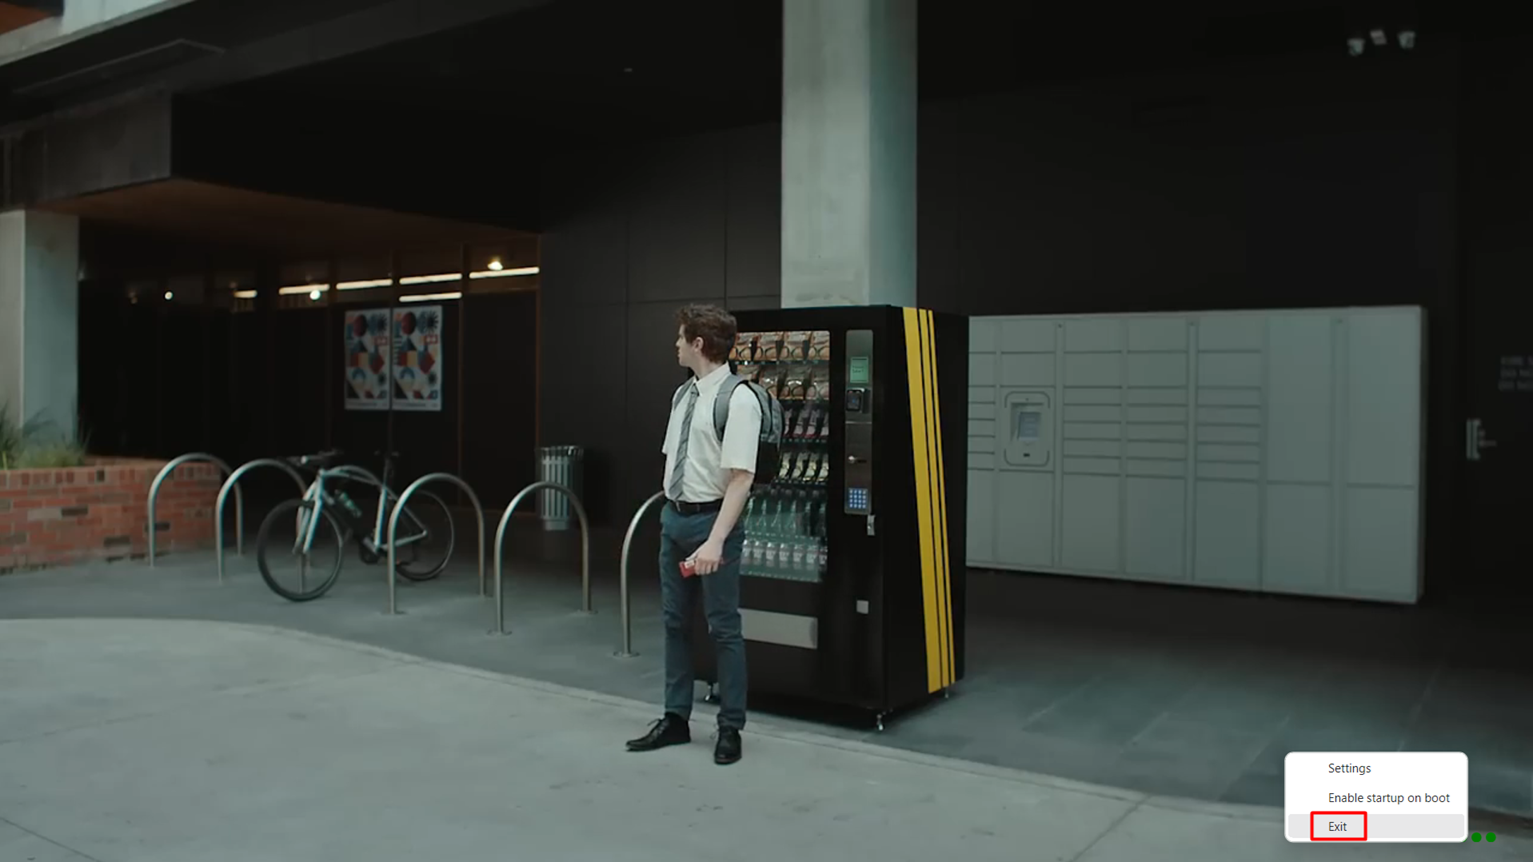
To minimize the Pickcel app, press Windows + M or Windows + D. To close the Pickcel app, use the exit option from the app by right-clicking:
Restart the system to confirm. After the boot, the Pickcel app should launch automatically and start playing the content.
To minimize the Pickcel app, press Windows + M or Windows + D. To close the Pickcel app, use the exit option from the app by right-clicking:
 The installation of the Pickcel digital signage software on your Windows player is complete, and you can start publishing content to your screens now.
**What's Next?**
Now that your Windows player is installed, complete your setup:
* Start [**Uploading Media**](/media/add-media) to your library
* Create your first [**Composition**](/compositions/compositions) and publish content
The installation of the Pickcel digital signage software on your Windows player is complete, and you can start publishing content to your screens now.
**What's Next?**
Now that your Windows player is installed, complete your setup:
* Start [**Uploading Media**](/media/add-media) to your library
* Create your first [**Composition**](/compositions/compositions) and publish content