> ## Documentation Index
> Fetch the complete documentation index at: https://docs.pickcel.com/llms.txt
> Use this file to discover all available pages before exploring further.
# How to install the Pickcel digital signage software on Raspberry Pi?
> Step-by-step guide to flash the Pickcel OS image onto a Raspberry Pi, connect the hardware, and complete the initial Pickcel player setup
**Prerequisites**
* Raspberry Pi 4 (or newer) with HDMI display, power adaptor, USB keyboard, and mouse
* MicroSD card (16 GB or higher) with card reader for flashing the Pickcel image
* Computer running Windows, macOS, or Ubuntu to install Raspberry Pi Imager
* Stable internet connection for both the setup computer and Raspberry Pi
Visit [https://www.pickcel.com/download/#raspberry-pi](https://www.pickcel.com/download/#raspberry-pi) and download the Pickcel OS image for Raspberry Pi.
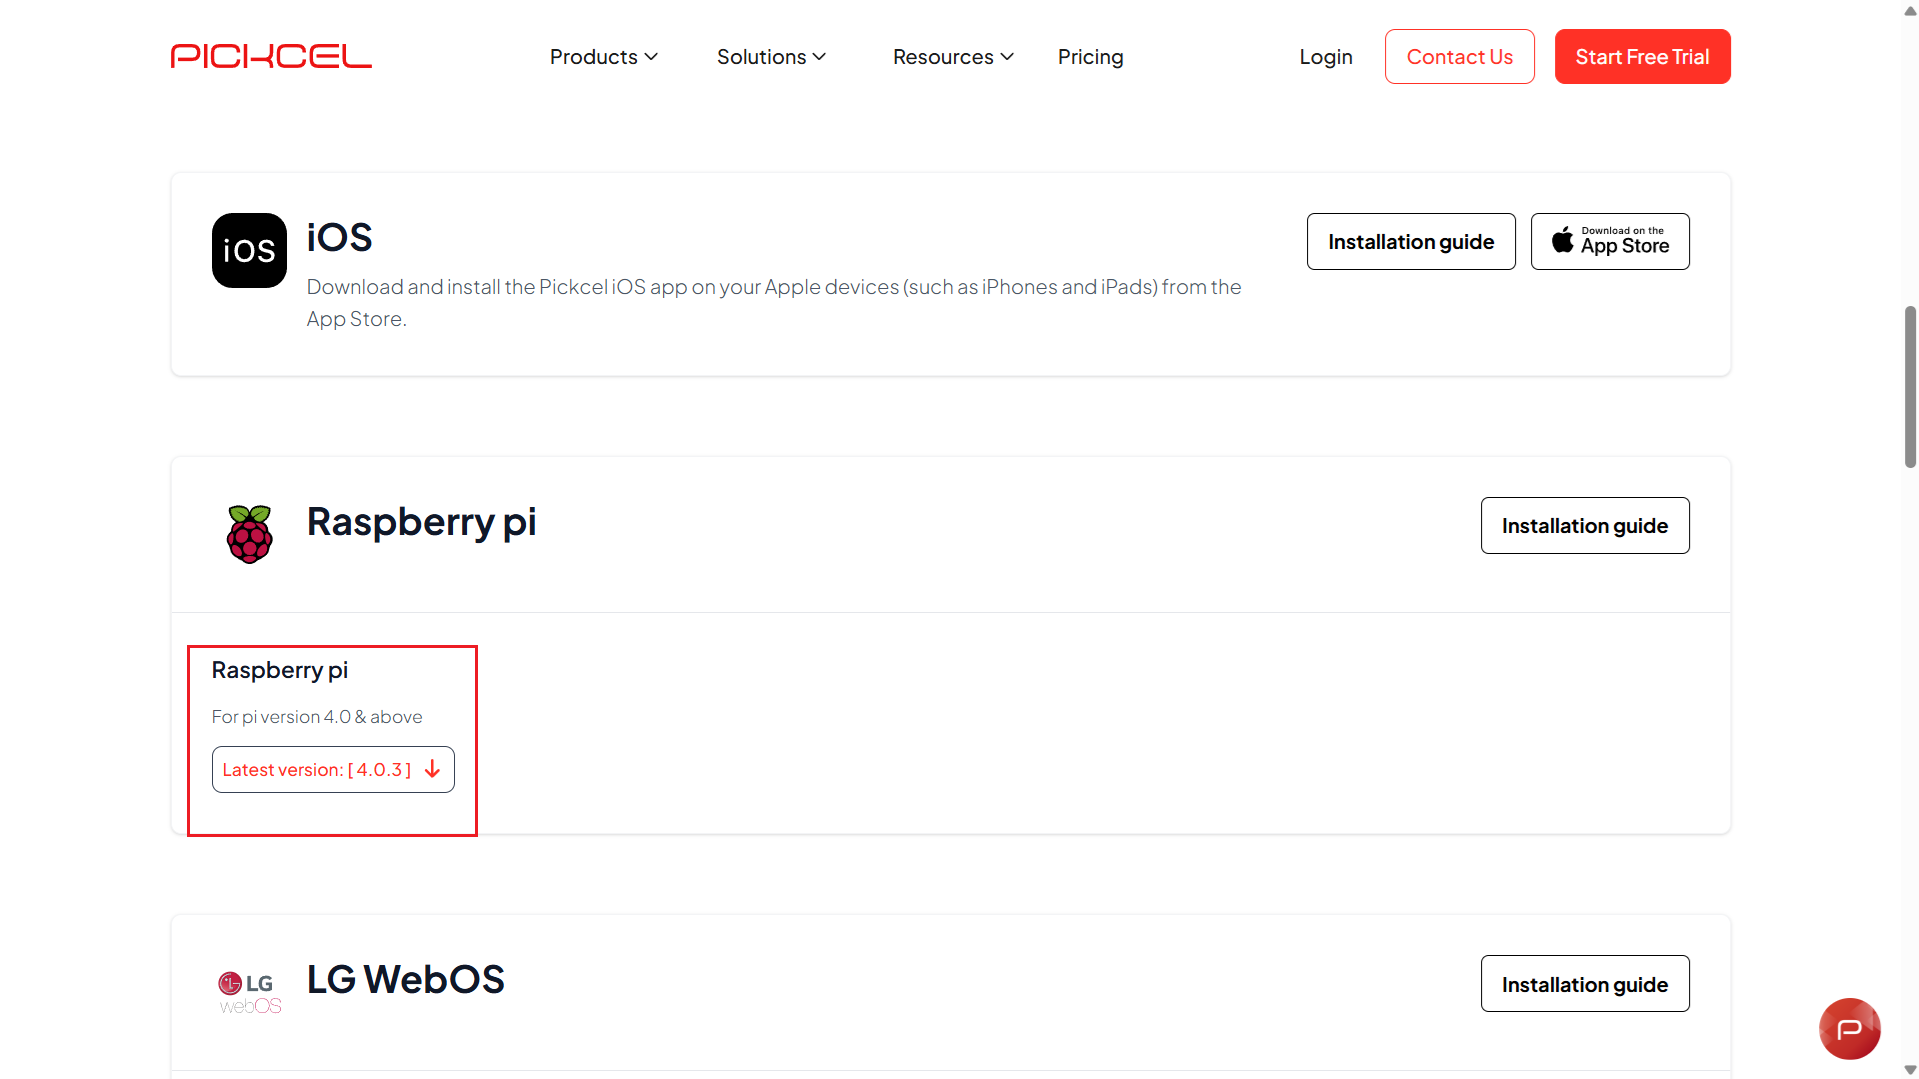 [Download Pickcel Raspberry Pi image directly](https://console.pickcel.com/players/raspberrypi/v4/4.0.3/pickcel.img.gz).
Download the **Raspberry Pi Imager tool** from [https://www.raspberrypi.com/software/](https://www.raspberrypi.com/software/) and run the installer. Proceed through the setup wizard using the default options.
The Raspberry Pi Imager is available for Windows, macOS, and Ubuntu.
[Download Pickcel Raspberry Pi image directly](https://console.pickcel.com/players/raspberrypi/v4/4.0.3/pickcel.img.gz).
Download the **Raspberry Pi Imager tool** from [https://www.raspberrypi.com/software/](https://www.raspberrypi.com/software/) and run the installer. Proceed through the setup wizard using the default options.
The Raspberry Pi Imager is available for Windows, macOS, and Ubuntu.
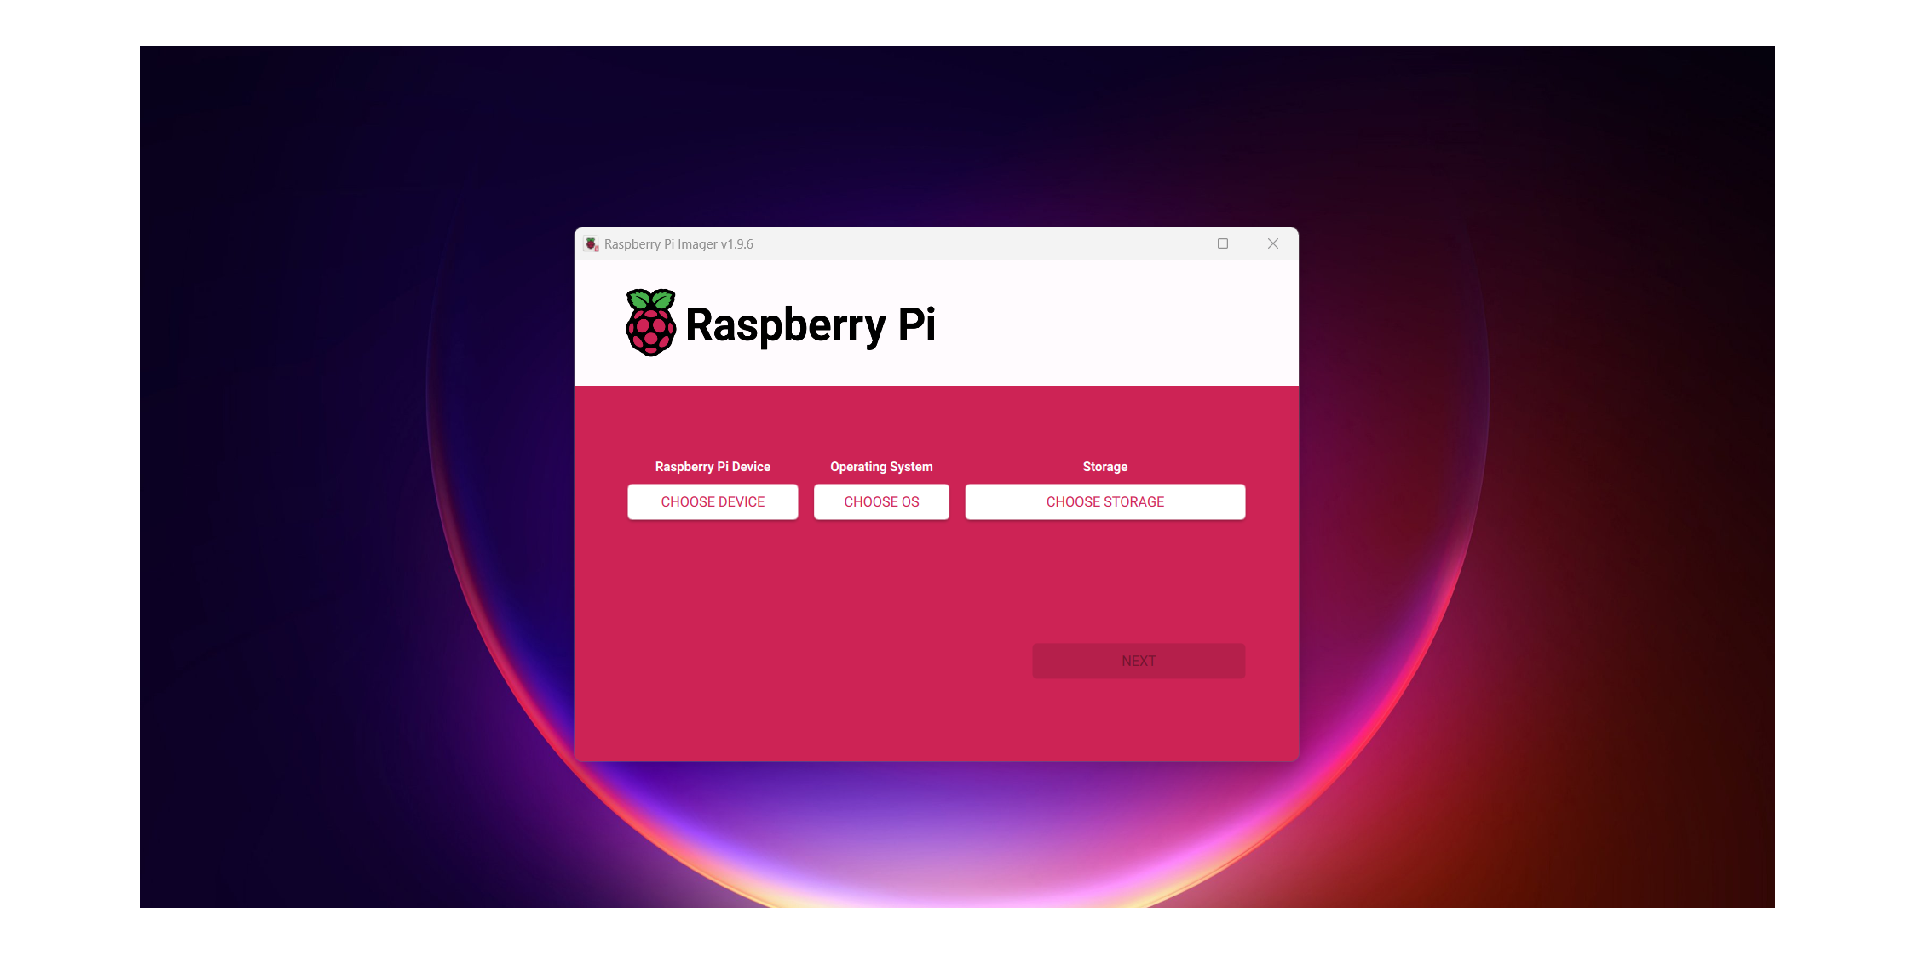
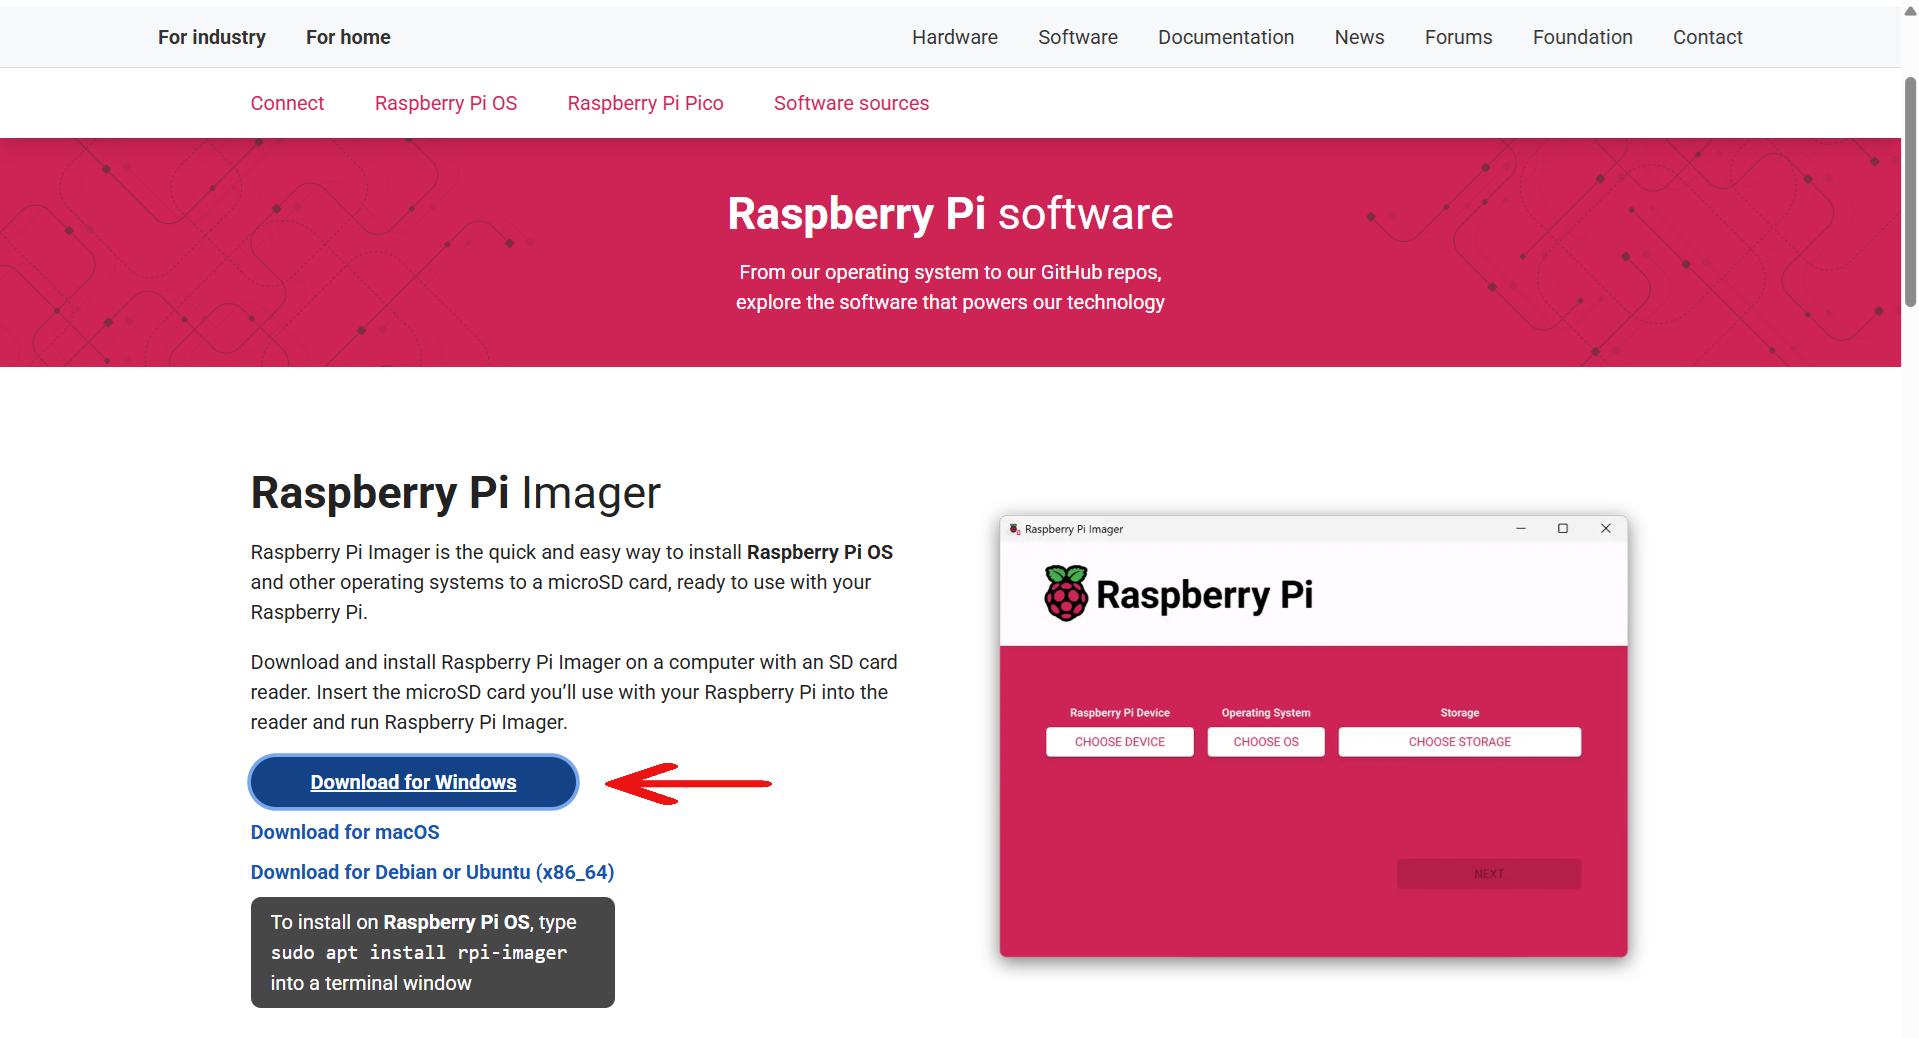 Open Raspberry Pi Imager and click **Choose Device**.
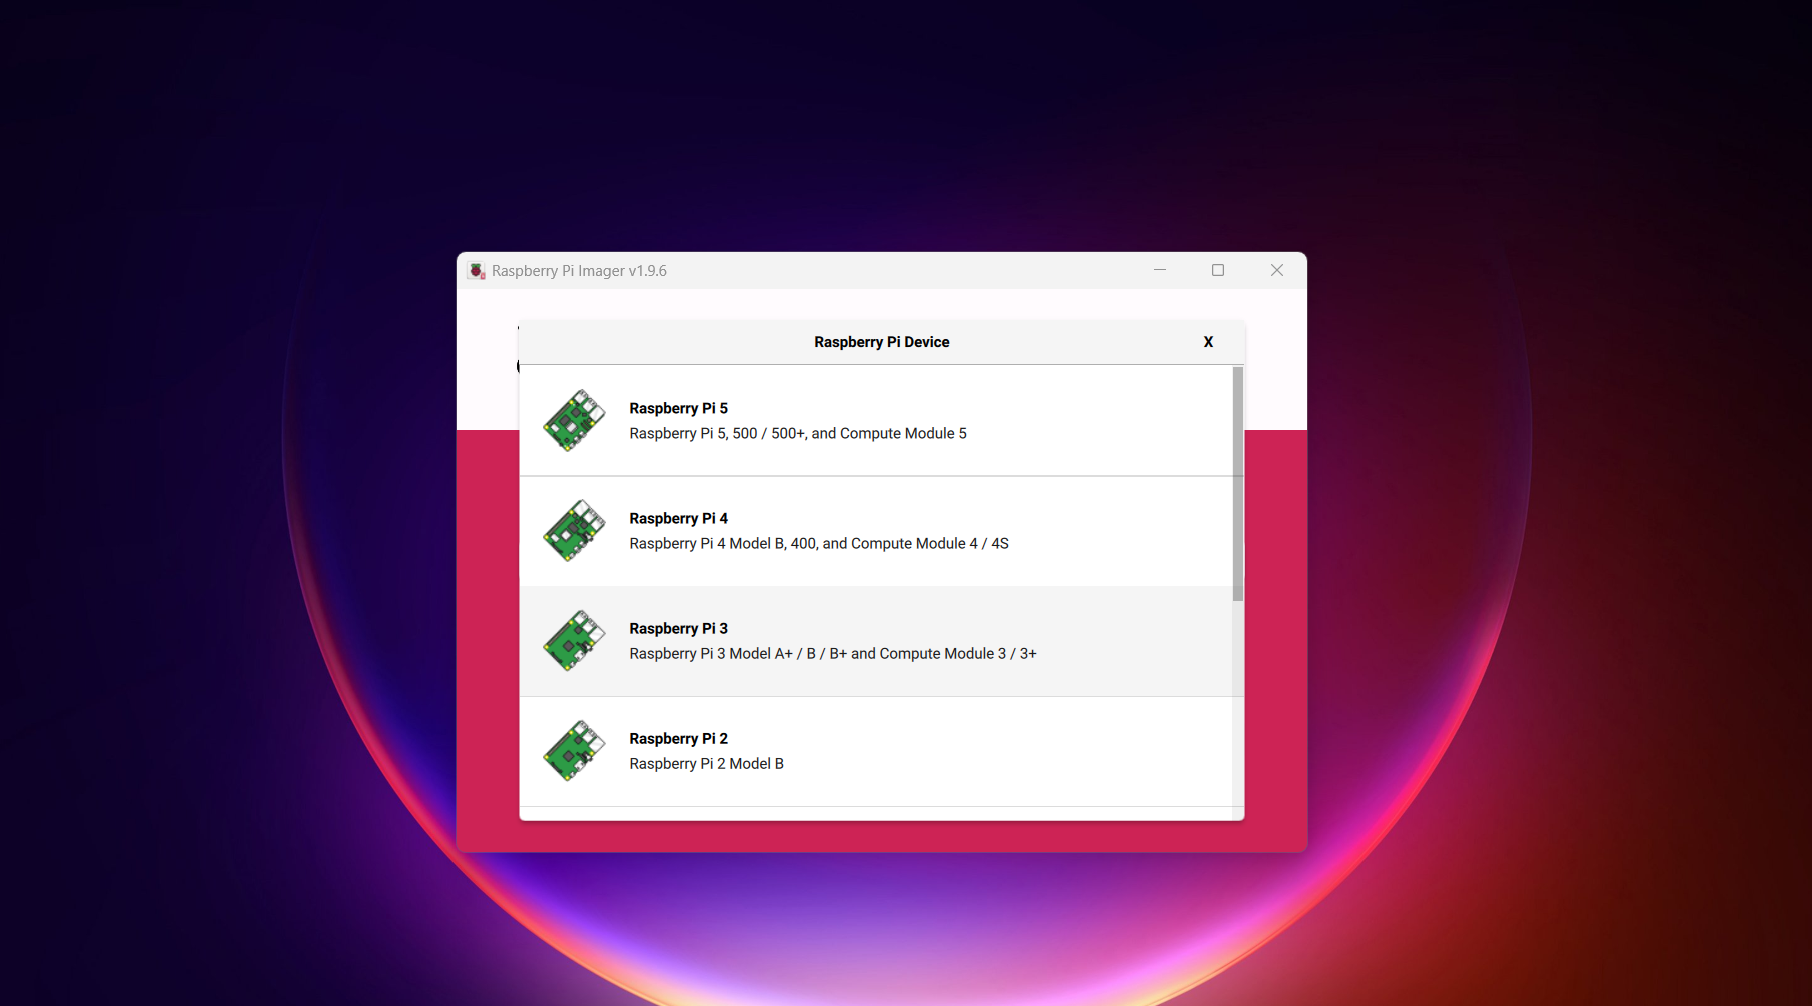
 Pick the Raspberry Pi model you are configuring.
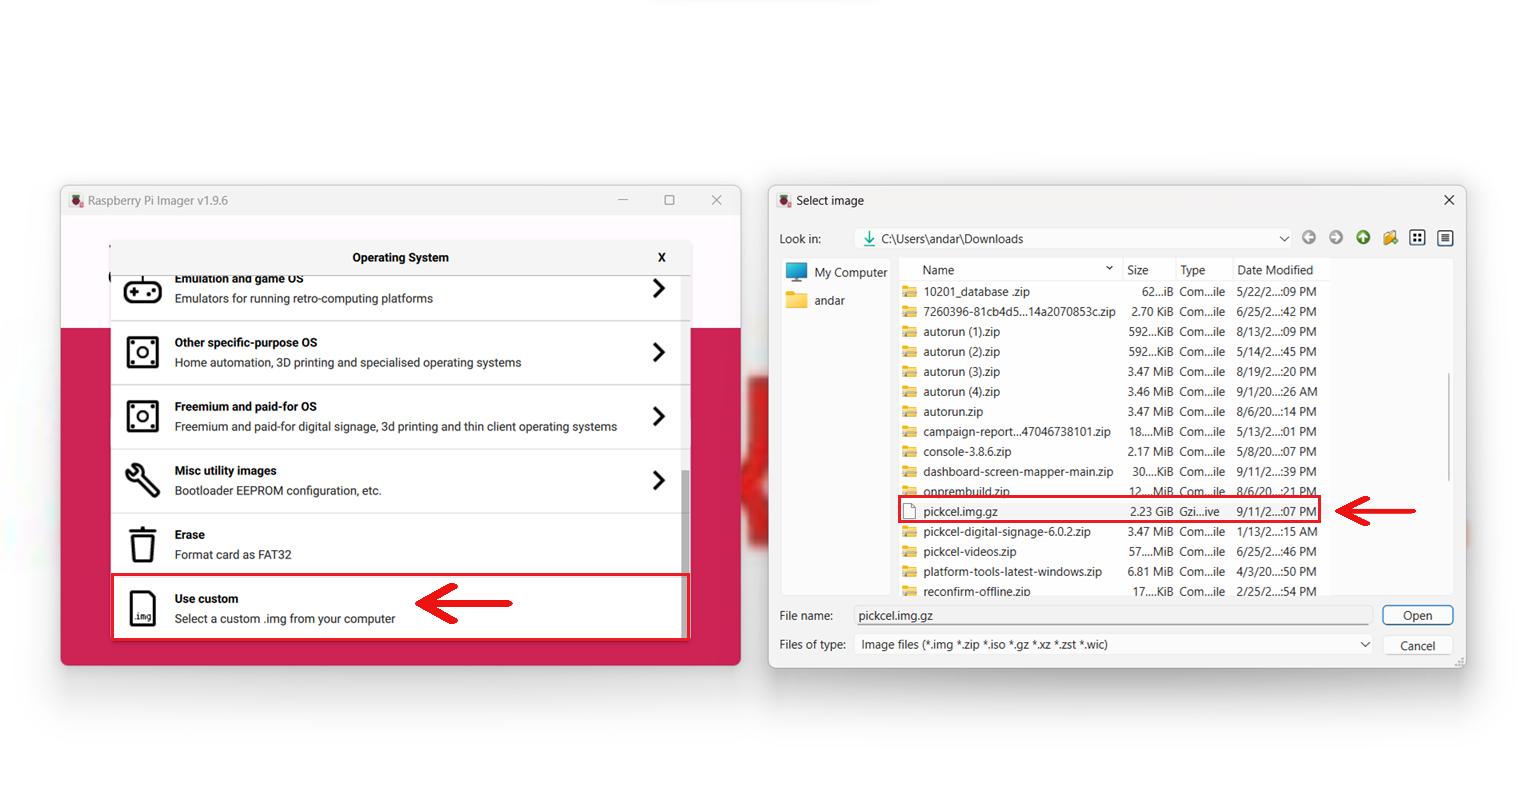
 Click **Choose OS**, pick **Custom**, and locate the Pickcel OS image you downloaded earlier.
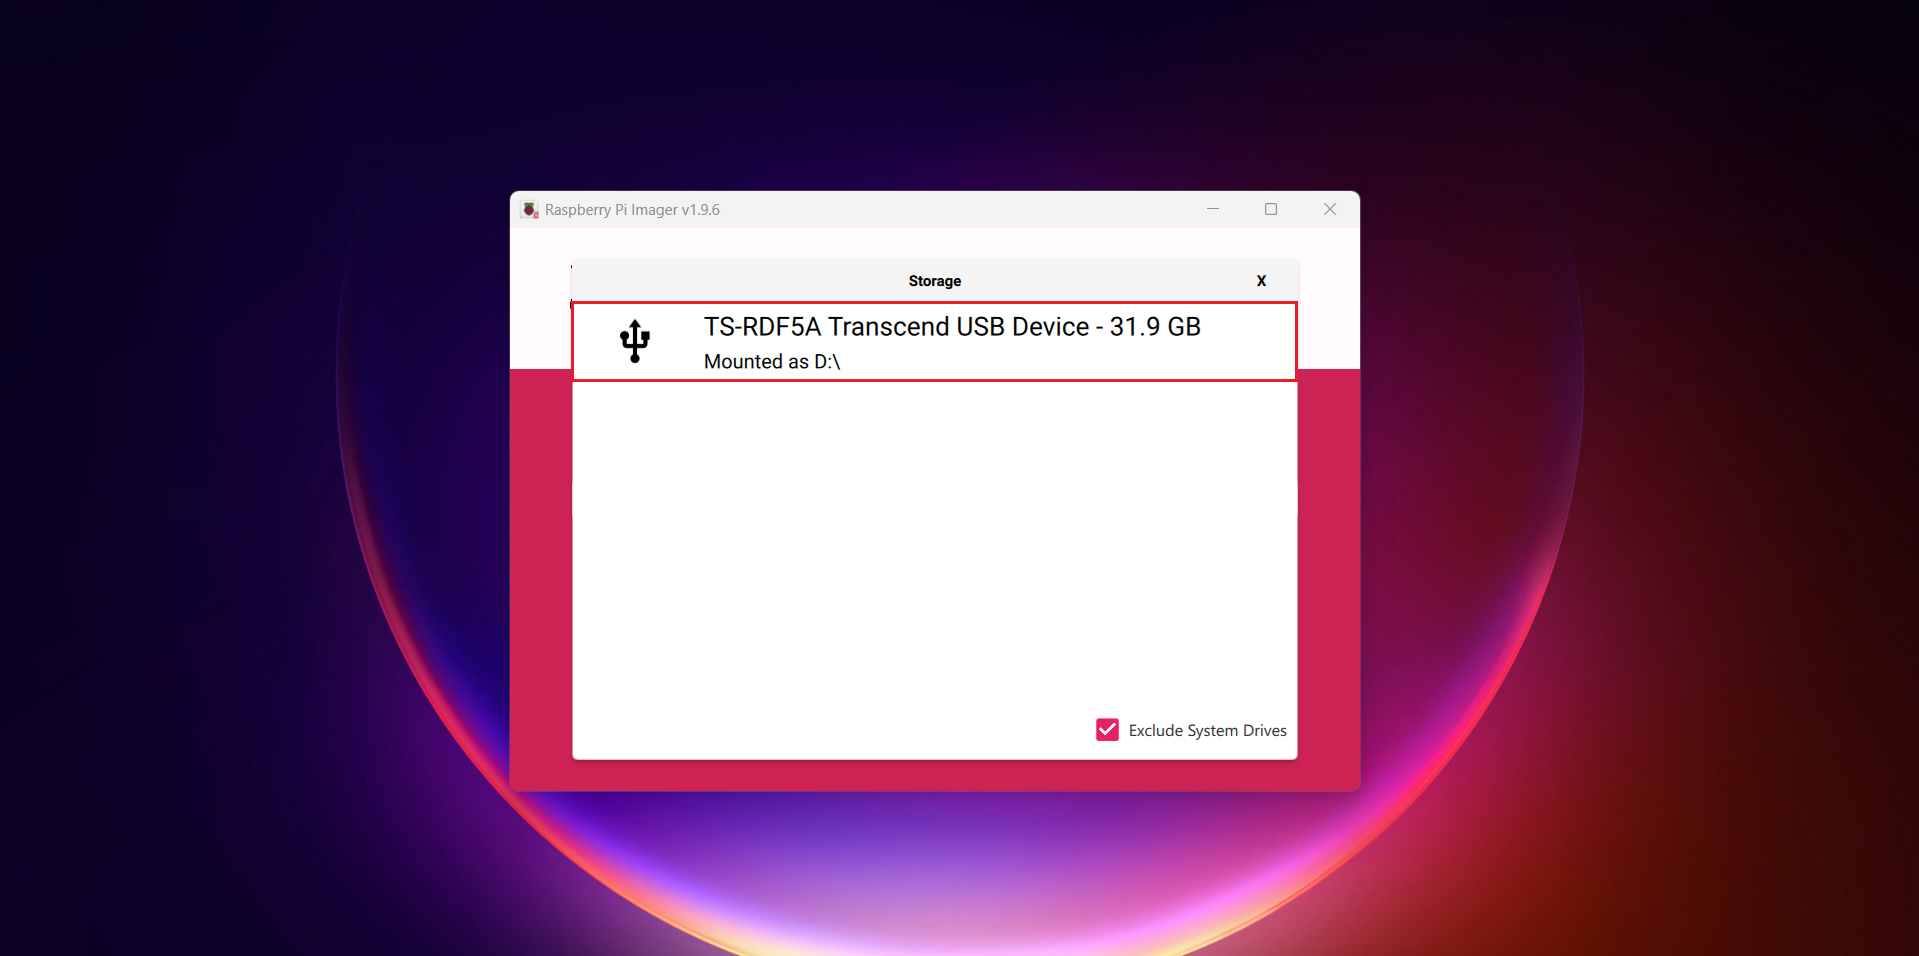
 Click **Choose Storage** and select your SD card (ensure the SD card is connected), then click **Next**.
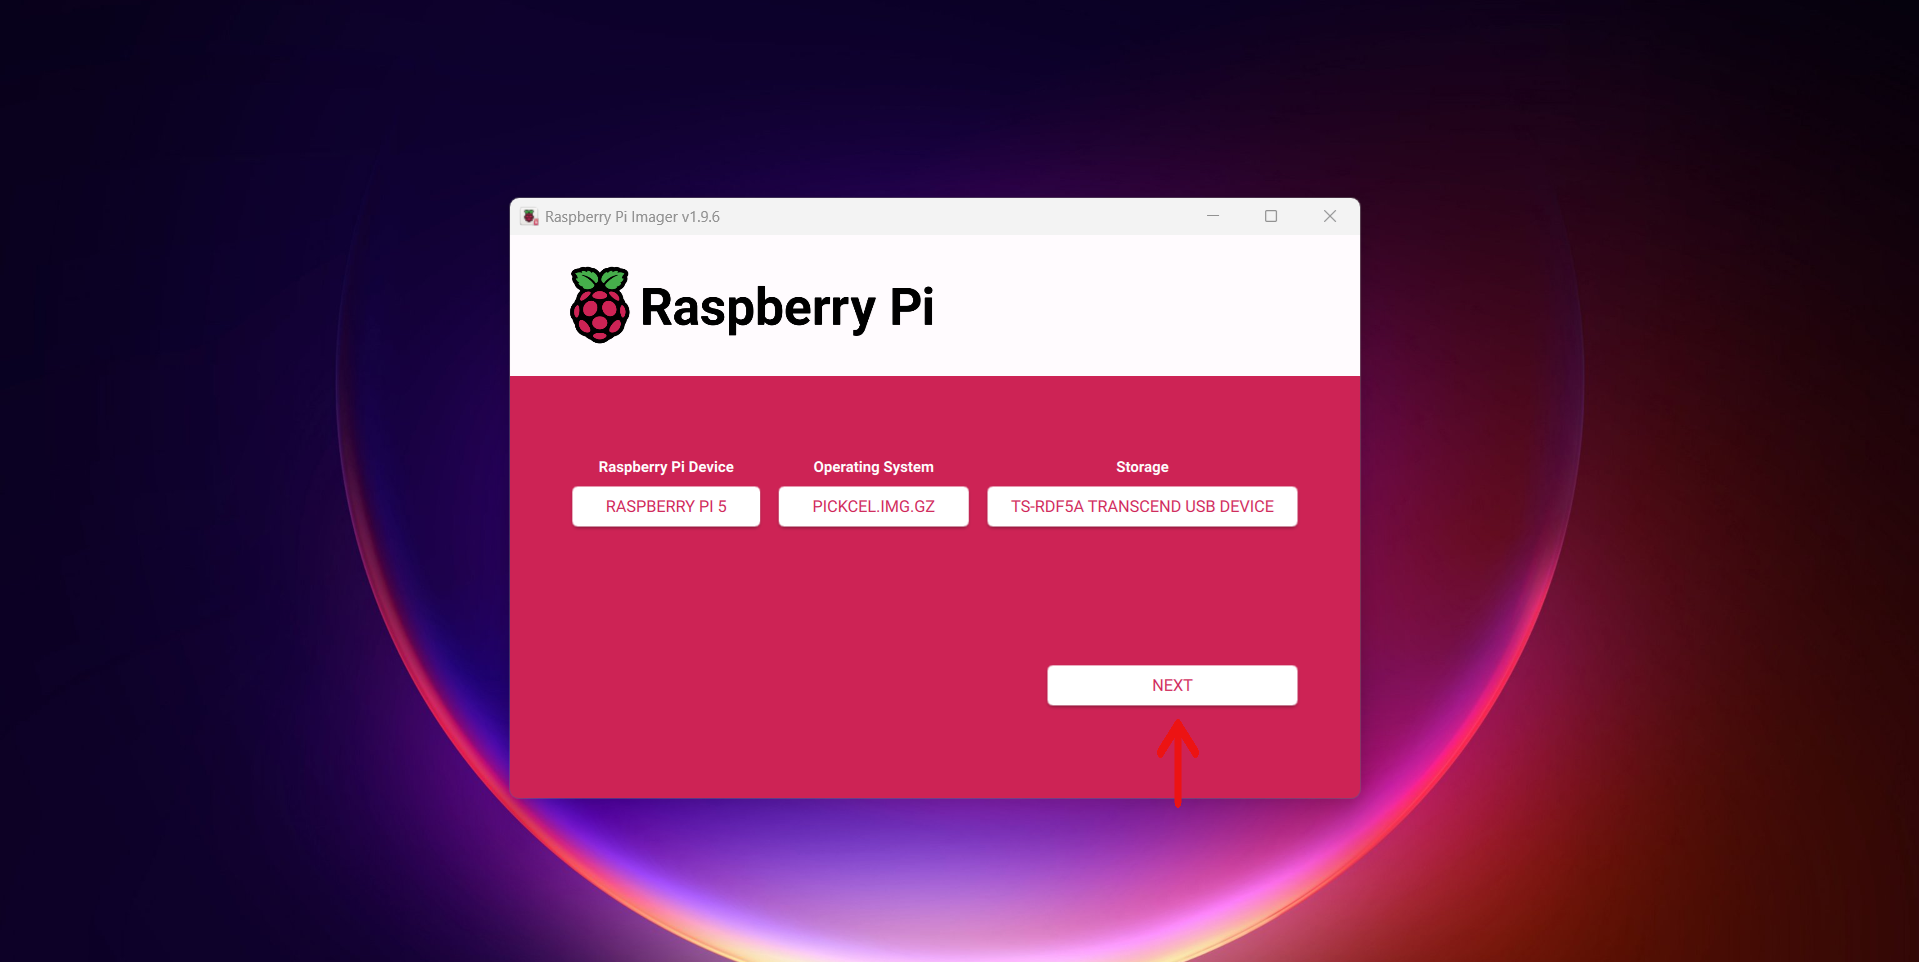 When prompted, choose **No** for custom settings.
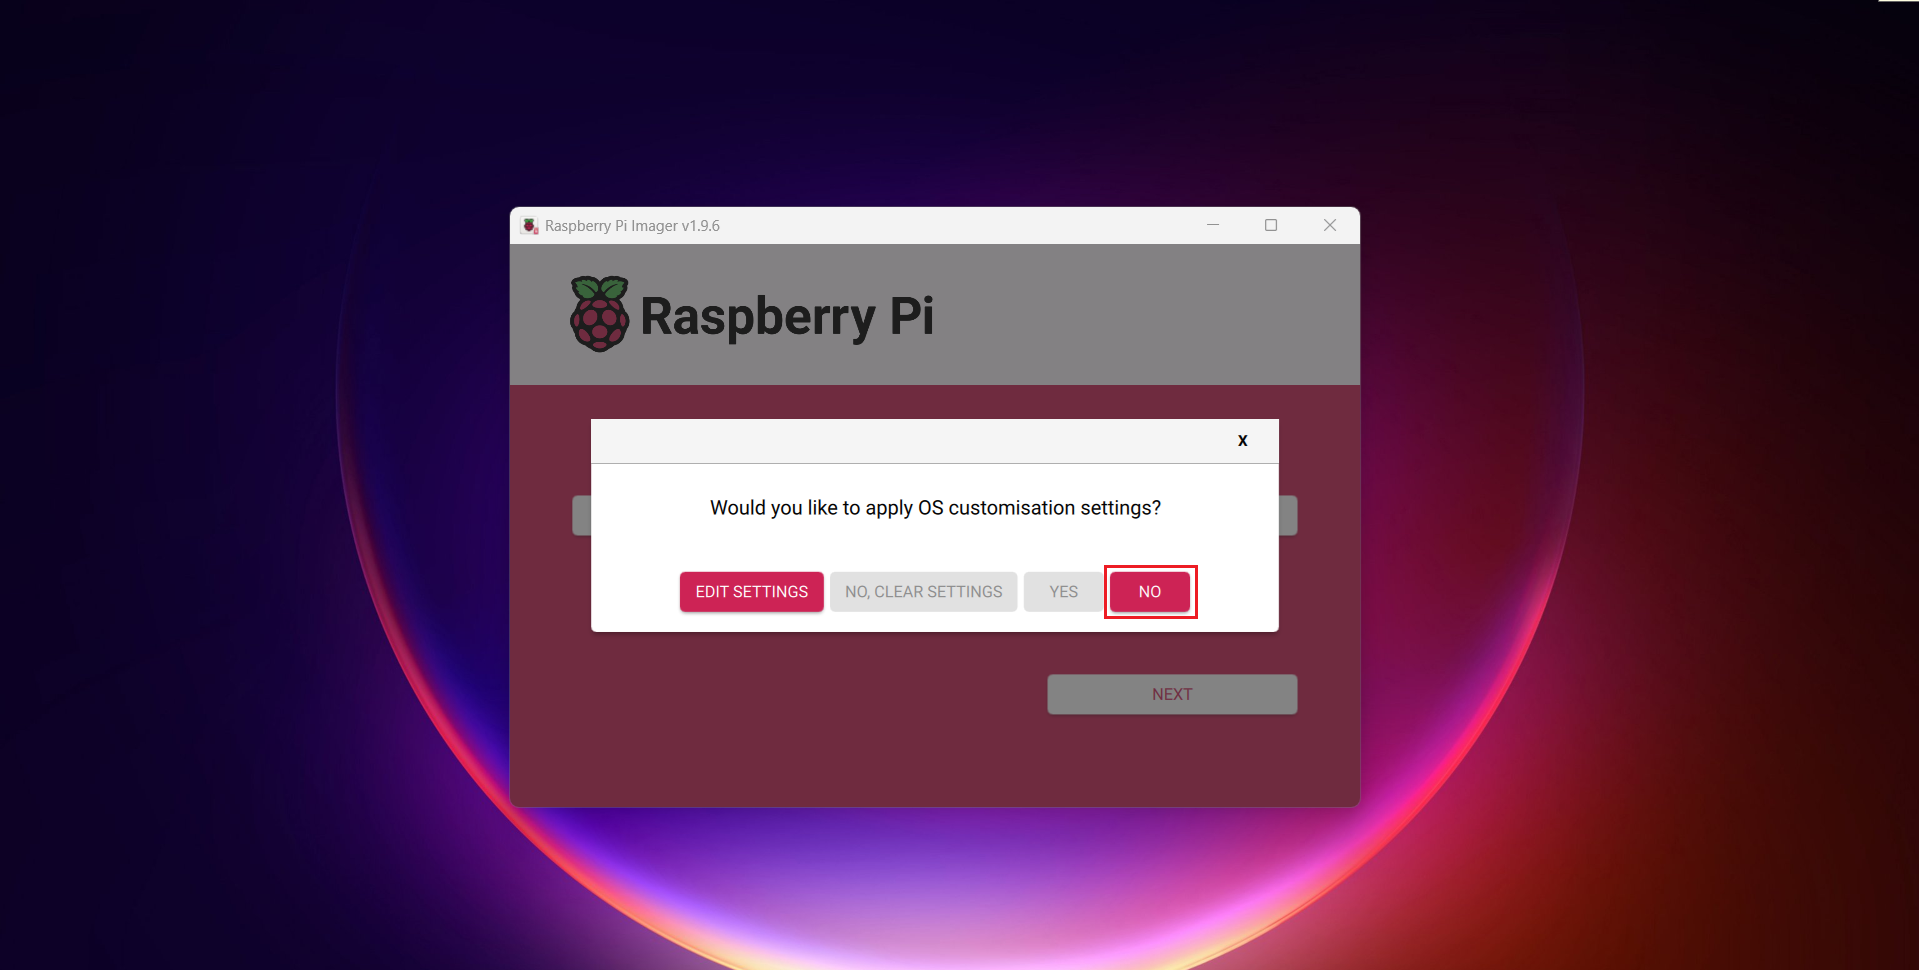 Then choose **Yes** to start writing the image.
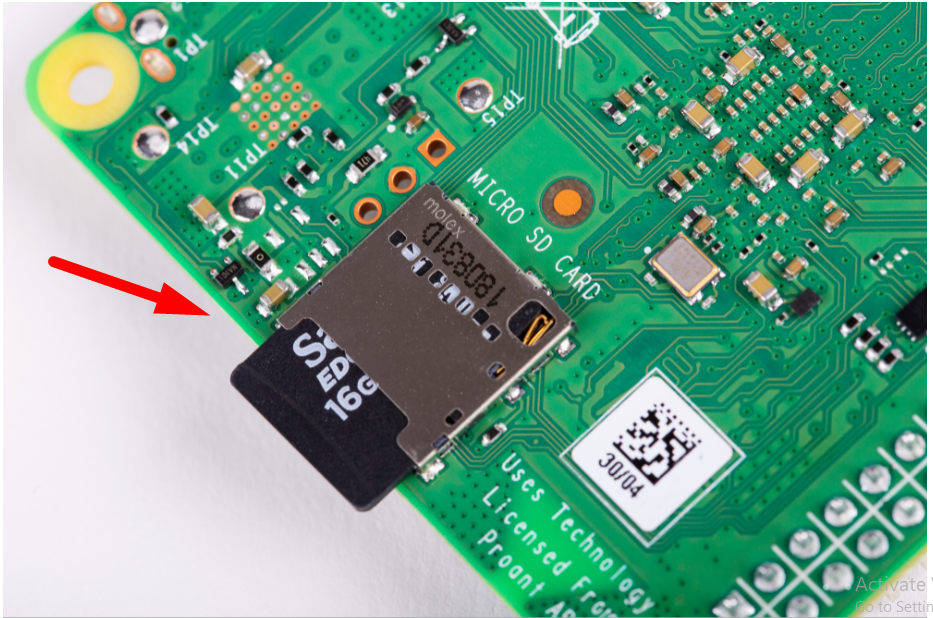
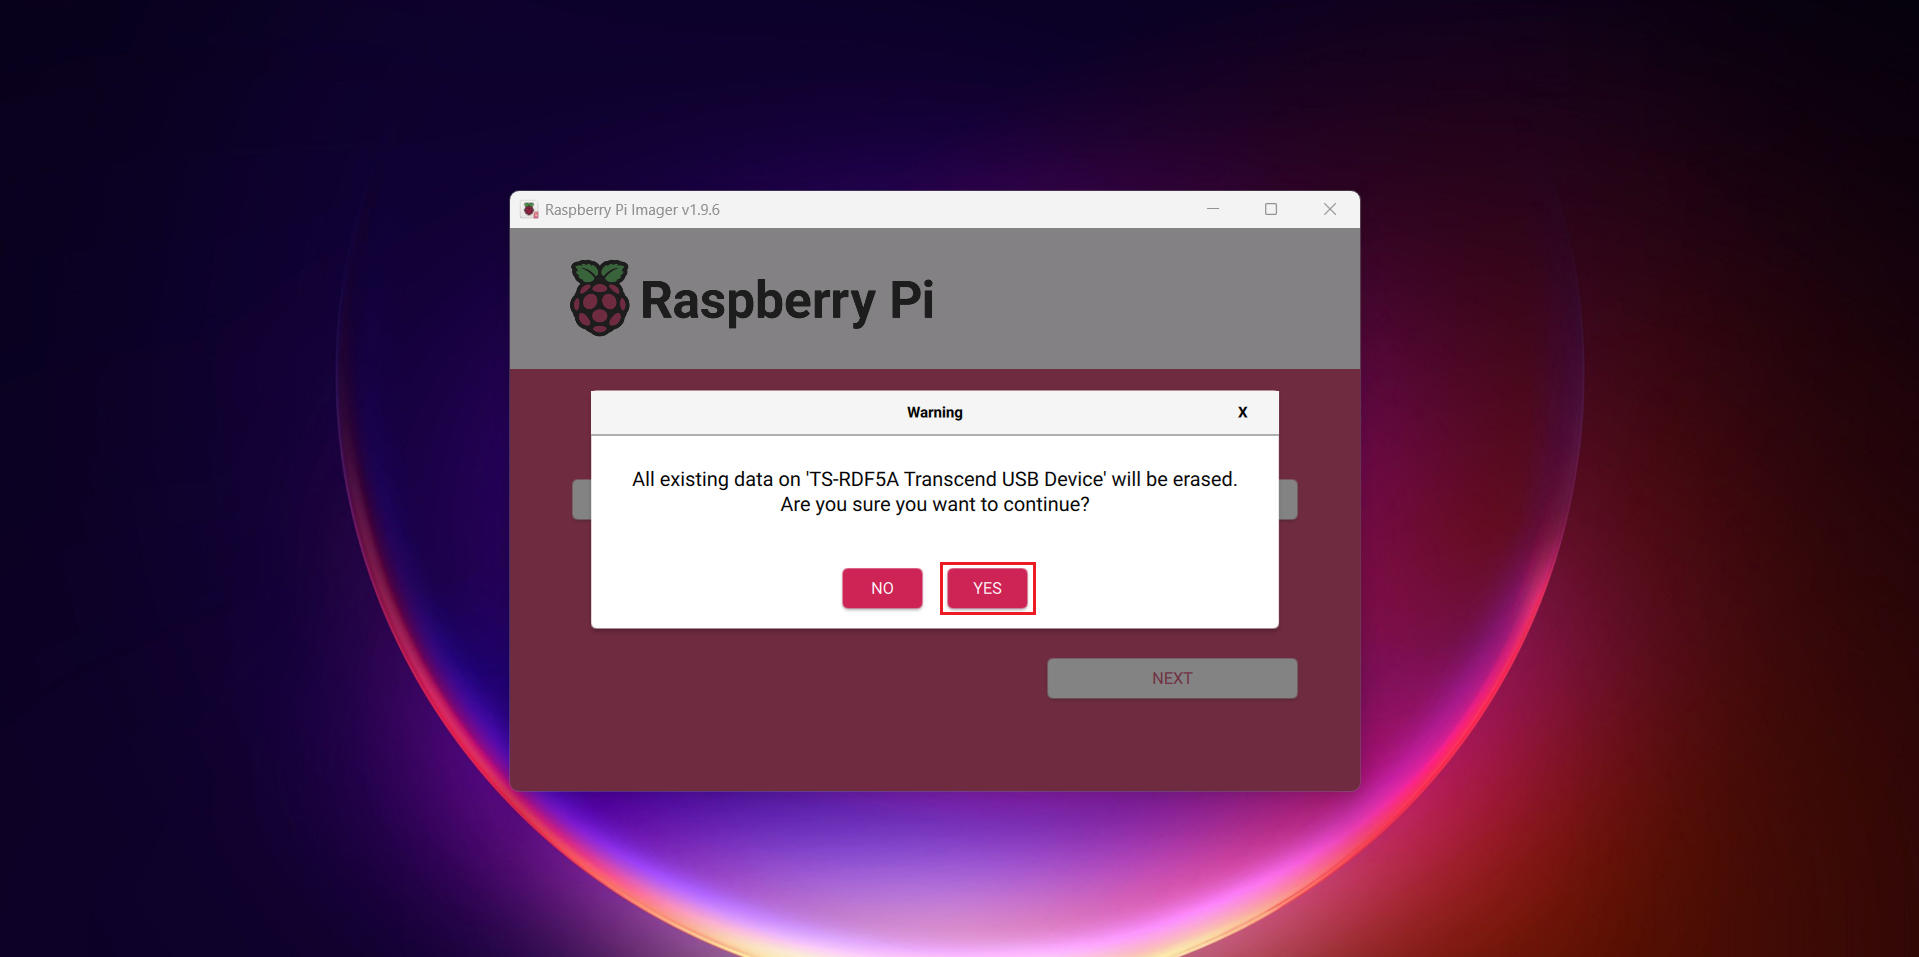 Wait until Raspberry Pi Imager completes writing and verifying the SD card. Once done, exit the Raspberry Pi Imager, eject the SD card safely, and insert it into your Raspberry Pi.
 Connect the Raspberry Pi with the HDMI cable, Ethernet cable, and a power adaptor.
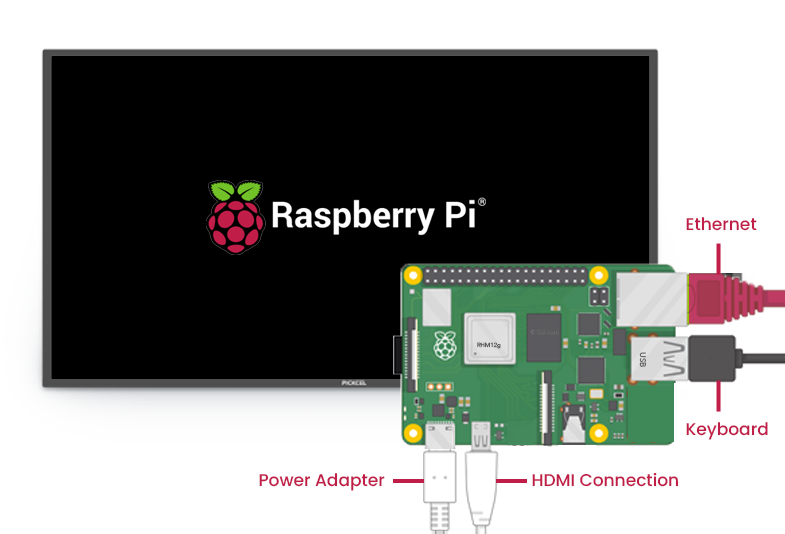 Power on the Raspberry Pi, the **Pickcel boot logo** should appear. Use a keyboard for the initial Wi-Fi configuration.
If the device is connected over Ethernet with a **DHCP IP** address and **DNS** setup, you may not require any configuration and hence may not need a USB keyboard.
Press Ctrl + M to minimize the Pickcel player. Connect a mouse, right-click, and open **Settings**.
Power on the Raspberry Pi, the **Pickcel boot logo** should appear. Use a keyboard for the initial Wi-Fi configuration.
If the device is connected over Ethernet with a **DHCP IP** address and **DNS** setup, you may not require any configuration and hence may not need a USB keyboard.
Press Ctrl + M to minimize the Pickcel player. Connect a mouse, right-click, and open **Settings**.
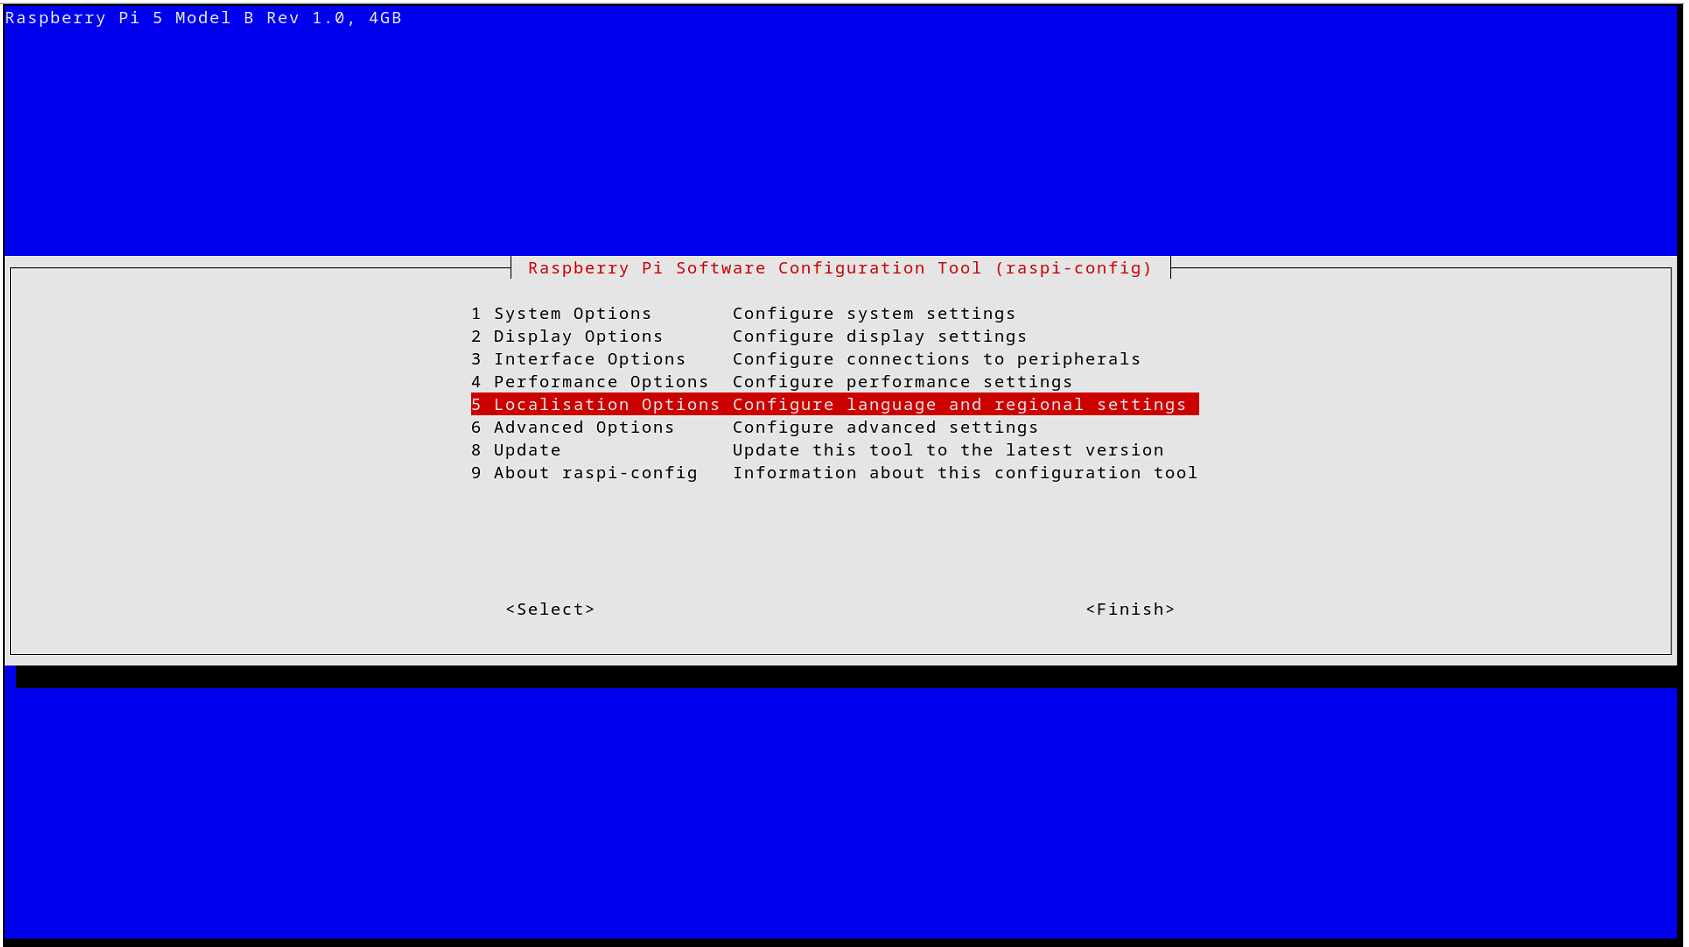
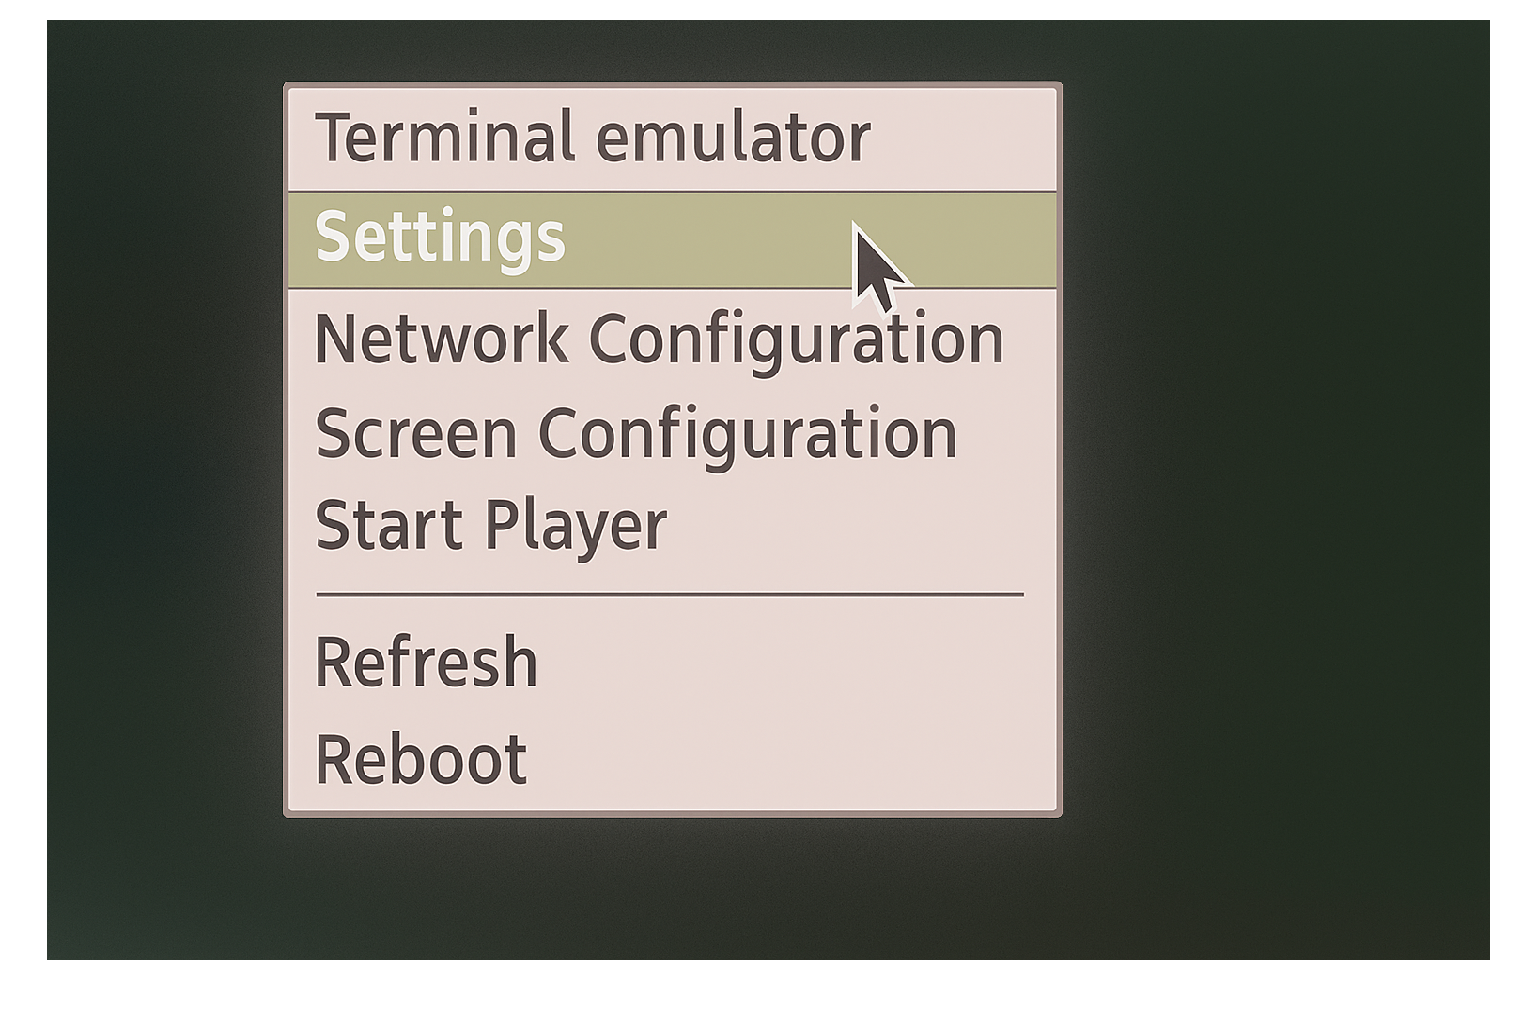 After opening the settings menu, use the arrow keys to navigate, Enter to select, and Esc to go back. Choose **Localization Options** to begin configuration.
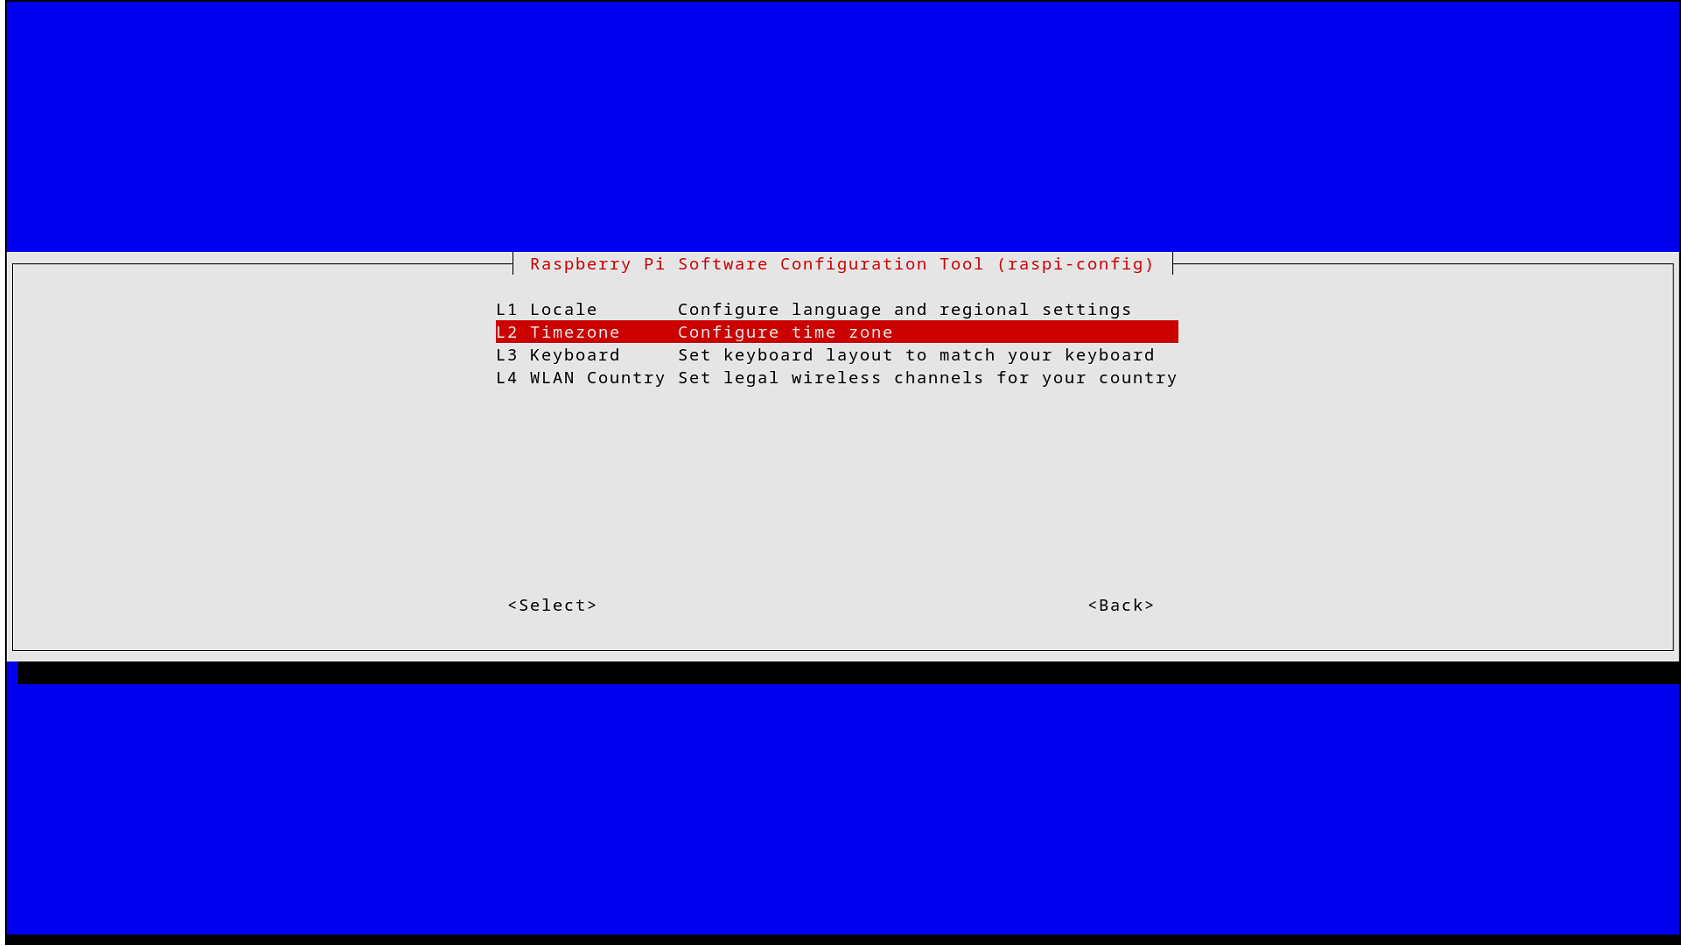
 Choose **Timezone**, select your geographic area, and pick your timezone city. Click **OK** to confirm and return to the configuration tool.
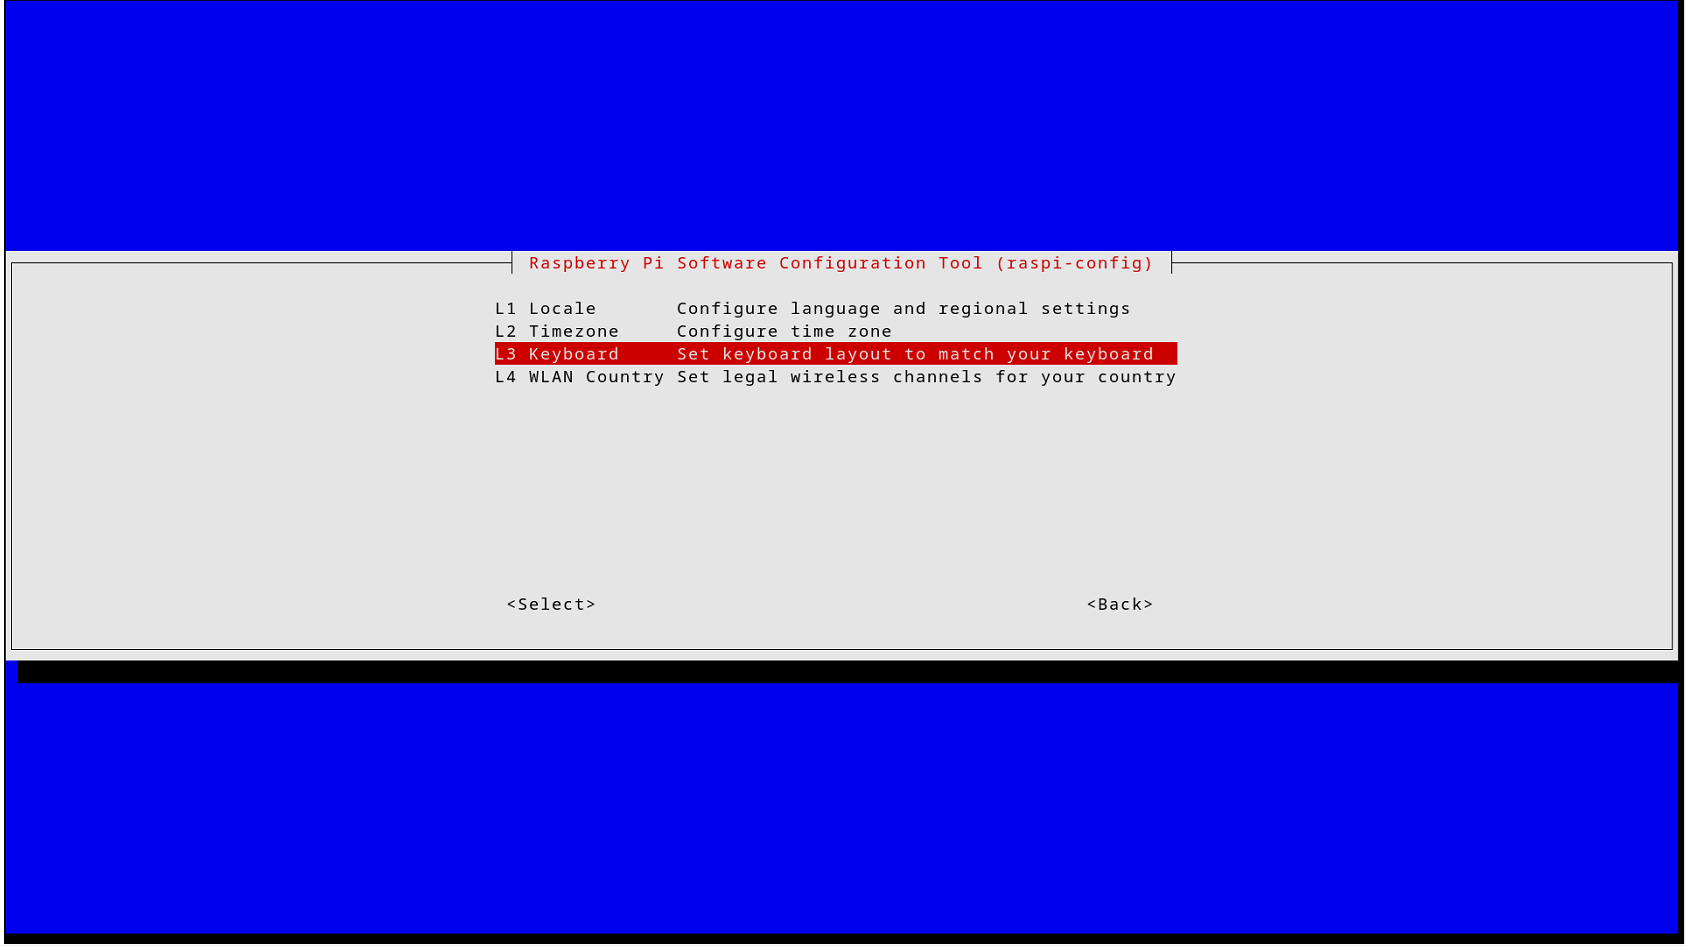
 Reopen **Localization Options** and select **Keyboard**.
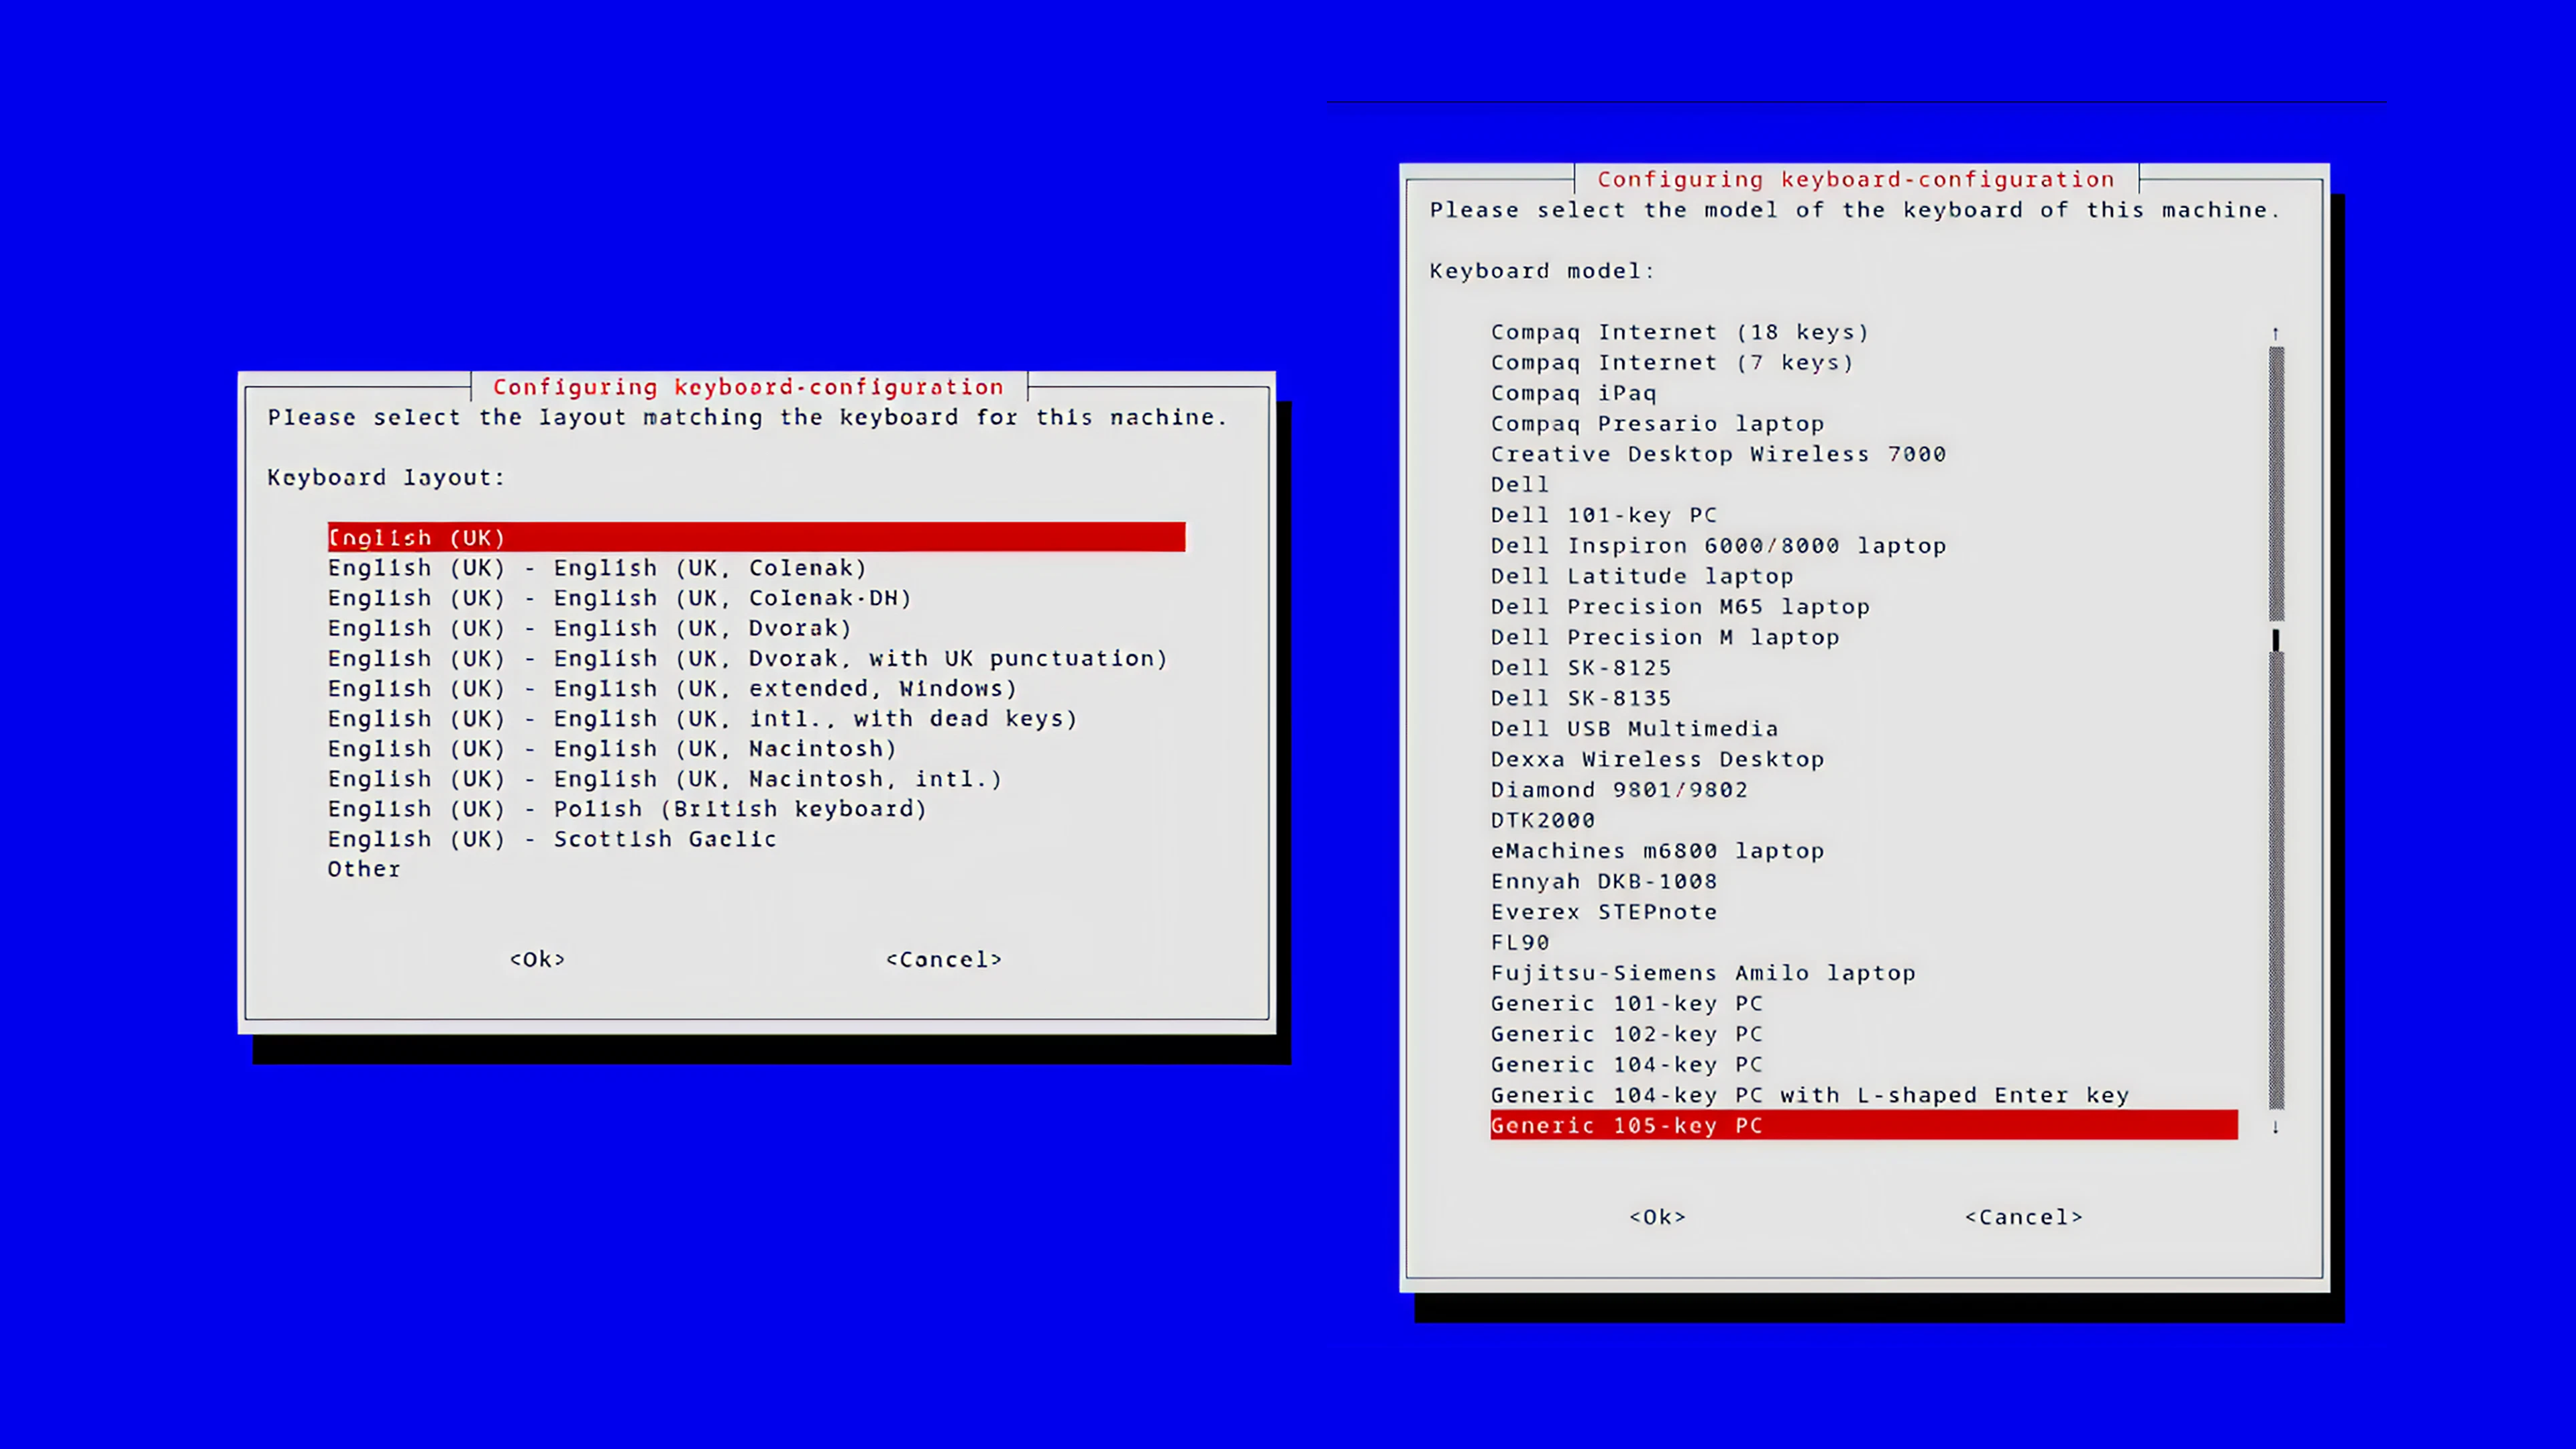
 Choose your keyboard model and layout, then click **Finish** to apply the settings and let the device reboot automatically.
 After the reboot, press Ctrl + M to minimize the Pickcel player. **Right-click** and open **Network Configuration**.
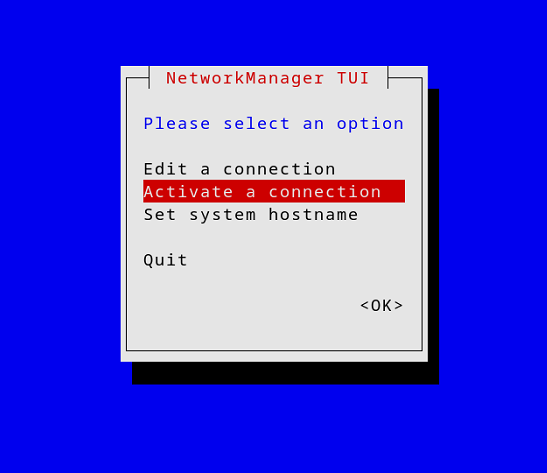
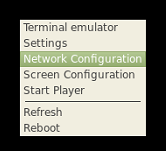 In the Network Configuration menu, select **Activate a connection**. Use the arrow keys to navigate, press Enter to choose an option, and Esc to go back.
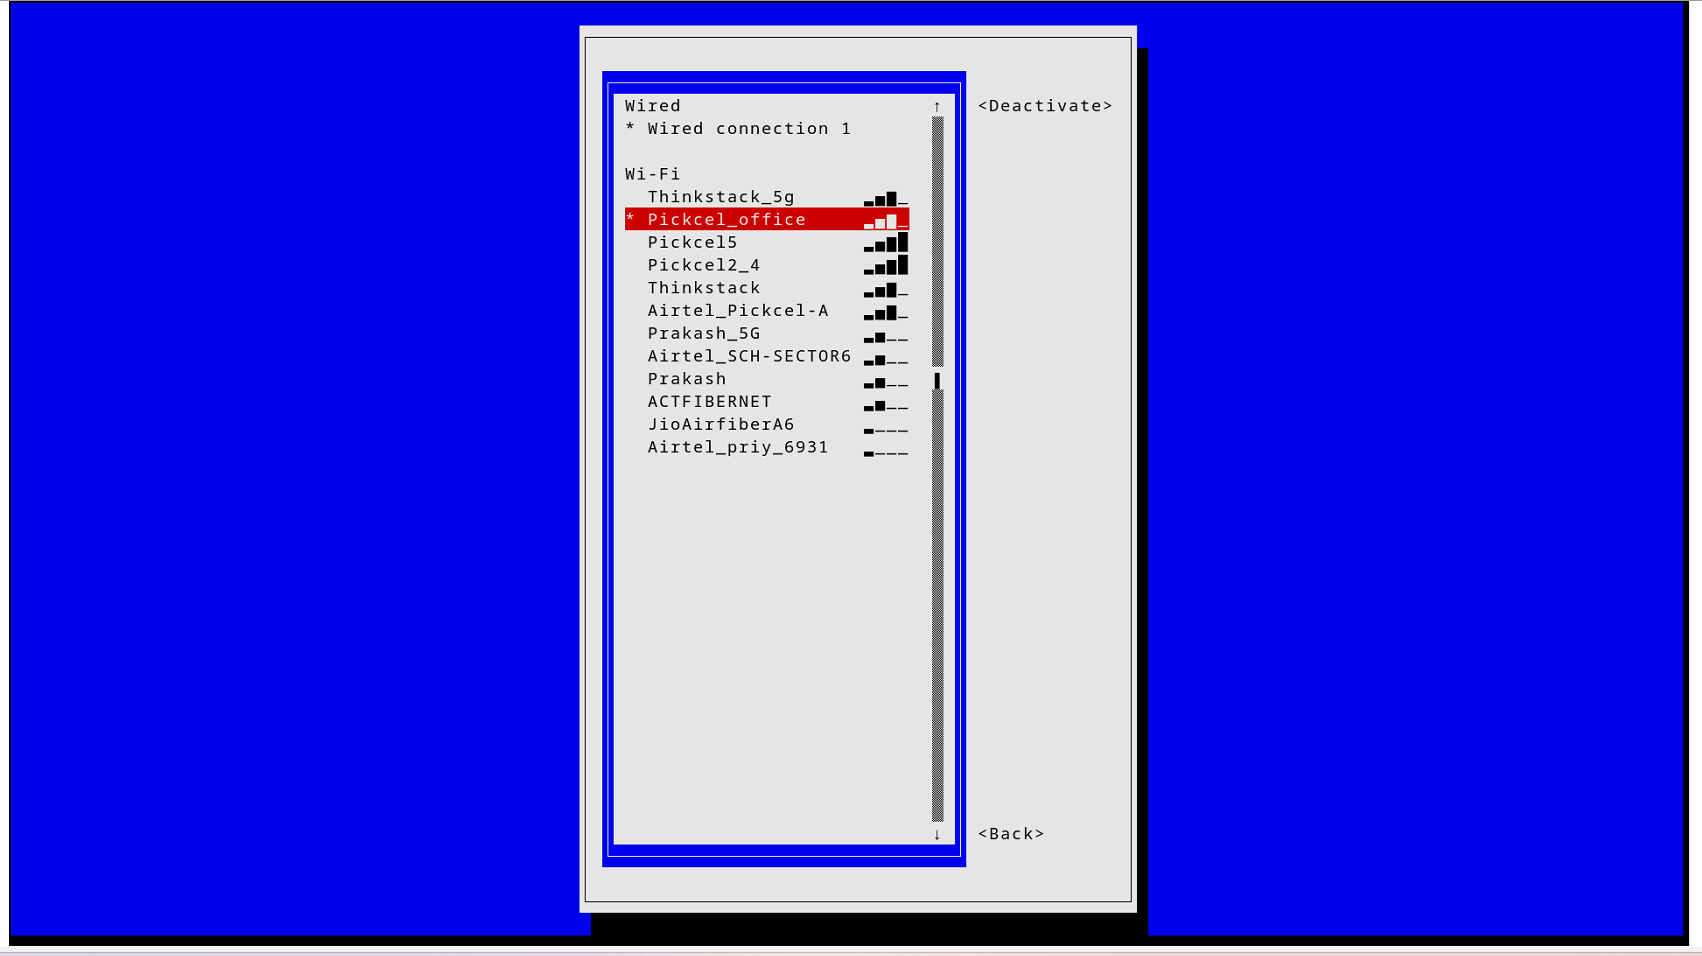
 Choose your preferred Wi-Fi network from the list, enter the password, and connect. Once connected, click **Quit** to exit and let the device reboot automatically.
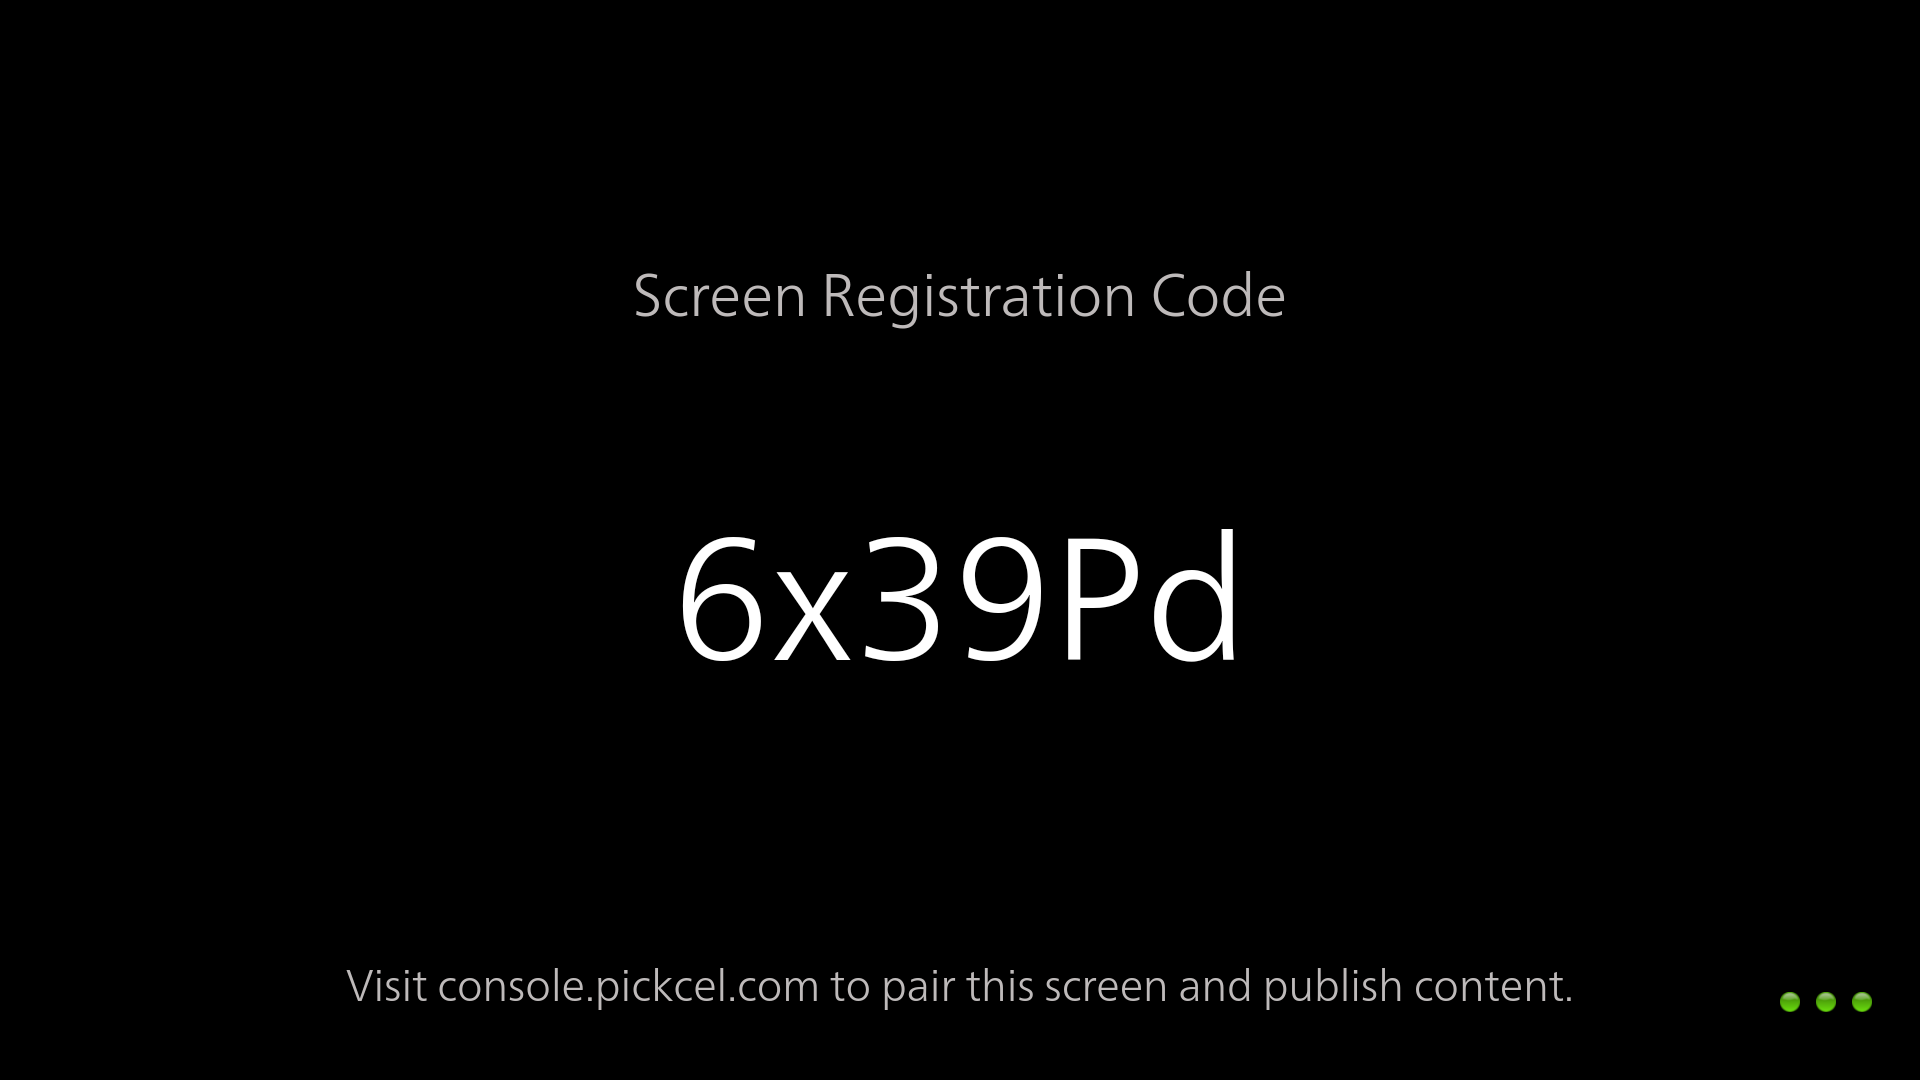
 After the reboot, the Pickcel app launches automatically and displays a **6-digit Screen Registration Code**. Enter this code in the [Pickcel Console](https://console.pickcel.com/) to pair the screen.
 Need help registering your Raspberry Pi? Follow the [Screen Registration guide](/screen-registration/screen-registration).
**What's Next?**
* Start [**Uploading Media**](/media/add-media) to your library
* Create your first [**Composition**](/compositions/compositions) and publish content
* Configure [**Schedules**](/schedule-and-publish/publish-v4) to automate playback
Need help registering your Raspberry Pi? Follow the [Screen Registration guide](/screen-registration/screen-registration).
**What's Next?**
* Start [**Uploading Media**](/media/add-media) to your library
* Create your first [**Composition**](/compositions/compositions) and publish content
* Configure [**Schedules**](/schedule-and-publish/publish-v4) to automate playback