> ## Documentation Index
> Fetch the complete documentation index at: https://docs.pickcel.com/llms.txt
> Use this file to discover all available pages before exploring further.
# How to install the Pickcel Digital Signage Player on LG webOS via USB flash drive
> Guide to install the Pickcel player app on LG webOS displays using a USB flash drive
The supported version of the LG WebOS Display is WebOS 4.0 and above.
You can also install the Pickcel application via URL method. Learn more in the [URL method installation guide](/player-installation/lg-webos/url-method).
* To begin, ensure that your display is connected to the internet.
* Open **General** and click on the **Time & Date** option, and set the **Date & Time** and **Time Zone**.
Follow the steps below to install the Pickcel app using the USB flash drive method.
**Important:** Before downloading, check your **LG webOS version** and **display orientation** so you pick the correct package.
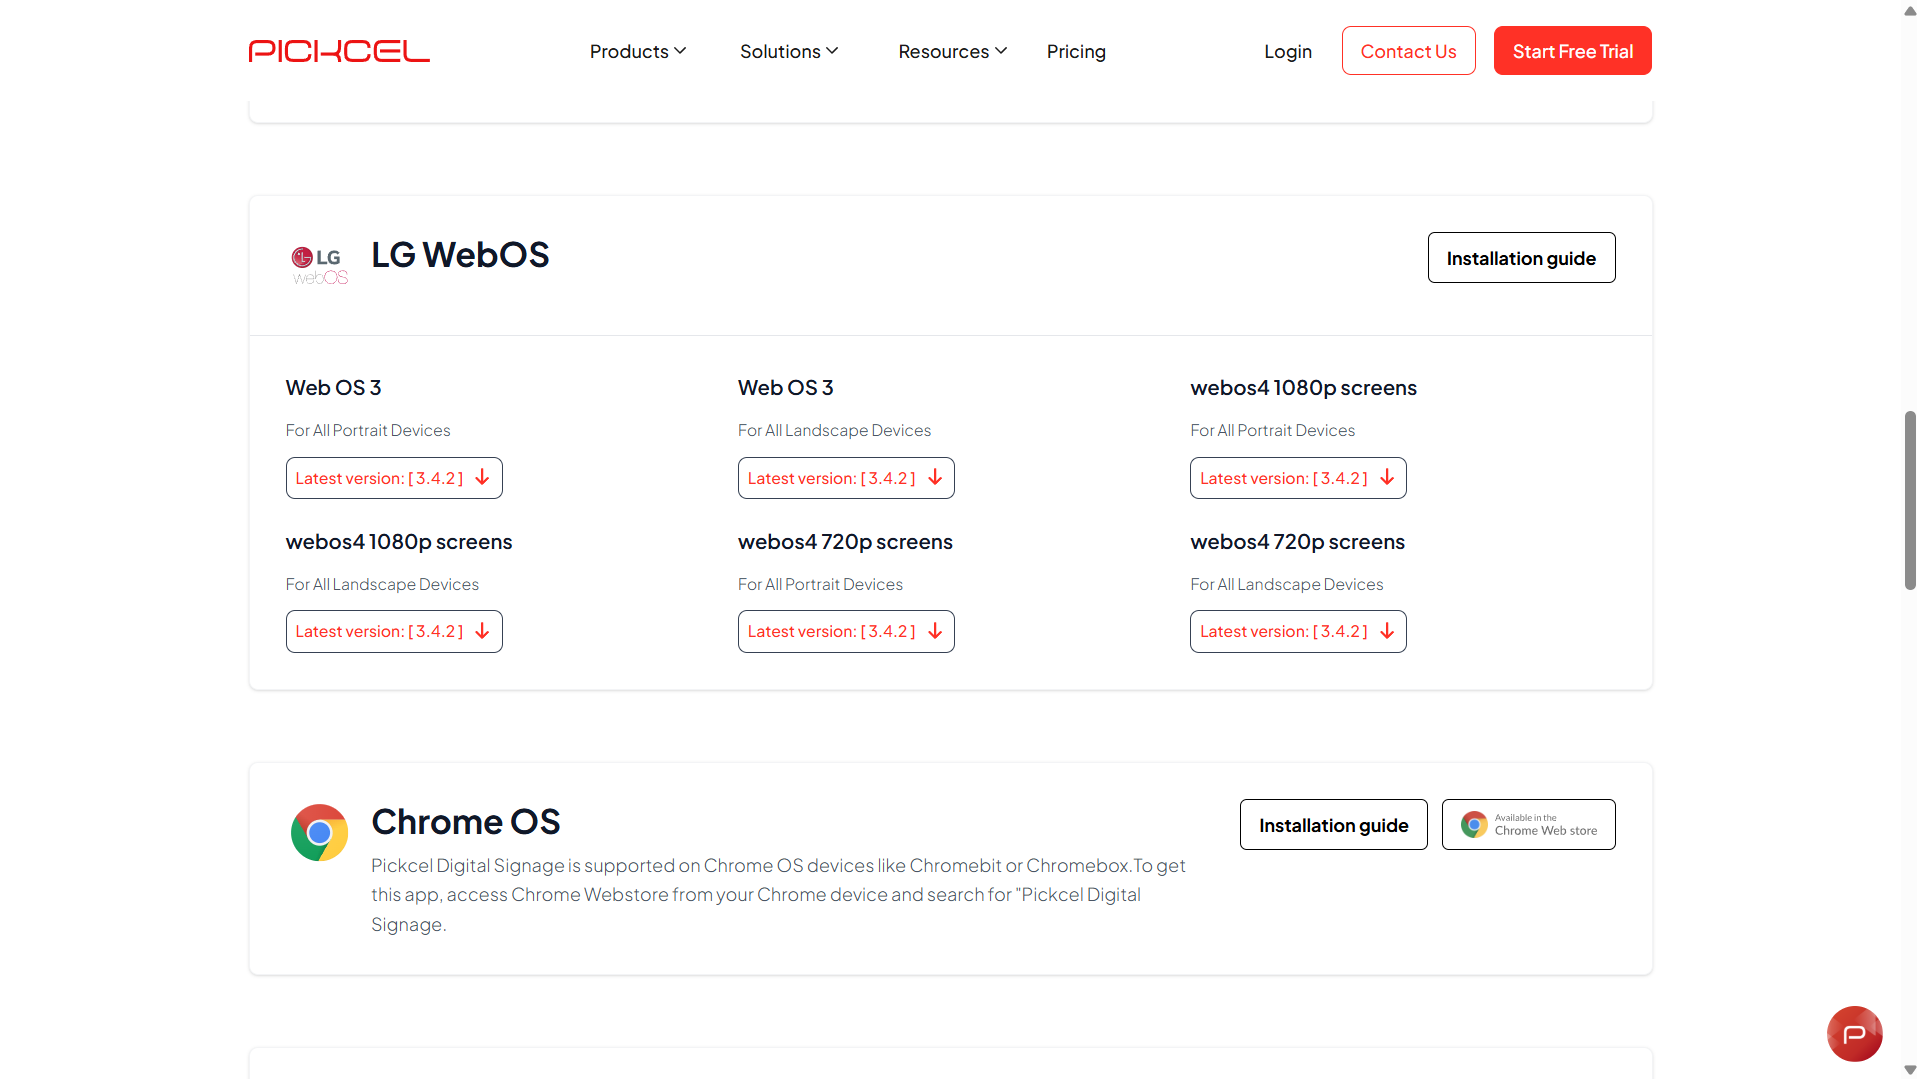
Go to the [Pickcel download page](https://www.pickcel.com/download/#lg-webos) and download the file suitable for your LG webOS device.
 Connect the USB drive and create a folder named **application** on it.
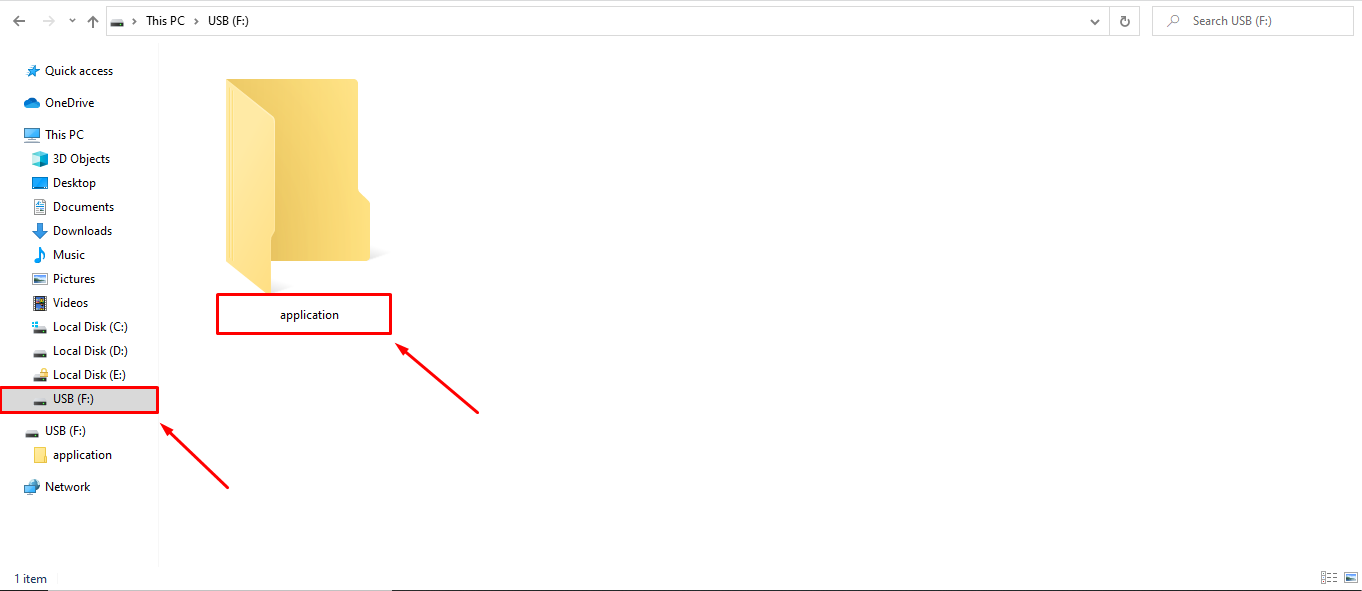 The folder name is case-sensitive.
Put the downloaded IPK file in the **application** folder and rename it to `com.lg.app.signage.ipk`.
The folder name is case-sensitive.
Put the downloaded IPK file in the **application** folder and rename it to `com.lg.app.signage.ipk`.
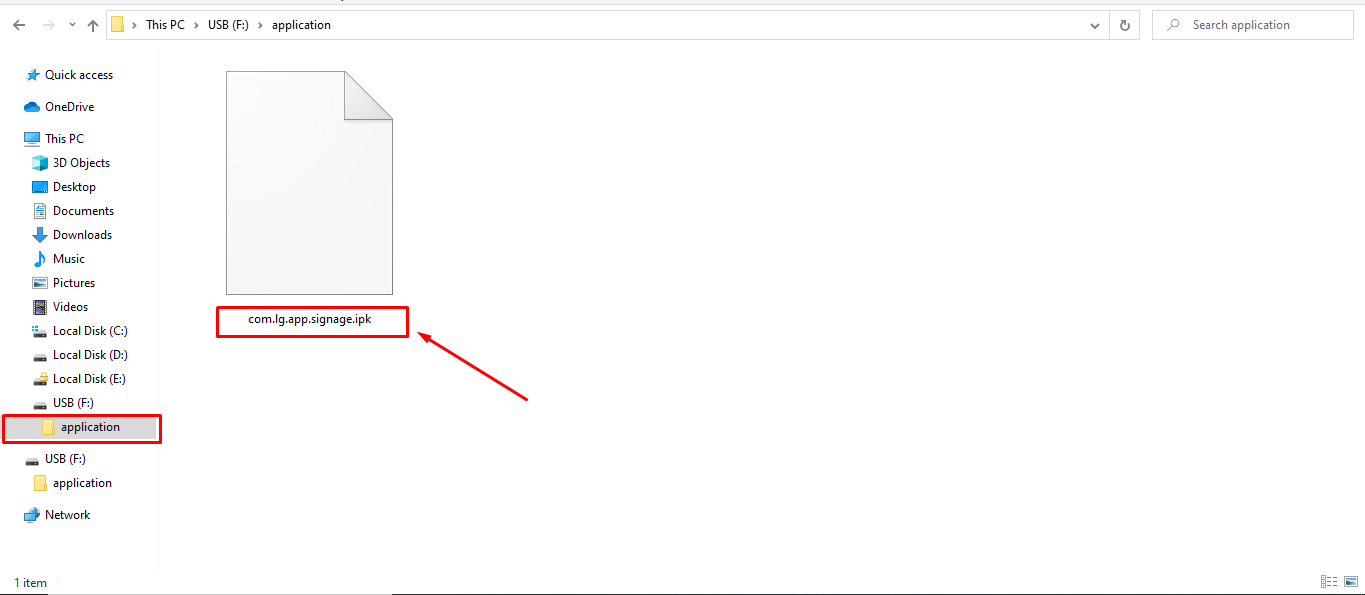 The file name is case-sensitive.
Insert the USB flash drive into the USB port of the LG webOS device, then click the **Settings** icon on the LG remote.
Open **General** and set the **Time & Date**.
Select the **SI SERVER SETTING** under the **EZ Setting** menu.
The file name is case-sensitive.
Insert the USB flash drive into the USB port of the LG webOS device, then click the **Settings** icon on the LG remote.
Open **General** and set the **Time & Date**.
Select the **SI SERVER SETTING** under the **EZ Setting** menu.
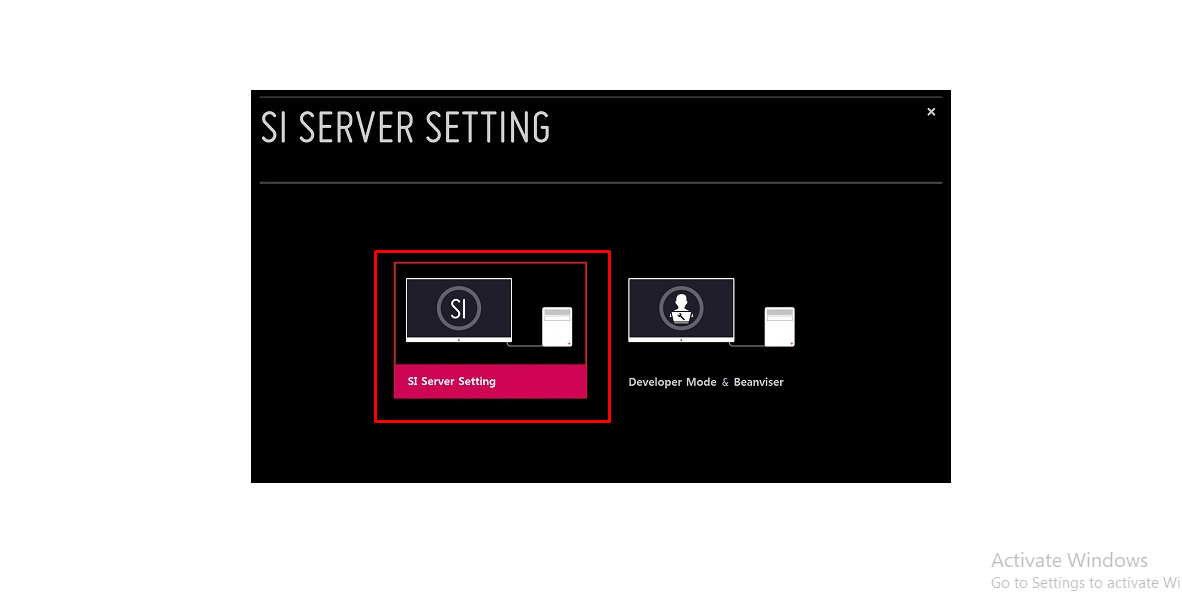
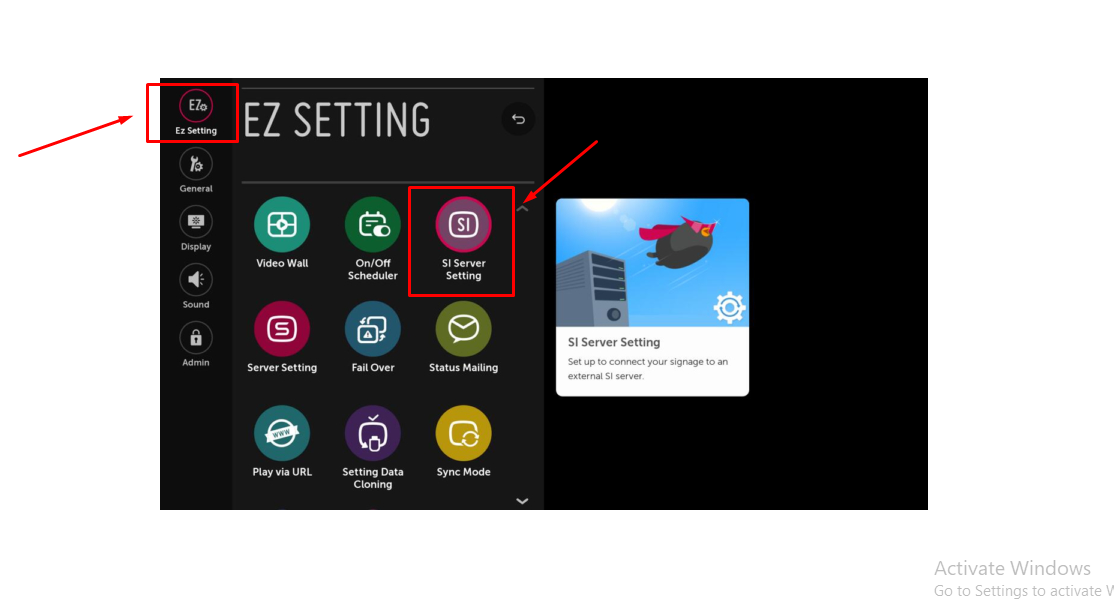 On the **SI SERVER SETTING** screen, select the **SI Server Setting** option.
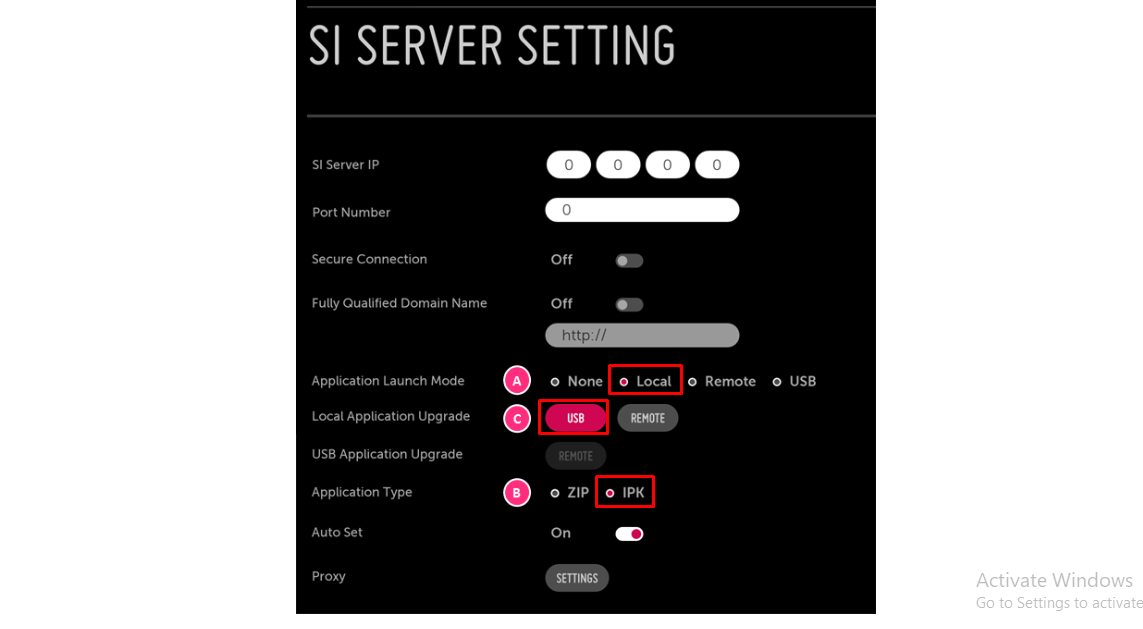
 On the settings menu, set the following fields with the values shown in the screenshot below:
* **Application Launch Mode**: Local
* **Application Type**: IPK
* **Local Application Upgrade**: USB
On the settings menu, set the following fields with the values shown in the screenshot below:
* **Application Launch Mode**: Local
* **Application Type**: IPK
* **Local Application Upgrade**: USB
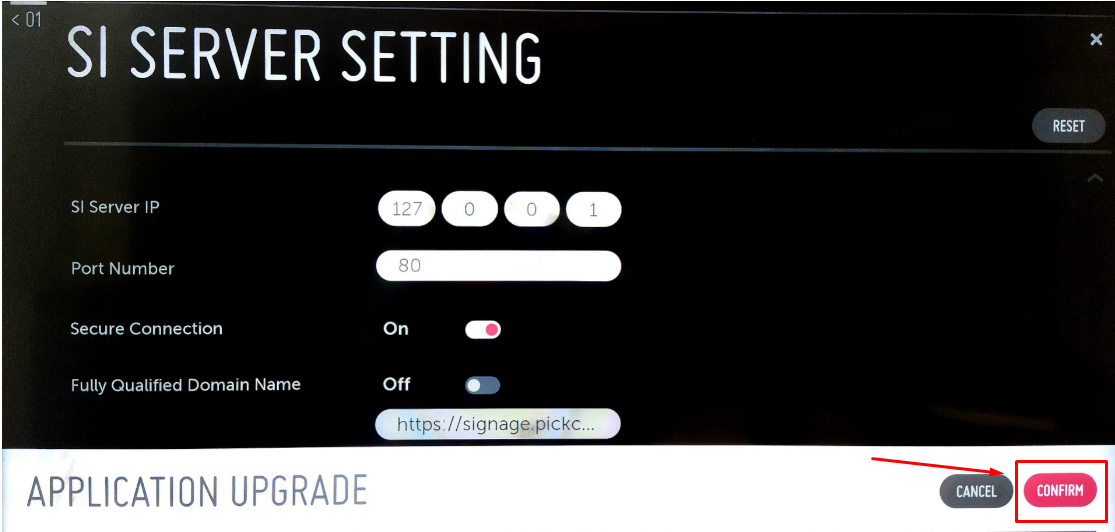
 After clicking **USB**, an Application Upgrade confirmation pop-up appears. Click **CONFIRM**.
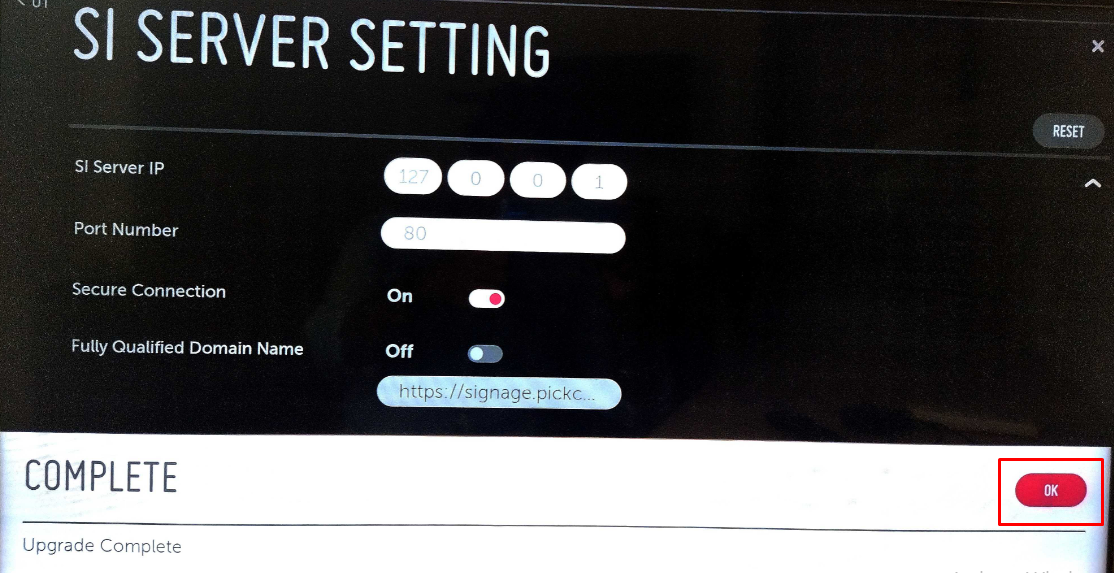
 A success message appears once installation finishes. Click **OK** and reboot the device.
 The Pickcel LG webOS signage Player should now appear in your display home menu.
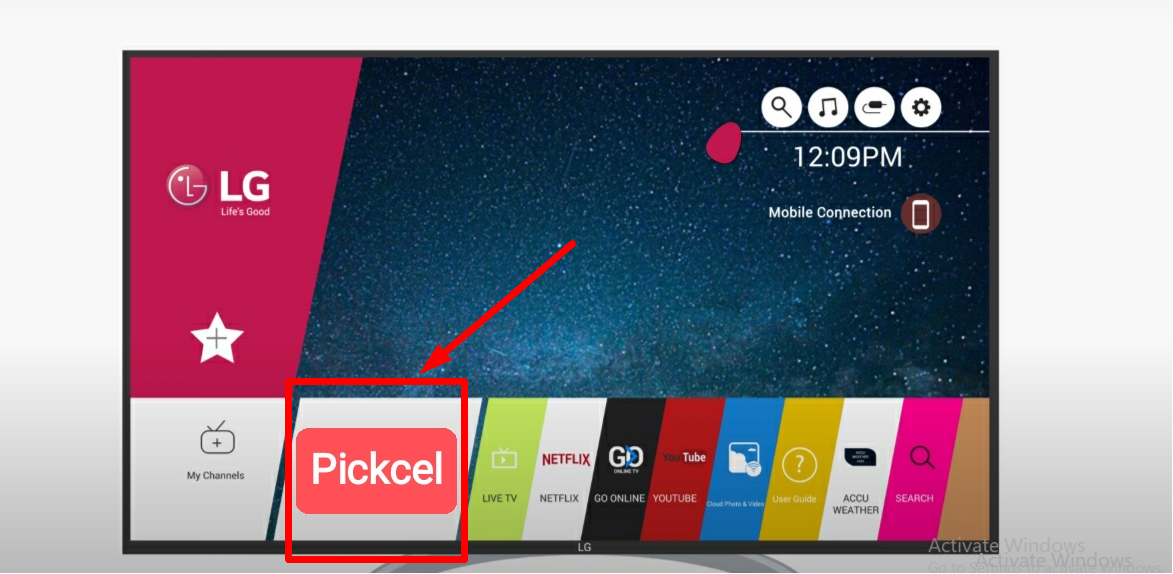 Press the **Home** button to see the Pickcel app on the home screen and select it. Press **OK** on the remote to launch the app.
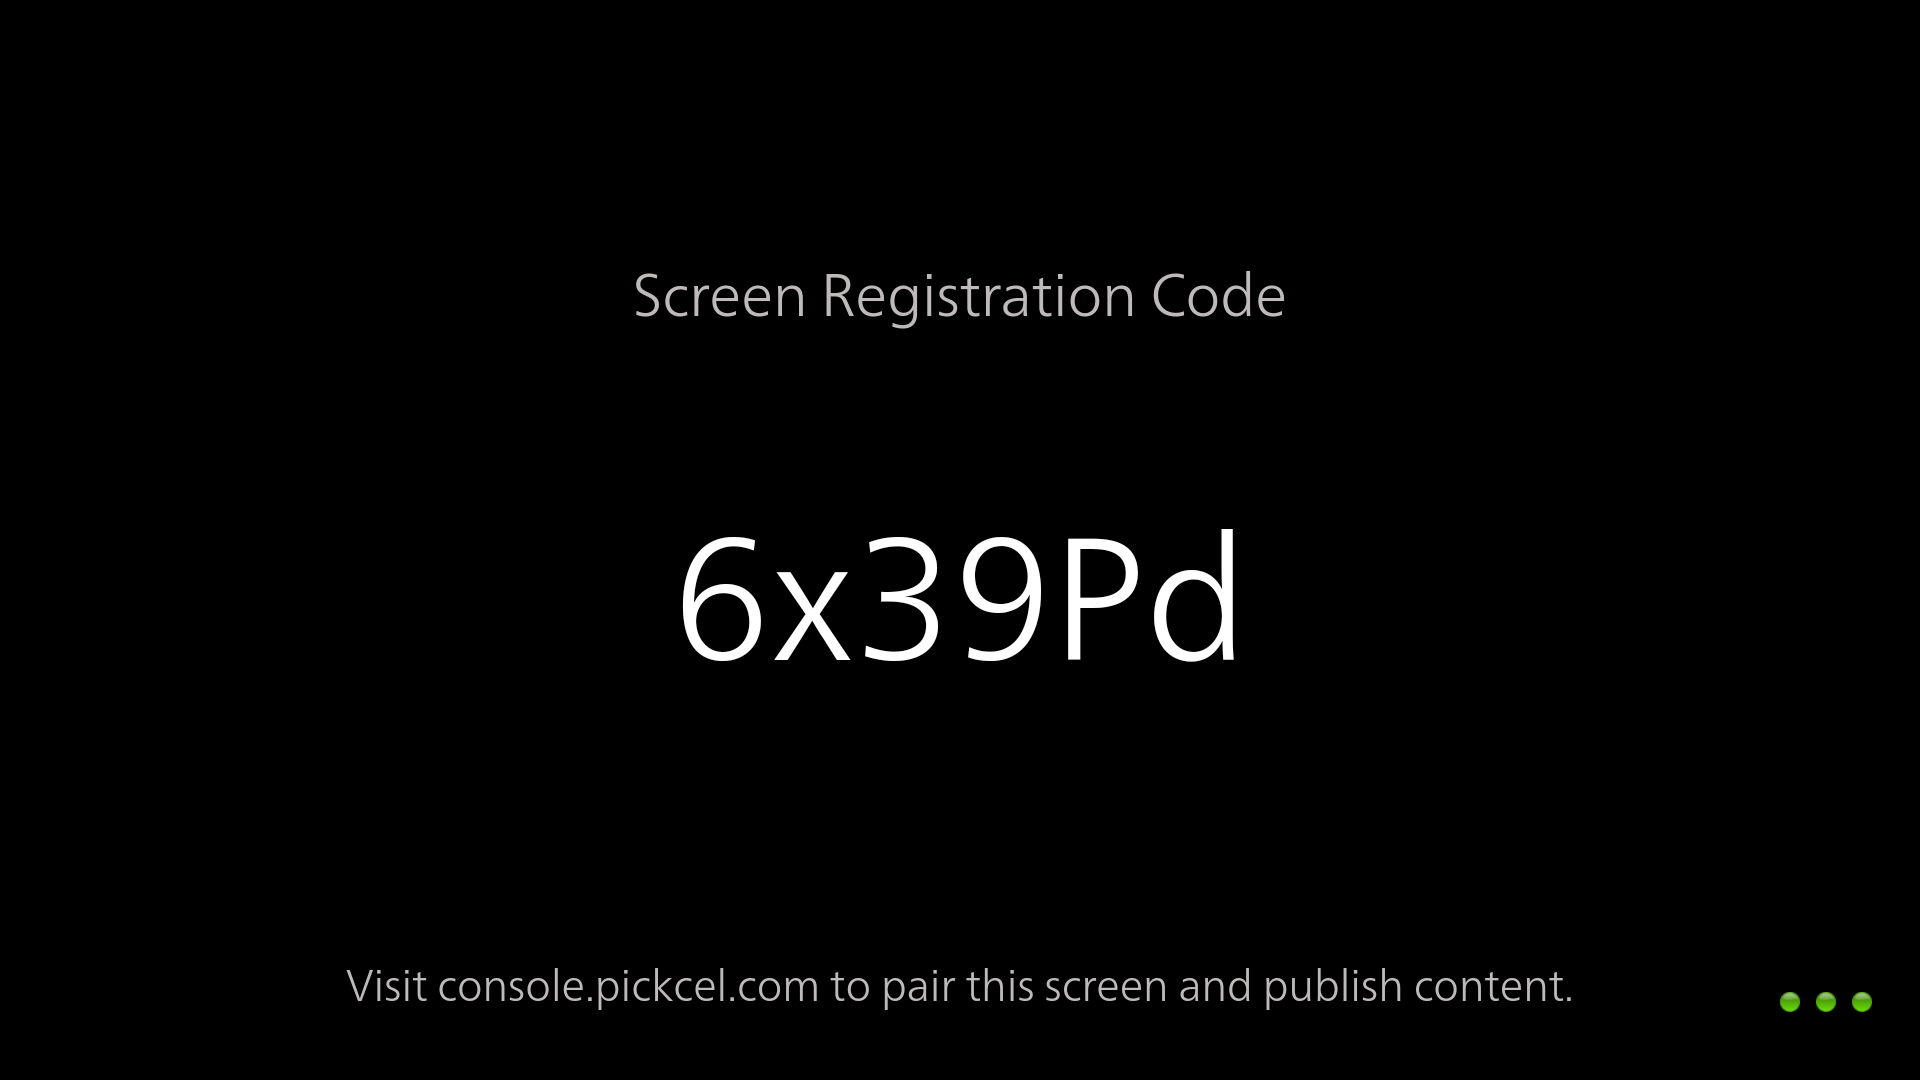
Once the app is launched, it takes a couple of minutes to connect to the internet. After it connects, a six-digit unique **Screen Registration Code** appears, which you'll use to pair this device with the Pickcel console.
To learn how to pair your LG device with the Pickcel console, see the [Screen Registration guide](/screen-registration/screen-registration).
Press the **Home** button to see the Pickcel app on the home screen and select it. Press **OK** on the remote to launch the app.
Once the app is launched, it takes a couple of minutes to connect to the internet. After it connects, a six-digit unique **Screen Registration Code** appears, which you'll use to pair this device with the Pickcel console.
To learn how to pair your LG device with the Pickcel console, see the [Screen Registration guide](/screen-registration/screen-registration).
 The Pickcel Digital Signage Player is now installed on your LG webOS display via the USB flash drive method.
**What's Next?**
* Start [**Uploading Media**](/media/add-media) to your library
* Create your first [**Composition**](/compositions/compositions) and publish content
The Pickcel Digital Signage Player is now installed on your LG webOS display via the USB flash drive method.
**What's Next?**
* Start [**Uploading Media**](/media/add-media) to your library
* Create your first [**Composition**](/compositions/compositions) and publish content