> ## Documentation Index
> Fetch the complete documentation index at: https://docs.pickcel.com/llms.txt
> Use this file to discover all available pages before exploring further.
# How to Configure Raspberry Pi for On-Premise
> Step-by-step instructions for configuring Raspberry Pi for Pickcel on-premise deployment including server endpoint, network, and timezone settings
Before proceeding with the configuration steps, you must first install the Pickcel Digital Signage Software on your Raspberry Pi. Please follow the detailed instructions provided in the [**Pickcel Raspberry Pi Installation Guide**](/player-installation/raspberry-pi) to complete the initial software setup.
## How to Change the Server Endpoint on Raspberry Pi with Pickcel
Ensure the Pickcel Digital Signage App is running on your Raspberry Pi. Press Ctrl + Shift + S on your keyboard to open the Pickcel Settings page.
If the mouse isn't responsive, press Ctrl + Shift + C to enable mouse functionality.
Click on the **Settings** icon using the mouse.
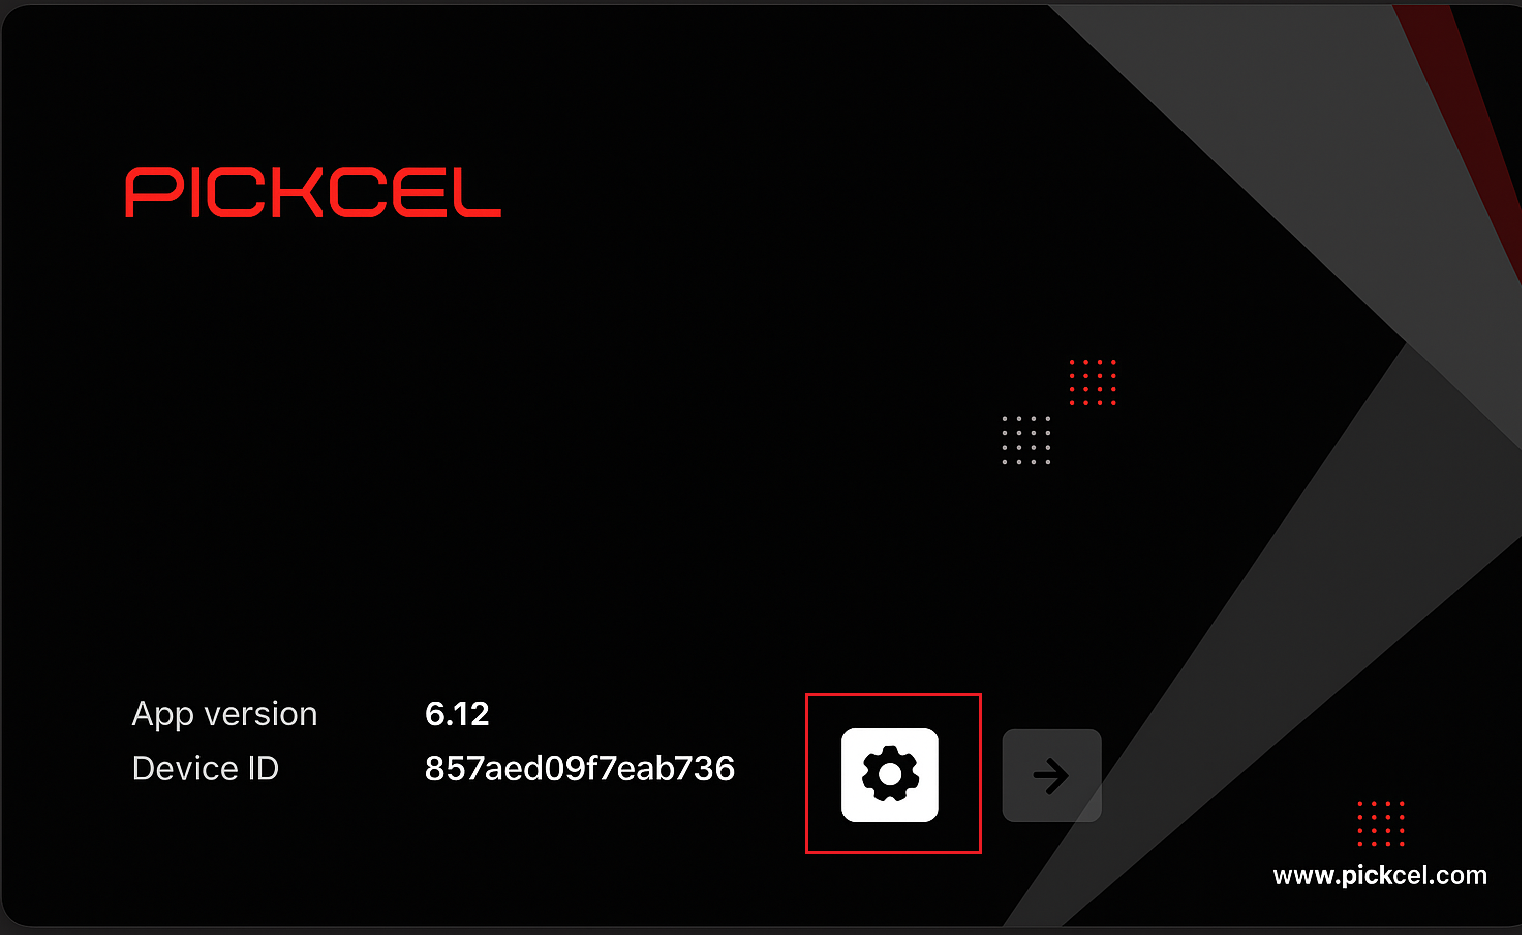 In the server URL field, enter your desired server address:
For HTTP: `http://`
For HTTPS with a self-signed certificate: `https://` Example: `https://172.17.0.19` or `https://signage.pickcel.com`
Click on **Apply** to save the new server settings.
In the server URL field, enter your desired server address:
For HTTP: `http://`
For HTTPS with a self-signed certificate: `https://` Example: `https://172.17.0.19` or `https://signage.pickcel.com`
Click on **Apply** to save the new server settings.
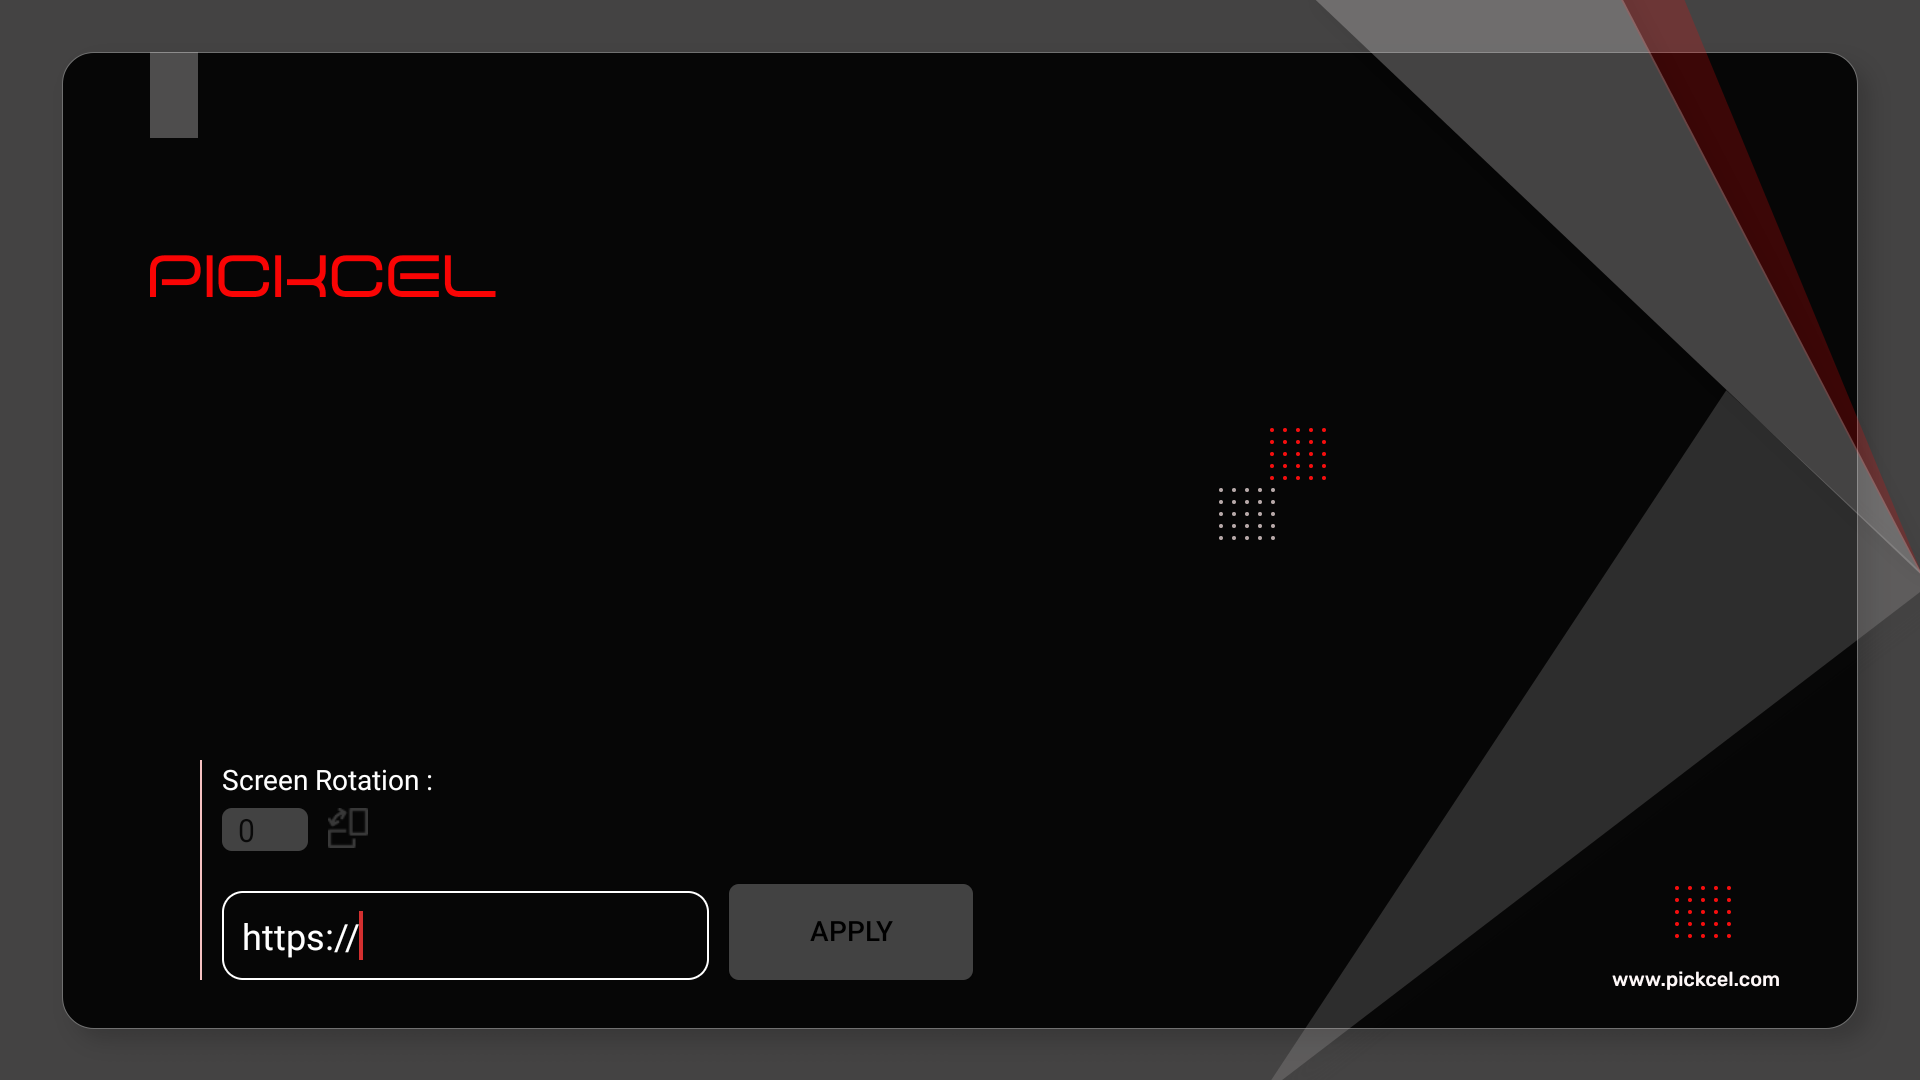 The Pickcel app will automatically restart and display a 6-digit registration code. Use this code to register your screen on the Pickcel console at [https://console.pickcel.com](https://console.pickcel.com/)
## How to Change the Network on Raspberry Pi
Press Ctrl + M on your keyboard.
If the mouse isn't responsive, press Ctrl + Shift + C.
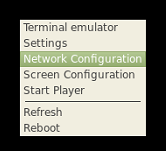
Right-click anywhere on the screen to open the context menu. Select **Network Configuration** to launch the Network Manager TUI.
The Pickcel app will automatically restart and display a 6-digit registration code. Use this code to register your screen on the Pickcel console at [https://console.pickcel.com](https://console.pickcel.com/)
## How to Change the Network on Raspberry Pi
Press Ctrl + M on your keyboard.
If the mouse isn't responsive, press Ctrl + Shift + C.
Right-click anywhere on the screen to open the context menu. Select **Network Configuration** to launch the Network Manager TUI.
 In the TUI, use the arrow keys to navigate to **Activate a connection** and press Enter.
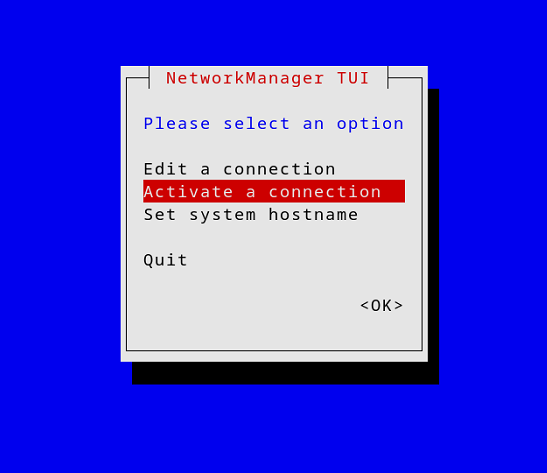 Select your desired Wi-Fi network from the list and press Enter. When prompted, enter the Wi-Fi password and confirm.
After a successful connection, return to the Network Manager TUI and click on Quit. The Pickcel app will automatically reboot and connect to the selected network.
## How to Set the Timezone on Raspberry Pi
Press Ctrl + M on your keyboard.
If the mouse isn't responsive, press Ctrl + Shift + C.
Right-click anywhere on the screen to open the context menu. Select **Settings**.
In the Settings menu, use the arrow keys to navigate to **Localization Options** and press Enter.
Select your desired Wi-Fi network from the list and press Enter. When prompted, enter the Wi-Fi password and confirm.
After a successful connection, return to the Network Manager TUI and click on Quit. The Pickcel app will automatically reboot and connect to the selected network.
## How to Set the Timezone on Raspberry Pi
Press Ctrl + M on your keyboard.
If the mouse isn't responsive, press Ctrl + Shift + C.
Right-click anywhere on the screen to open the context menu. Select **Settings**.
In the Settings menu, use the arrow keys to navigate to **Localization Options** and press Enter.
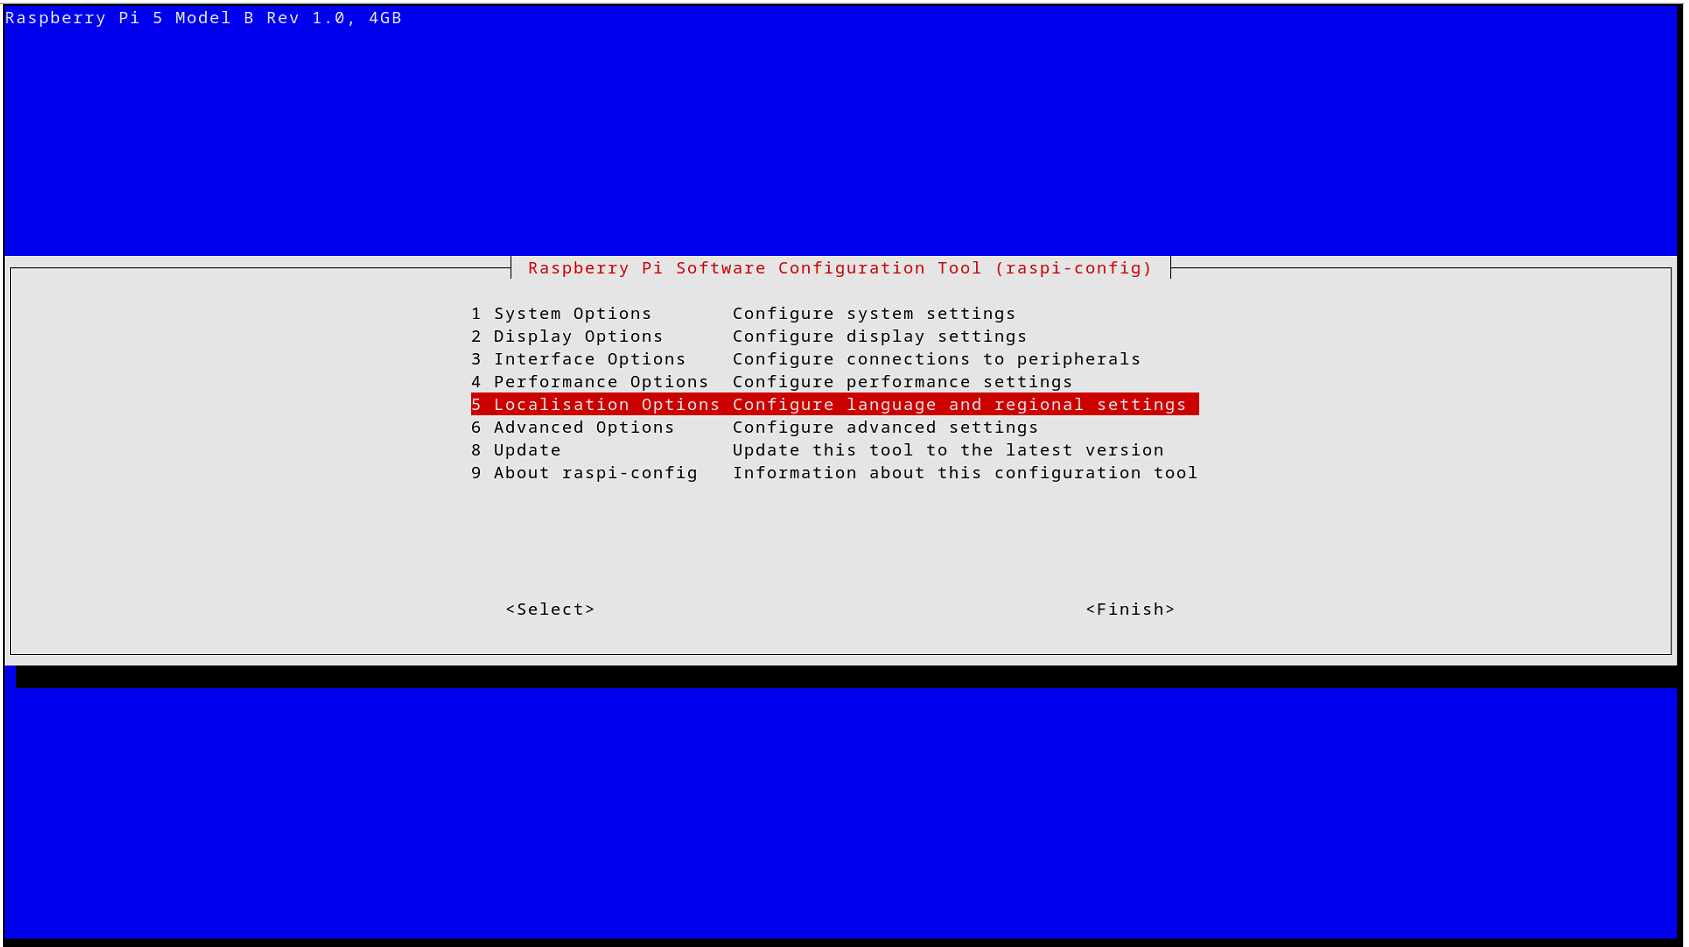 Select **Timezone** (listed as L2 in the Localisation Options menu) and press Enter.
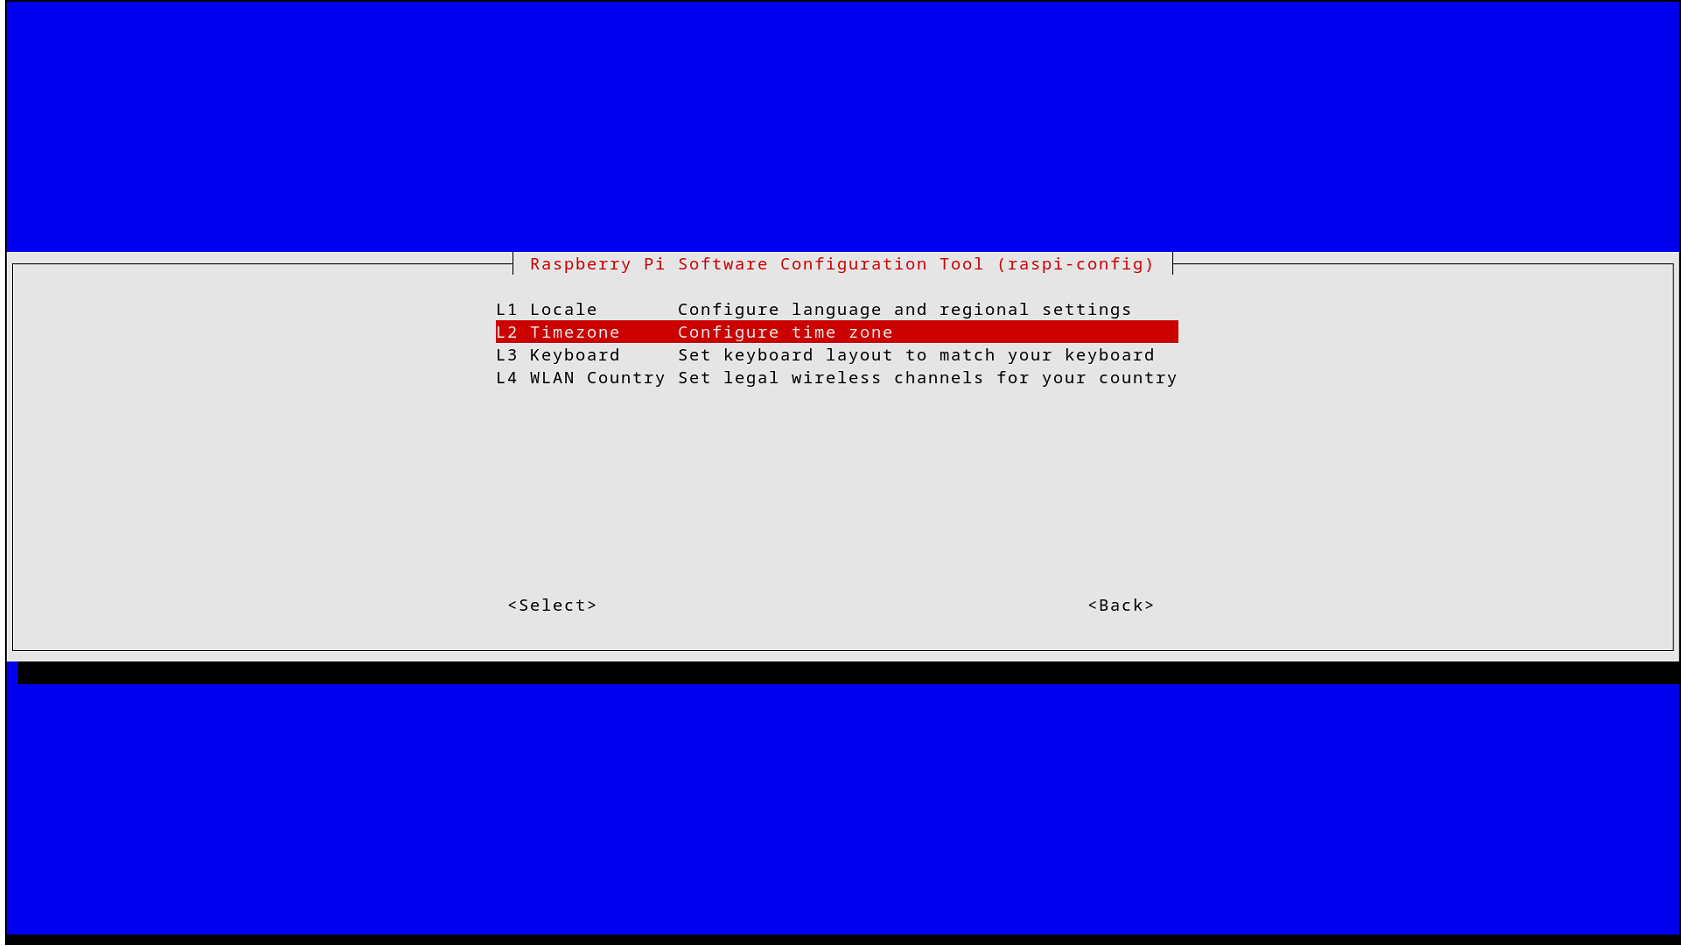 Configuring time zone data page appears, choose your geographic area and then your specific time zone city. After selection, press Enter to confirm.
You will be taken back to Config tool page, Navigate to **Finish** and press Enter. The device will automatically reboot, applying the new time zone settings.
Configuring time zone data page appears, choose your geographic area and then your specific time zone city. After selection, press Enter to confirm.
You will be taken back to Config tool page, Navigate to **Finish** and press Enter. The device will automatically reboot, applying the new time zone settings.