> ## Documentation Index
> Fetch the complete documentation index at: https://docs.pickcel.com/llms.txt
> Use this file to discover all available pages before exploring further.
# How to Display Tableau Dashboards on Your Screens Using Pickcel?
> Use the standalone Tableau app to connect Tableau Cloud and display interactive dashboards directly on your digital signage screens
The **standalone Tableau app** uses Pickcel's Connected App integration to securely display Tableau dashboards. It connects directly to Tableau Cloud and supports automatic dashboard refresh, making it ideal for sharing business intelligence and analytics.
**Looking for an alternative?** If you need 2FA support or are using BrightSign devices, use the [Dashboard app (Tableau method)](/apps/dashboard-apps/tableau) instead, which uses server-side login and works across all device types.
The process is divided into two main parts: first, creating a "Connected App" in Tableau to grant secure access, and second, using the credentials from Tableau to set up the app in Pickcel. By following these steps, you can display your interactive Tableau dashboards and reports directly on your digital screens.
## **Part 1: Create a Connected App in Tableau**
In this section, you will configure Tableau to trust Pickcel and generate the secure credentials needed for the integration.
1. Sign in to your [Tableau Cloud](https://sso.online.tableau.com/) account using your Site Administrator credentials.
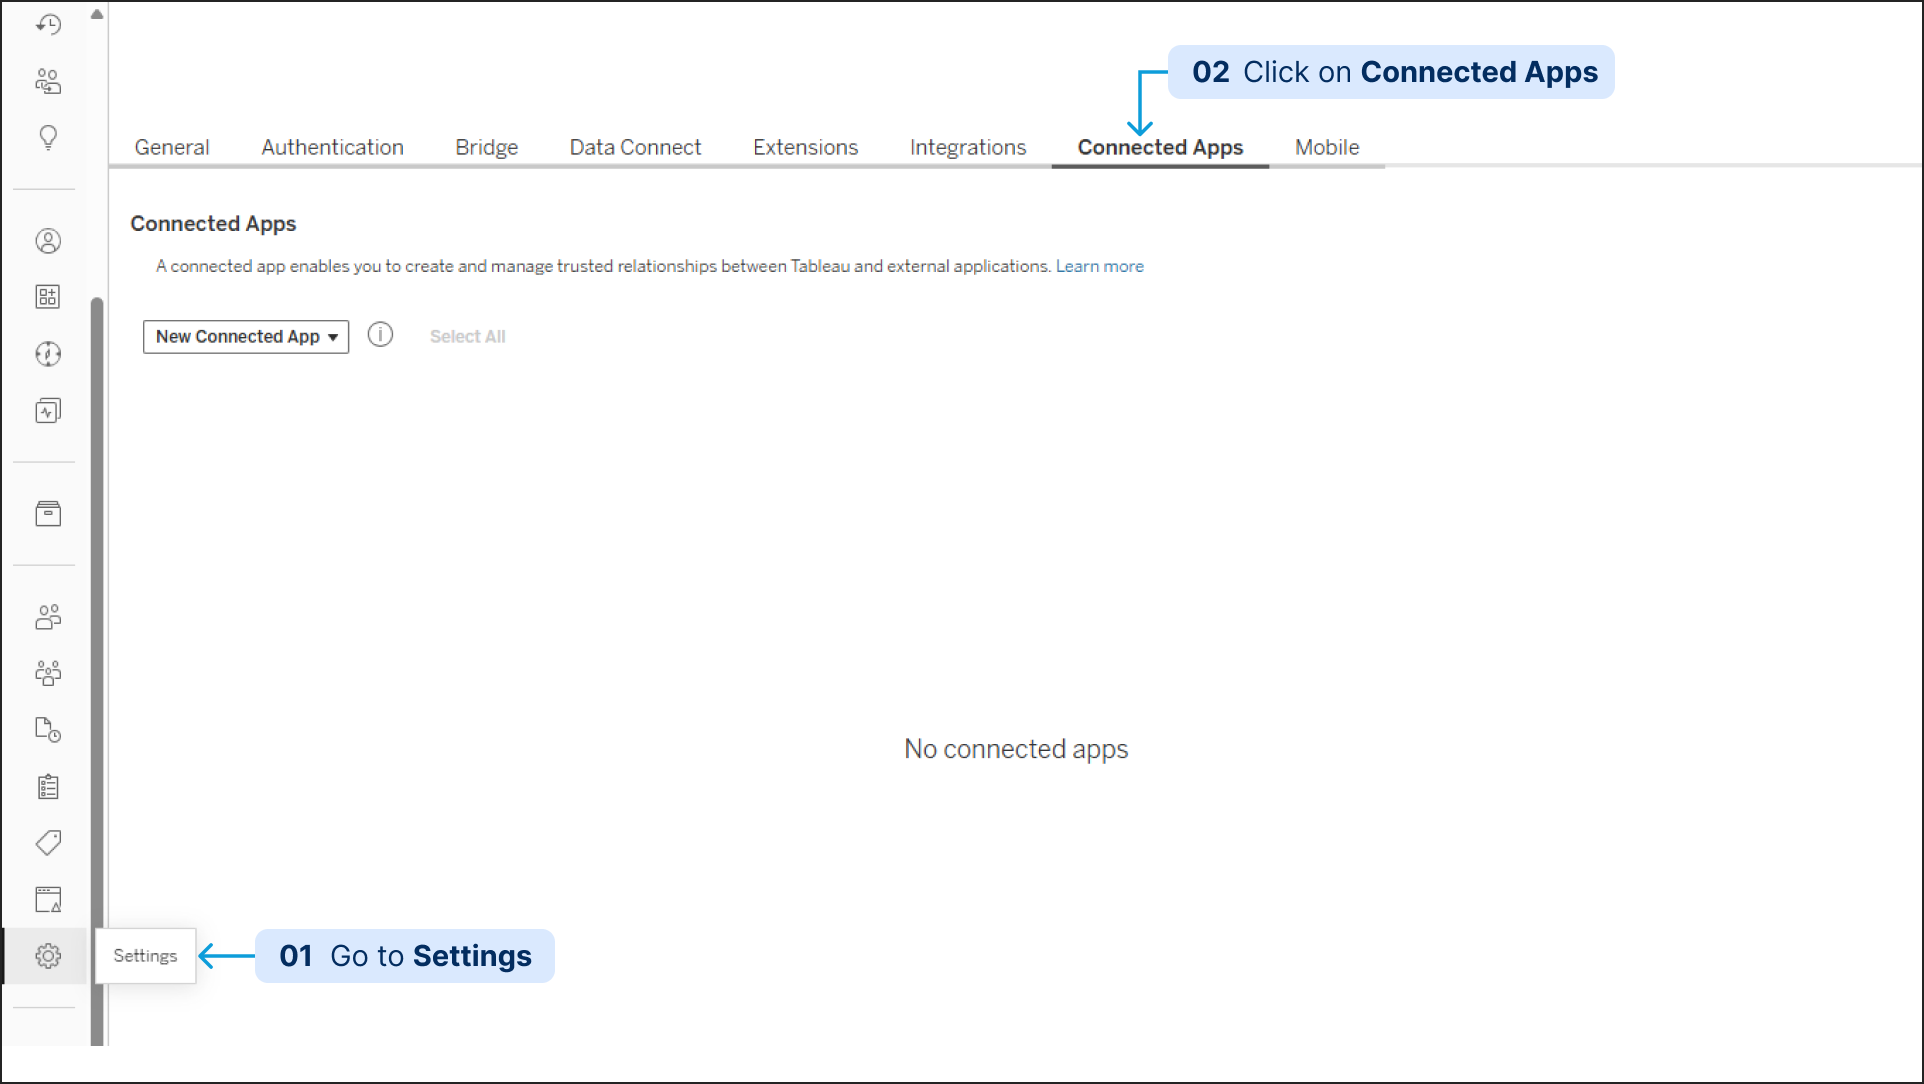
2. From the navigation pane on the left, select **Settings**, then go to the **Connected Apps** tab.
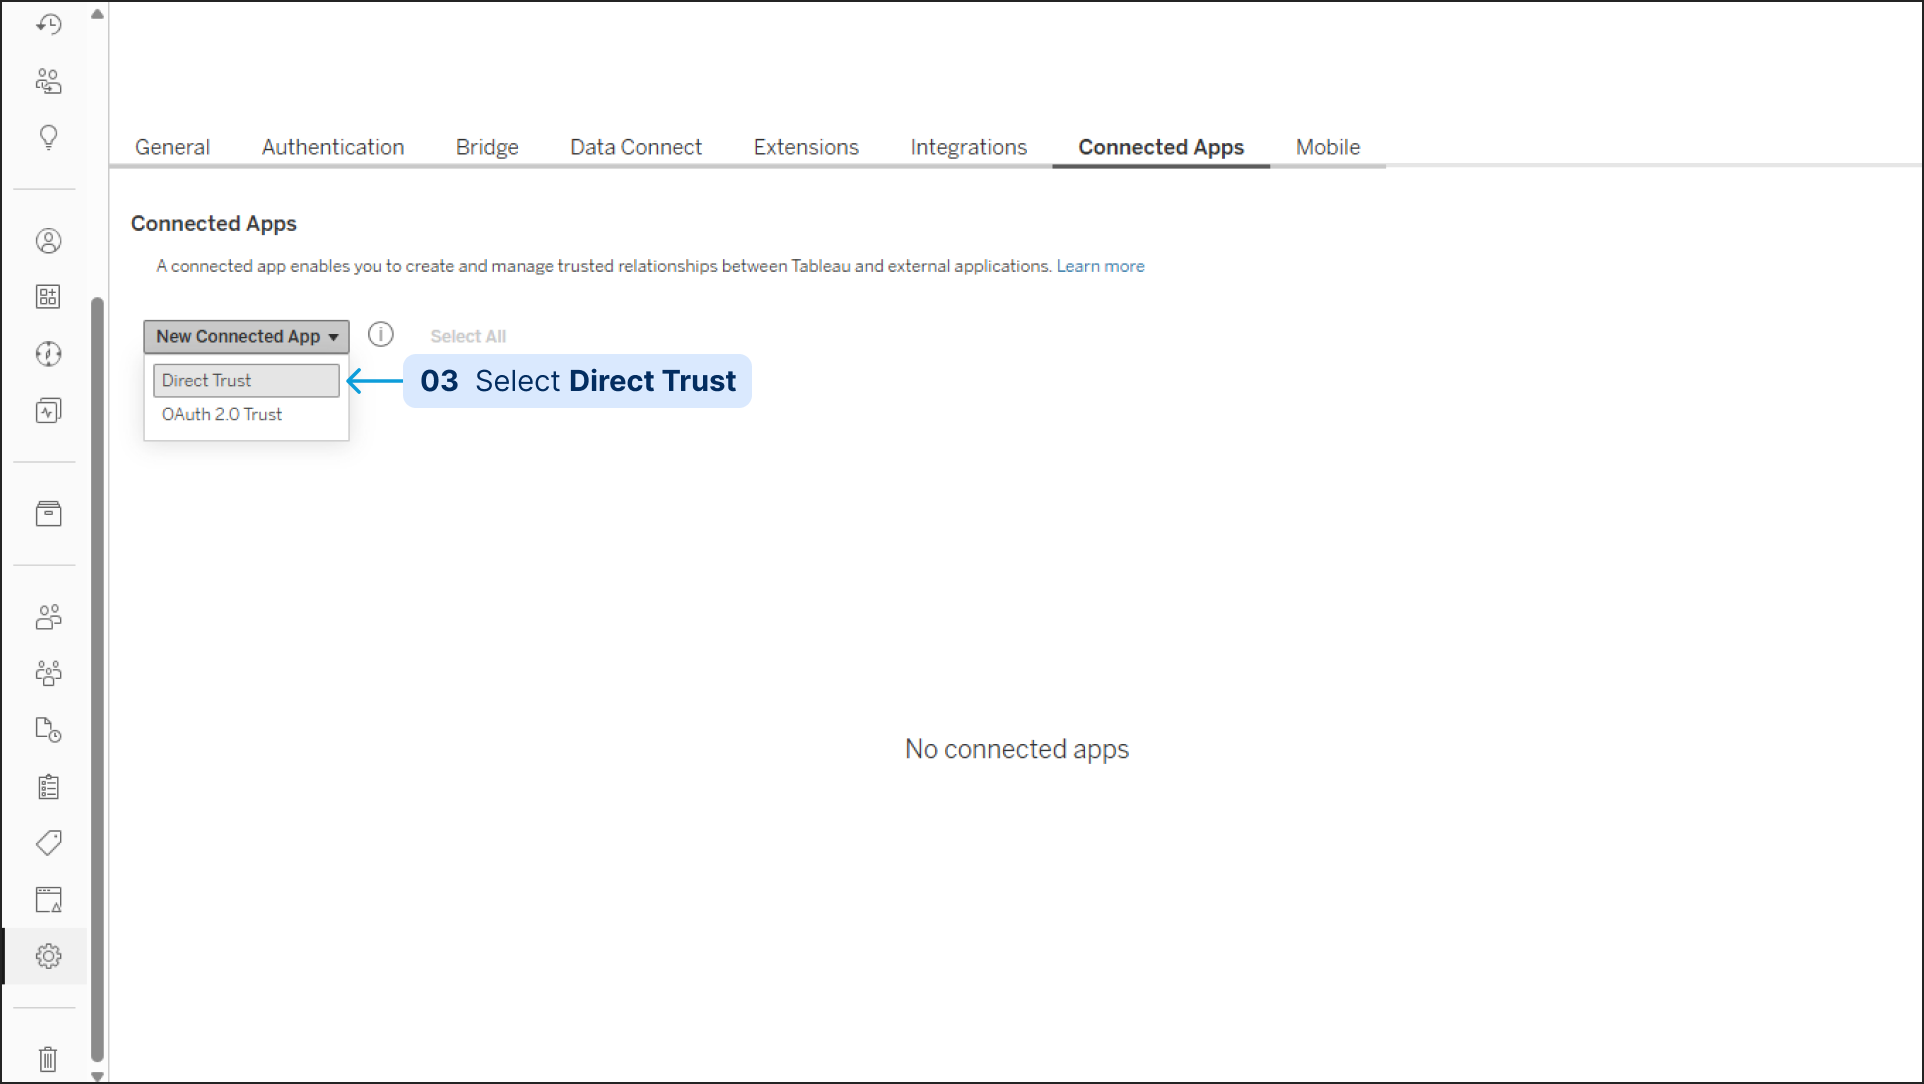
3. Click the drop-down arrow next to the **New Connected App** button and select **Direct Trust**. (A configuration dialog box will appear.)
4. In the dialog box, fill in the following details:
* **App Name:** Give your connected app a descriptive name, such as Pickcel Signage Integration.
* **Access Level:** You can set this for the entire site or for a specific project, depending on which dashboards you want to make available.
* In the **Domain allowlist** section, you can enter the Pickcel domain for added security or leave it as **All domains** for broader access.
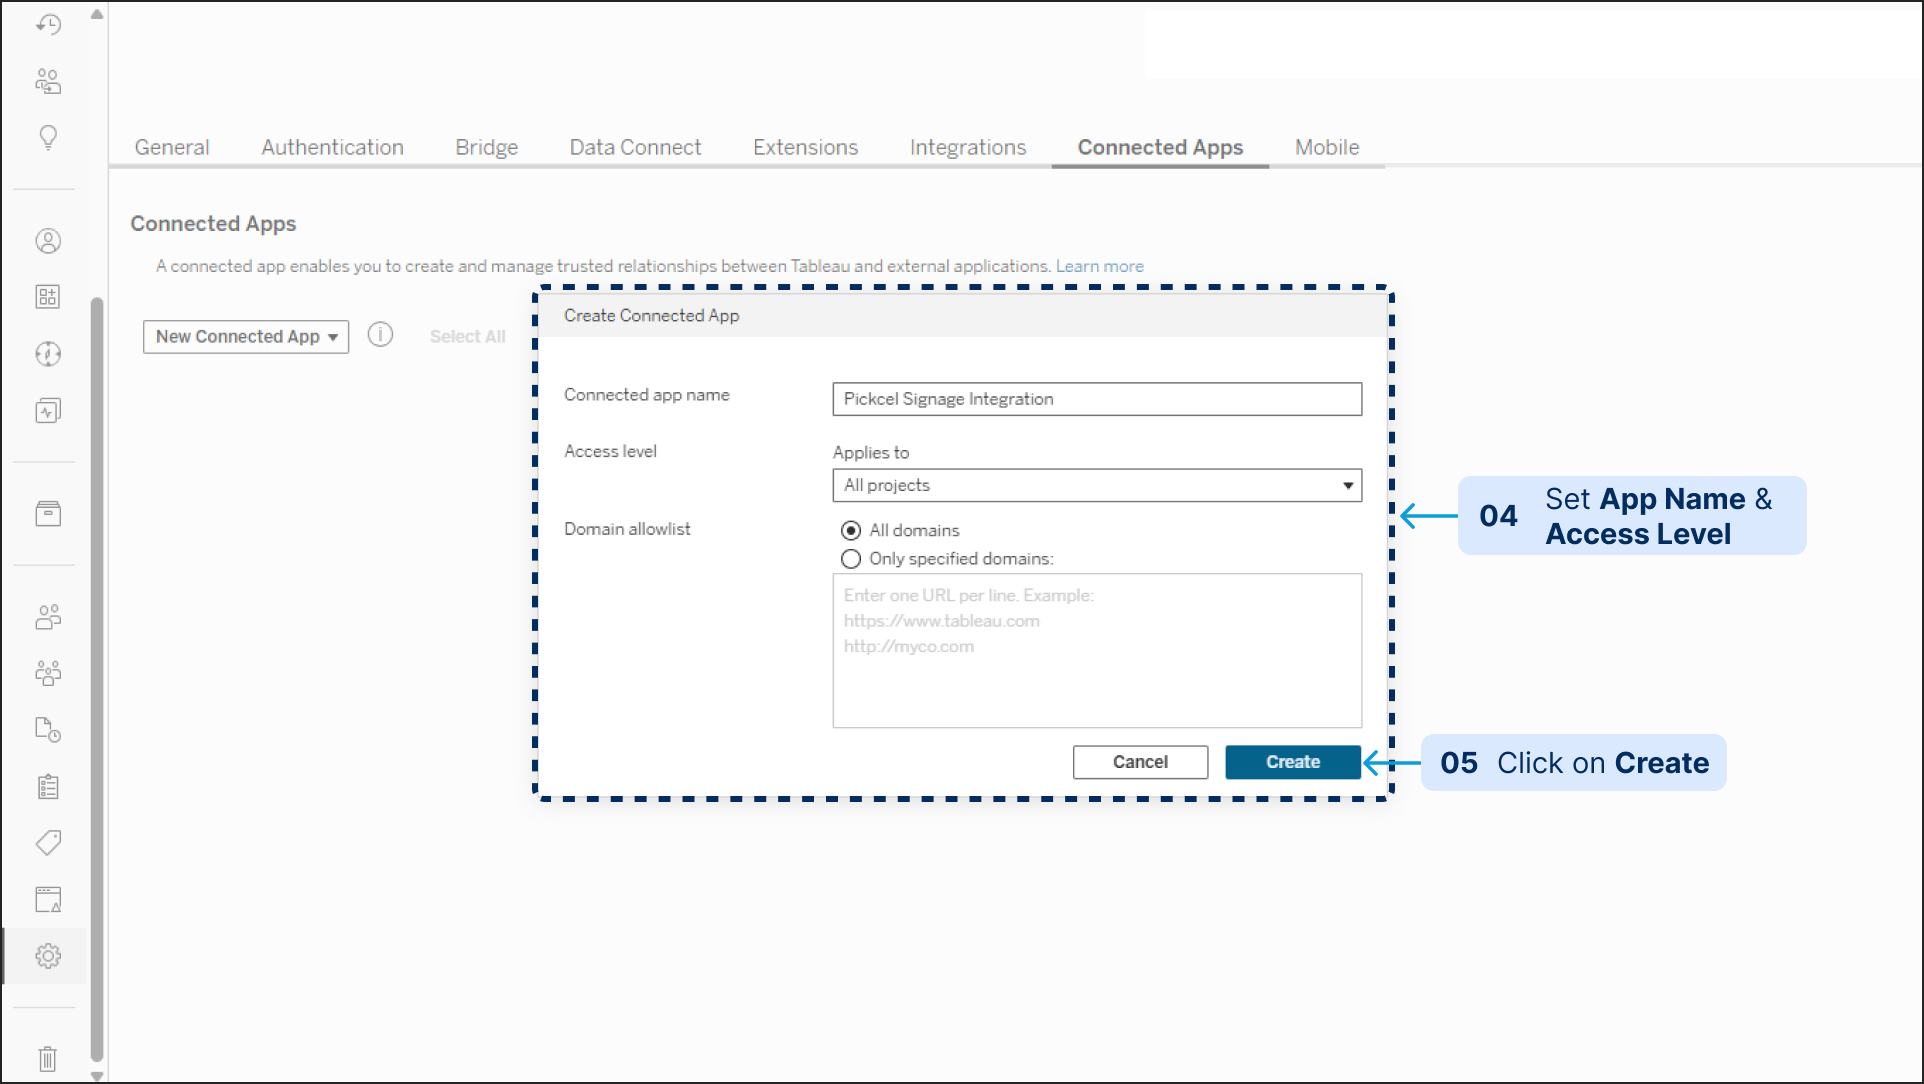
5. Click the **Create** button. Your new app will appear in the list.
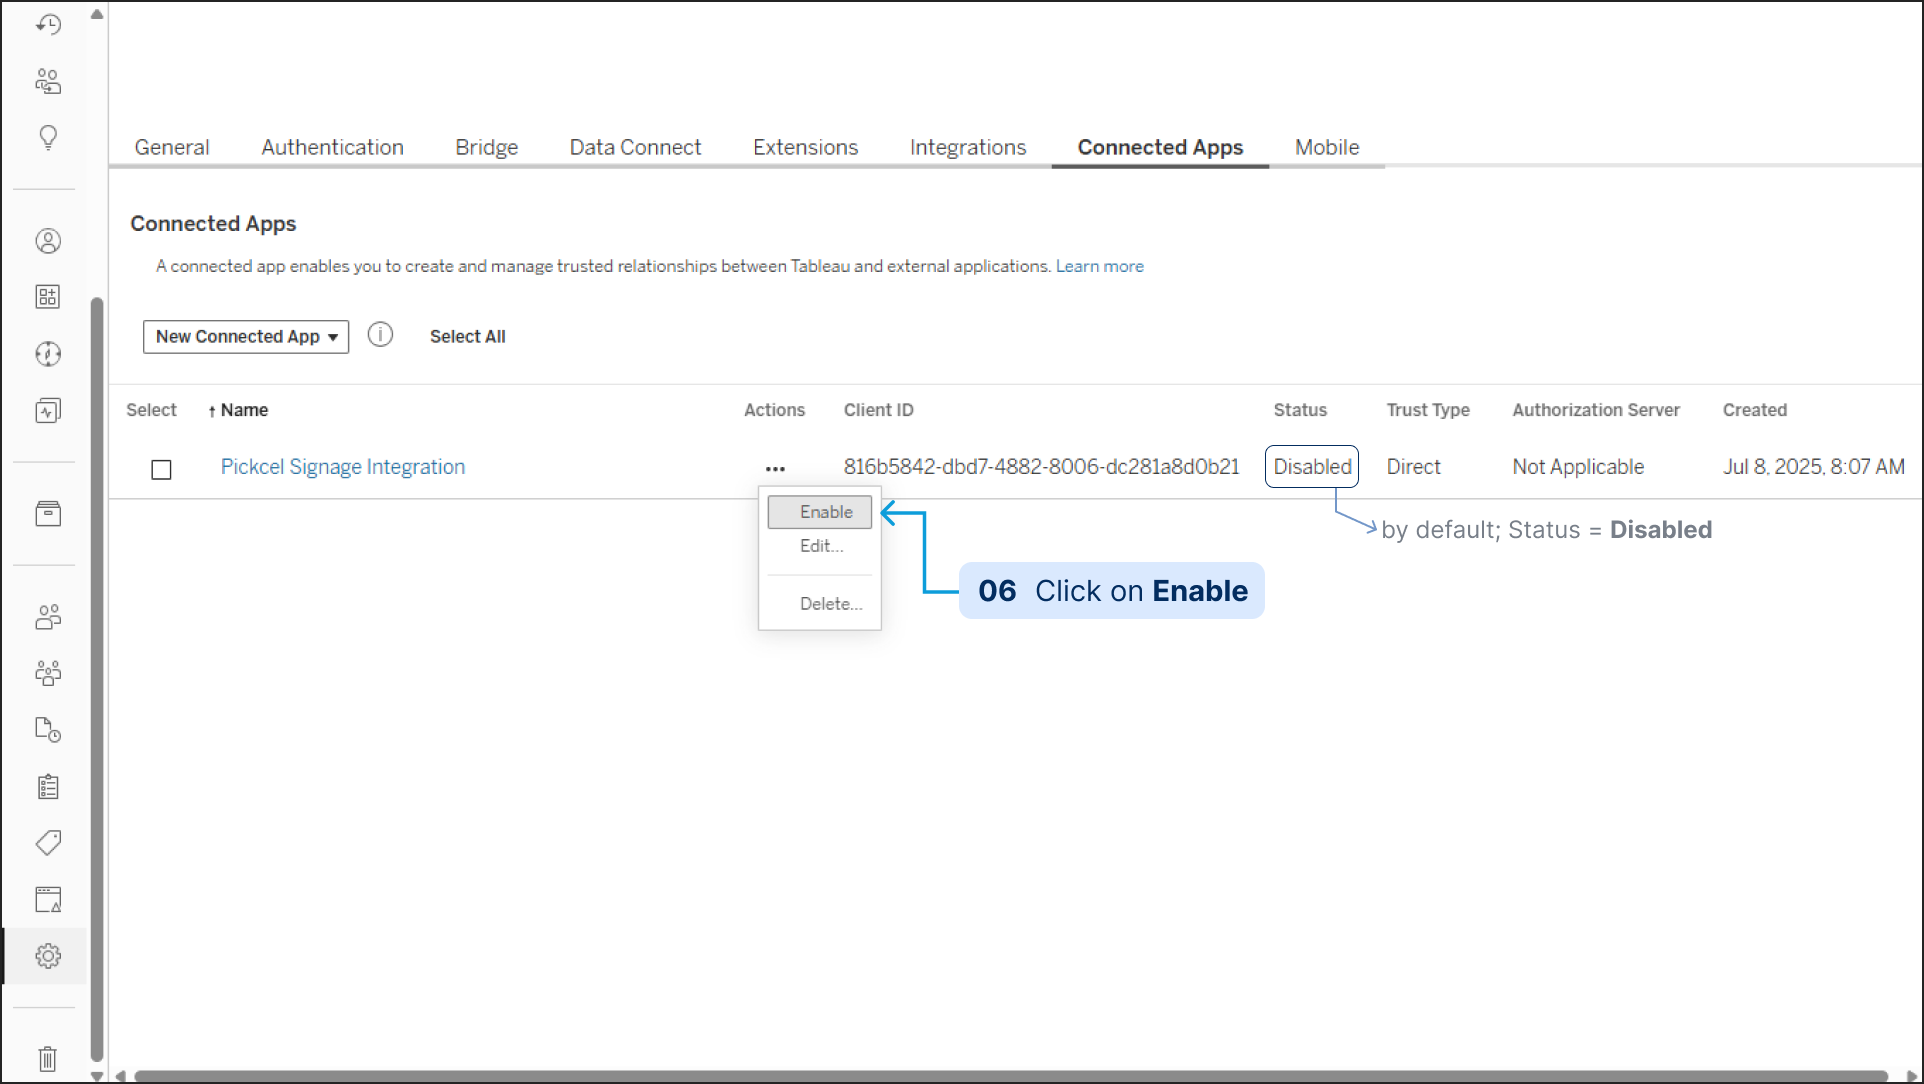
6. By default, the new app is disabled. Locate your newly created app in the list and click the three-dots menu (**...**) next to it, then select **Enable**.
7. Now, click on the name of your app to open its details. Click the **Generate New Secret** button.
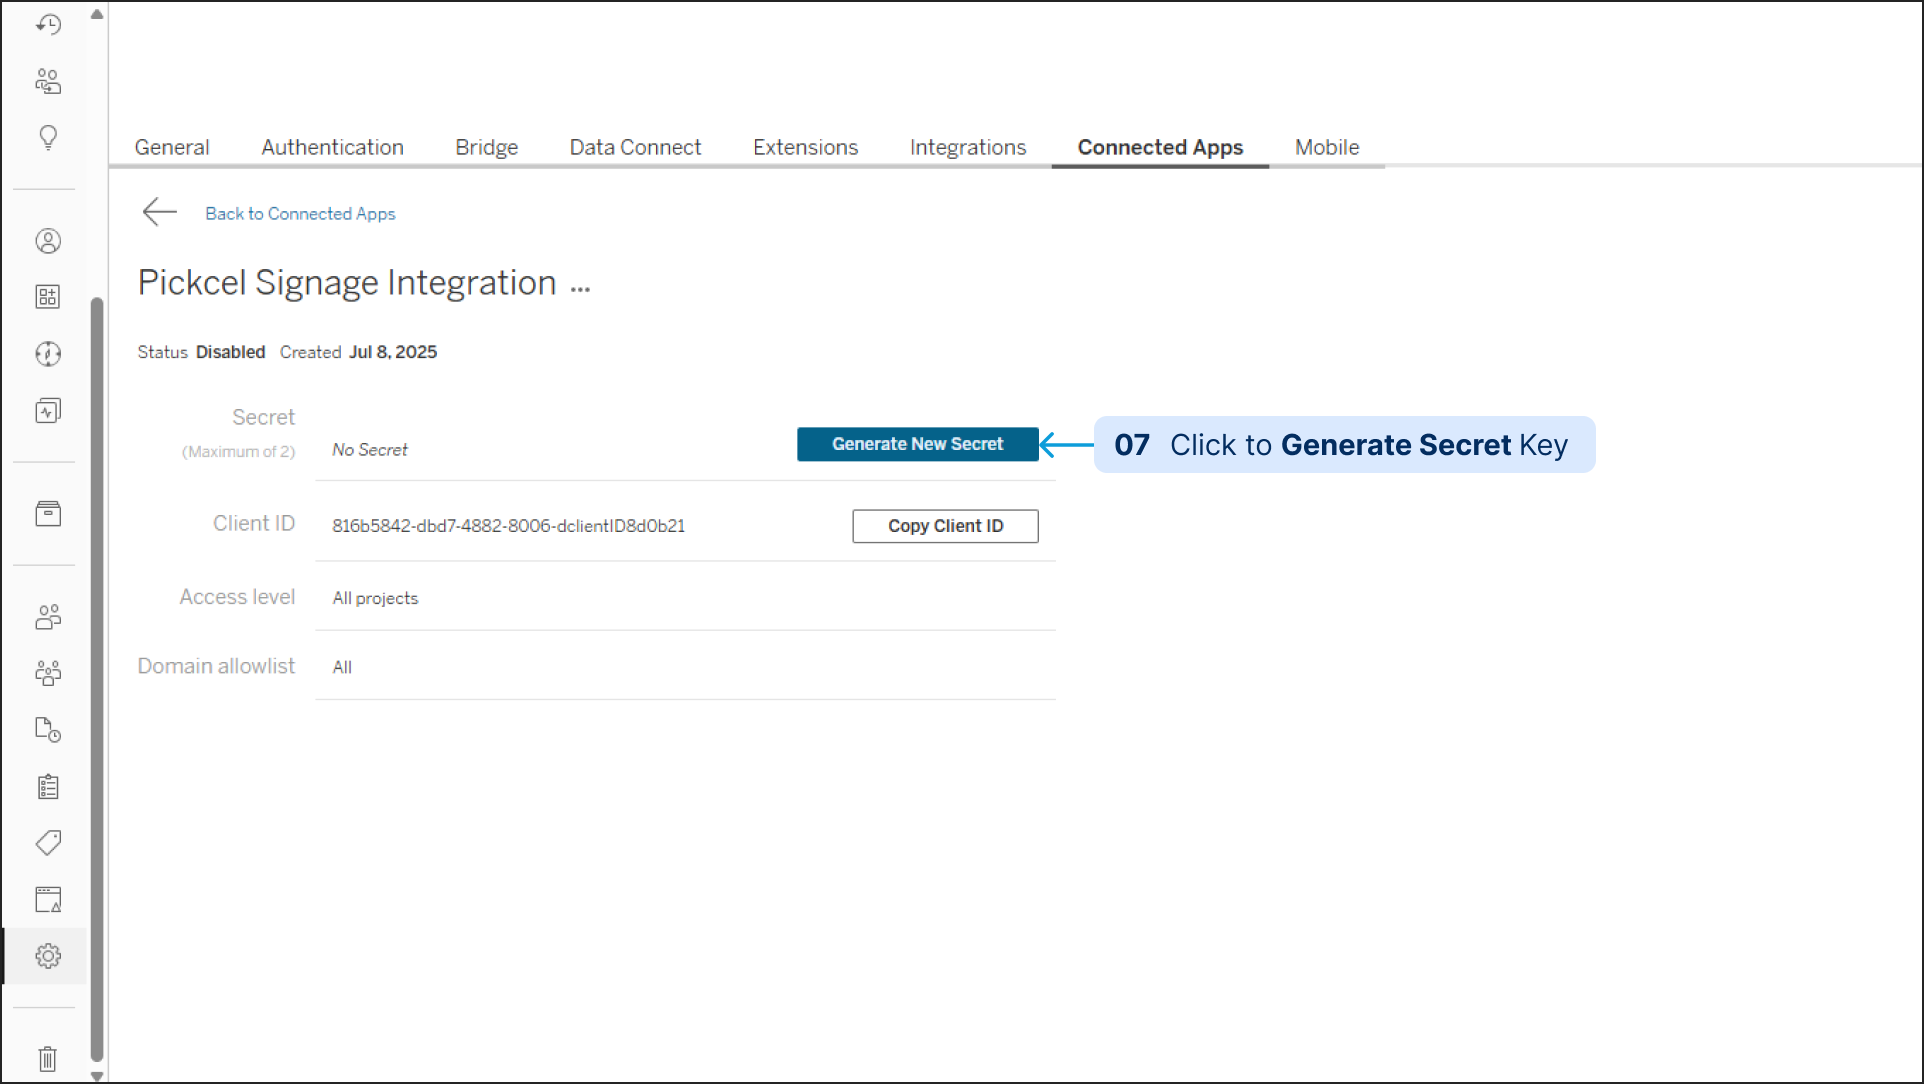
8. Tableau will now display the credentials Pickcel needs. **Copy the Secret ID, Secret Value and Client ID** and save them in a secure place. You will need them in the next part.

9. While still in Tableau, navigate to the specific dashboard you wish to display. **Copy its full URL** from your browser's address bar.
With your credentials and dashboard URL copied, you are now ready to configure the app in Pickcel.
## Part 2: Configure the Tableau App in Pickcel
Now you'll use the credentials you just generated to set up the Tableau app within your Pickcel account.
Log in to your [Pickcel account](https://console.pickcel.com/). Go to the **Apps** module and search for **Tableau**.
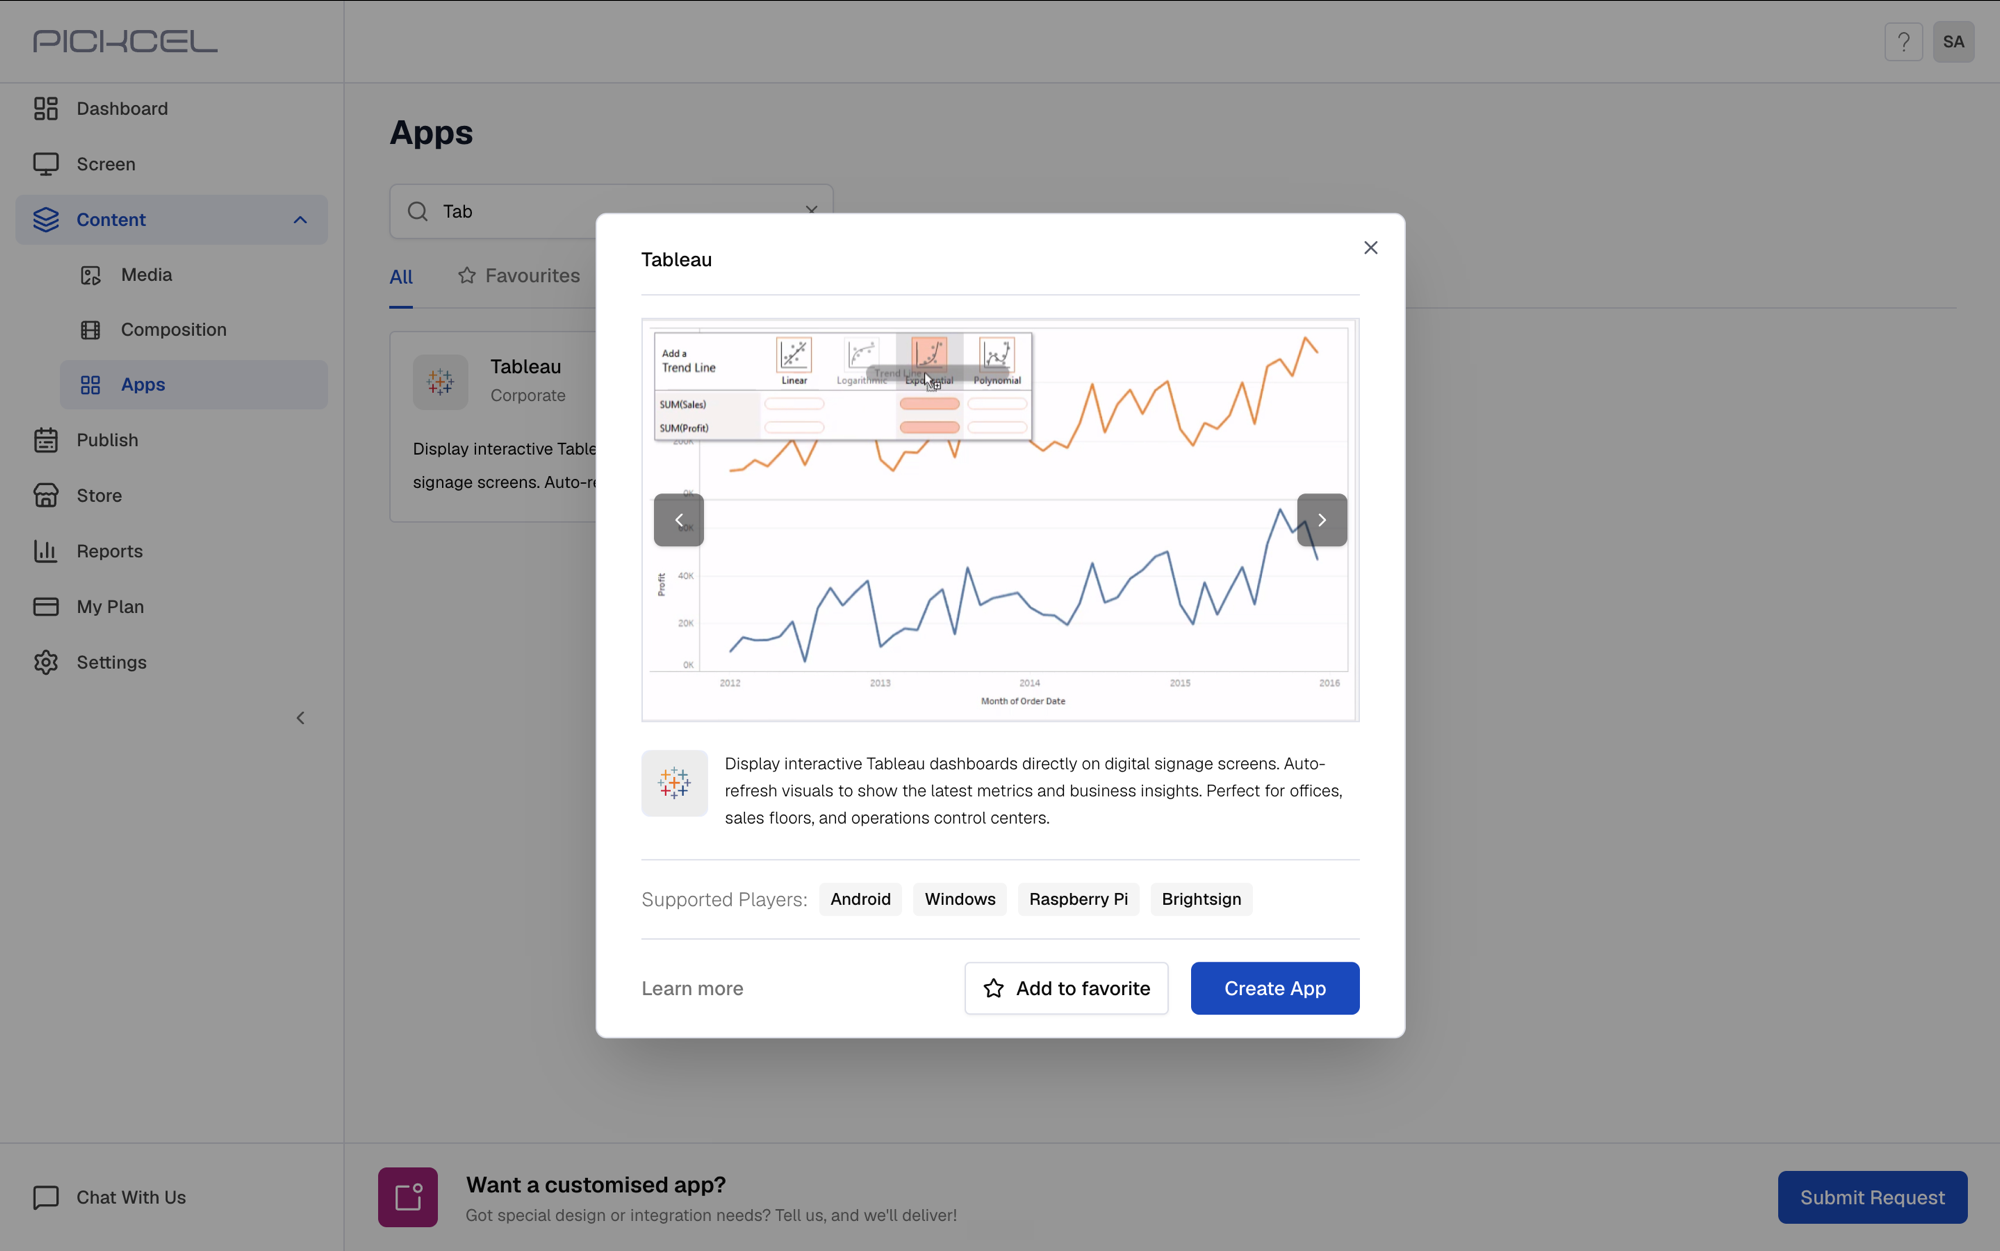
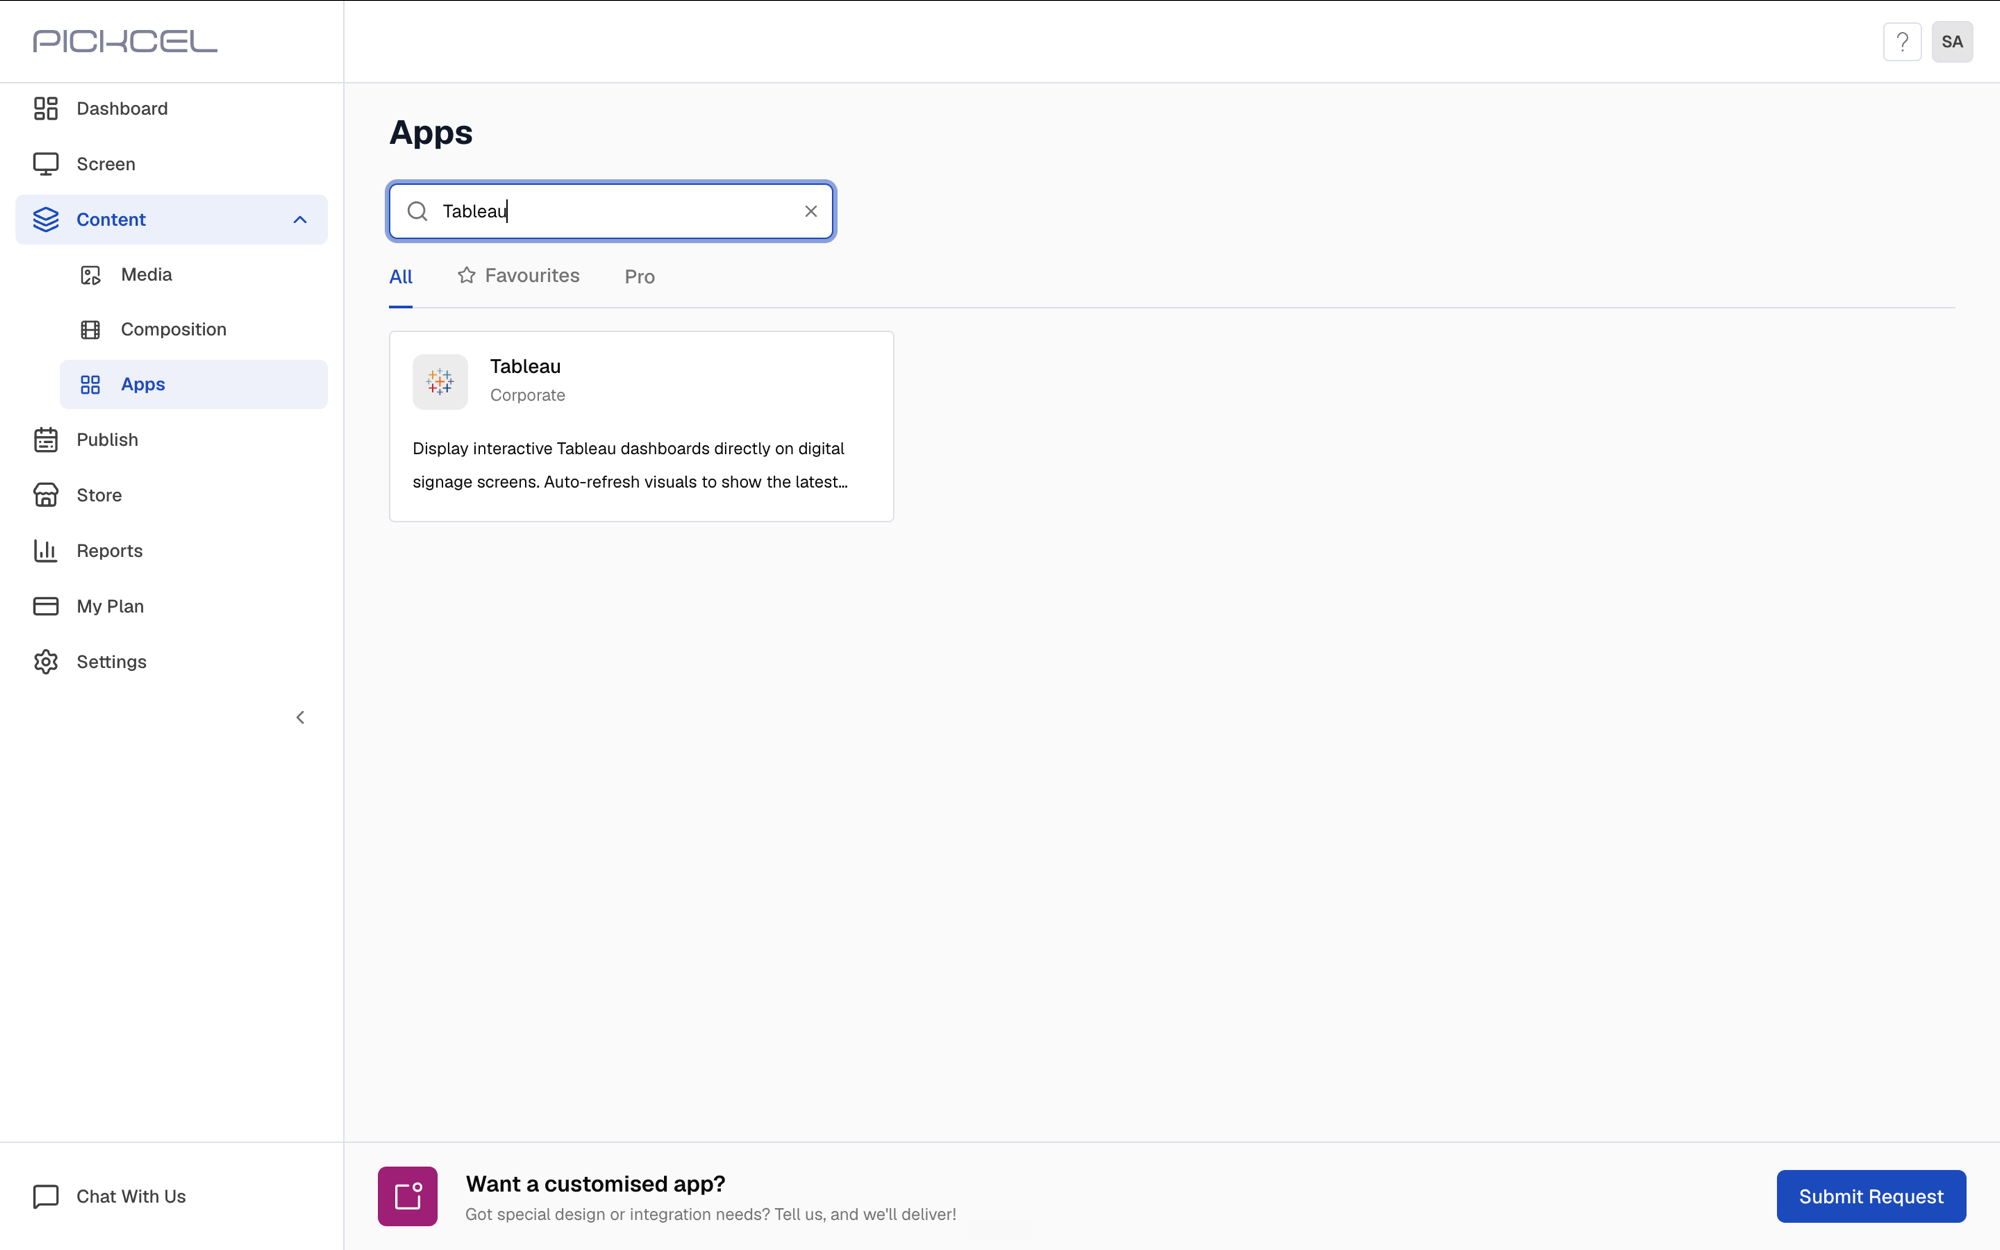 Click the **Tableau** app card, then click **Create App** in the app details panel.
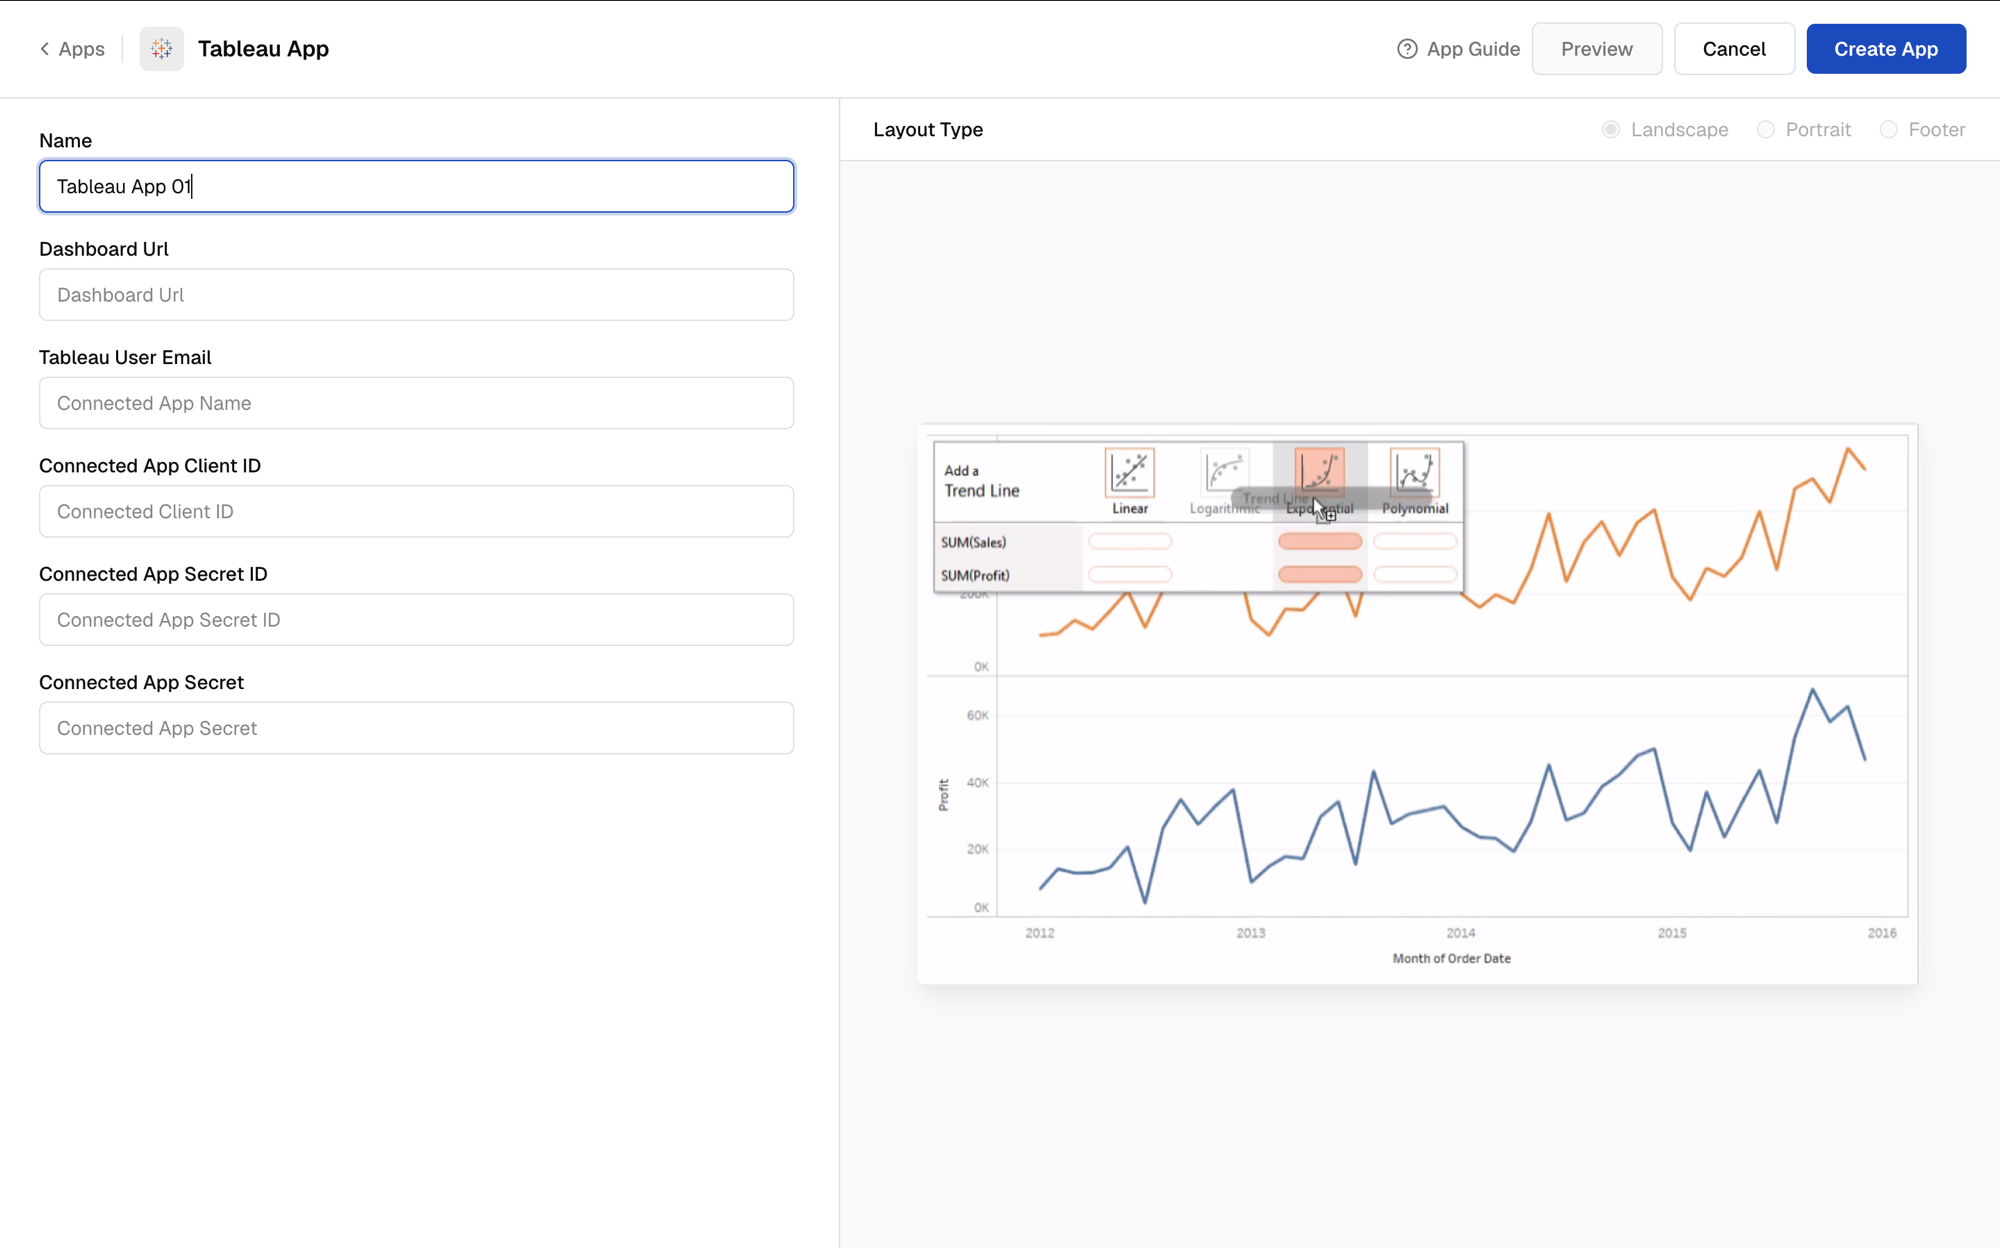
 Fill in the following fields:
* **Name**: a name for this dashboard, e.g. Q3 Sales Performance Dashboard
* **Dashboard Url**: the full URL of the Tableau dashboard you copied earlier
* **Tableau User Email**: the email of the Tableau user who has permission to view the dashboard
* **Connected App Client ID**: the **Client ID** you copied from Tableau
* **Connected App Secret ID**: the **Secret ID** you copied from Tableau
* **Connected App Secret**: the **Secret Value** you copied from Tableau
Then choose a **Layout Type**, **Landscape**, **Portrait**, or **Footer**, to match your screen.
Fill in the following fields:
* **Name**: a name for this dashboard, e.g. Q3 Sales Performance Dashboard
* **Dashboard Url**: the full URL of the Tableau dashboard you copied earlier
* **Tableau User Email**: the email of the Tableau user who has permission to view the dashboard
* **Connected App Client ID**: the **Client ID** you copied from Tableau
* **Connected App Secret ID**: the **Secret ID** you copied from Tableau
* **Connected App Secret**: the **Secret Value** you copied from Tableau
Then choose a **Layout Type**, **Landscape**, **Portrait**, or **Footer**, to match your screen.
 Click **Preview** to test the connection and load your dashboard. If it loads correctly, click **Create App** to save your configuration.
## What's Next?
The app is saved to your **Media** library under the name you gave it. Add it to a composition, then schedule and publish it to your screens like any other content.
* Learn about [Compositions](/compositions/compositions)
* Learn how to [Publish or Schedule Content](/schedule-and-publish/publish-overview)
Click **Preview** to test the connection and load your dashboard. If it loads correctly, click **Create App** to save your configuration.
## What's Next?
The app is saved to your **Media** library under the name you gave it. Add it to a composition, then schedule and publish it to your screens like any other content.
* Learn about [Compositions](/compositions/compositions)
* Learn how to [Publish or Schedule Content](/schedule-and-publish/publish-overview)