> ## Documentation Index
> Fetch the complete documentation index at: https://docs.pickcel.com/llms.txt
> Use this file to discover all available pages before exploring further.
# How to add the Digital Menu Board app from the Pickcel App Store?
> Create a digital signage menu board for a restaurant or cafe using a ready-made Digital Menu Board template, with prices, item photos, and live availability toggles.
The Digital Menu Board app turns a screen into a live price list for a restaurant, cafe, or food court. Pick one of the ready-made templates, swap in your own categories, items, and photos, and update prices or availability any time without touching the screen.
In this guide we build a breakfast menu for a fictional cafe, **Sunrise Cafe**, starting from the **Daily Bites** template.
## Prerequisites
* A [Pickcel account](https://console.pickcel.com/) with access to the **Content** module
* Item photos uploaded to the **Media** library, if you want photos next to your items
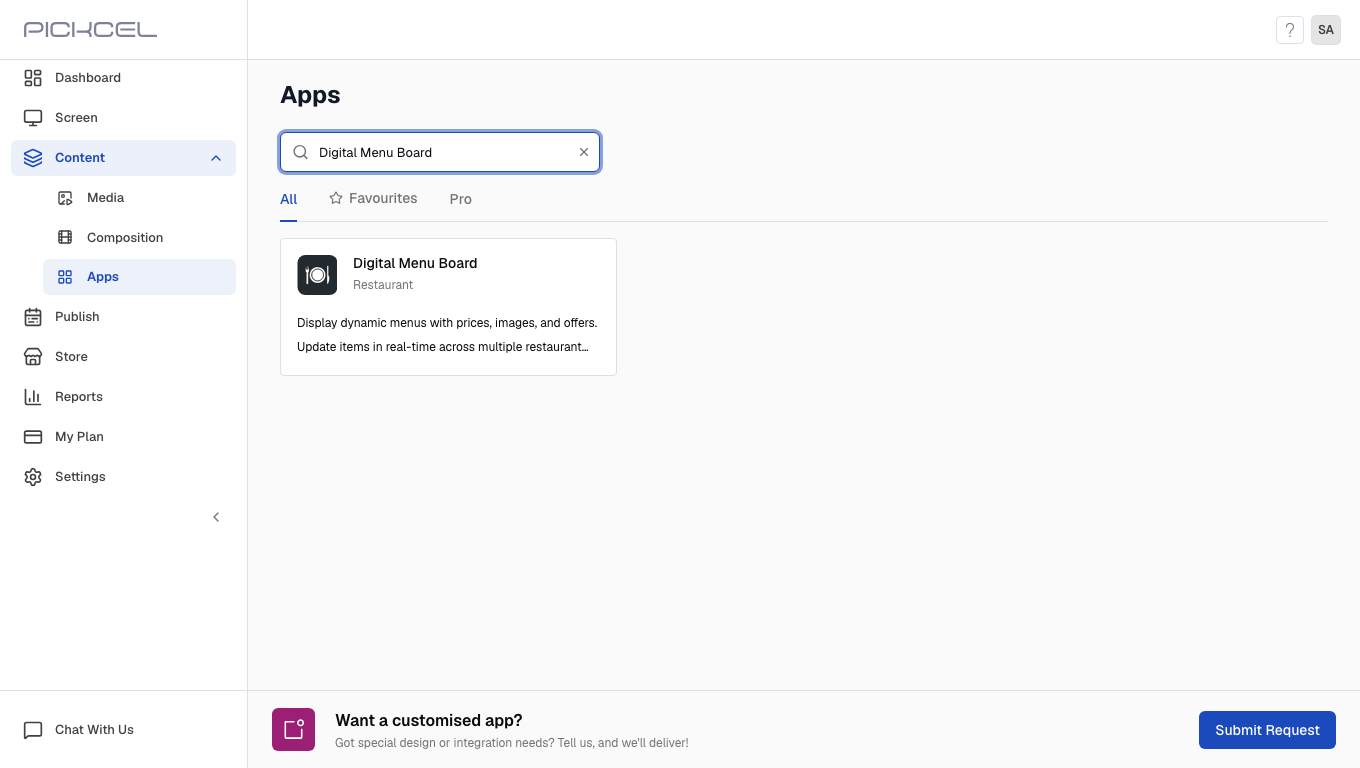
In the Pickcel console, expand **Content** in the left menu and select **Apps**. Search for **Digital Menu Board** using the search field.
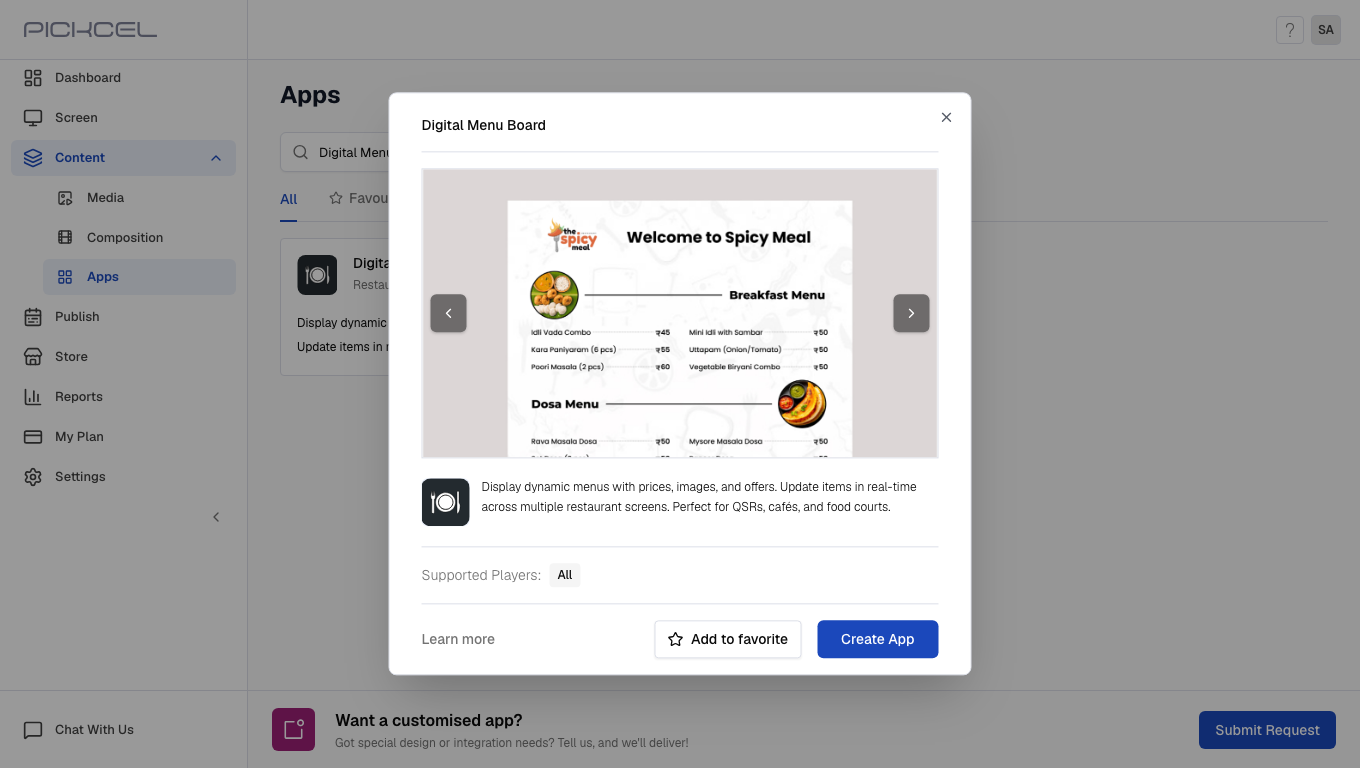
 Click the **Digital Menu Board** card. A details panel opens with a preview of the app. Click **Create App**. The app editor opens in a new browser tab.
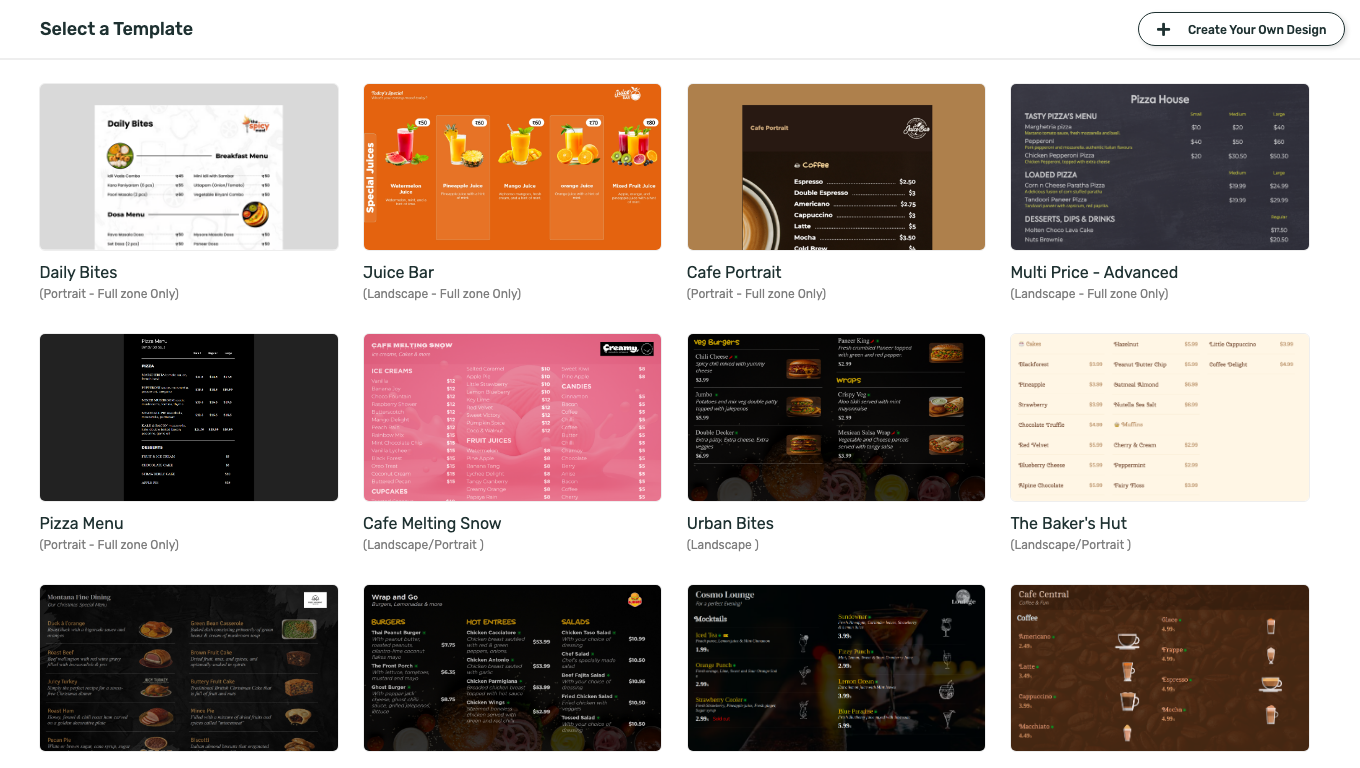
 The editor opens on **Select a Template** with a gallery of pre-built layouts for different cuisines and screen orientations. Hover a template and click **Edit** to use it. We picked **Daily Bites**, a portrait breakfast layout with sample categories and prices already filled in.
 Need full control over layout instead of a preset design? Use [Create Your Own Design](/apps/digital-menu-board-custom-design) to build a menu from a blank canvas.
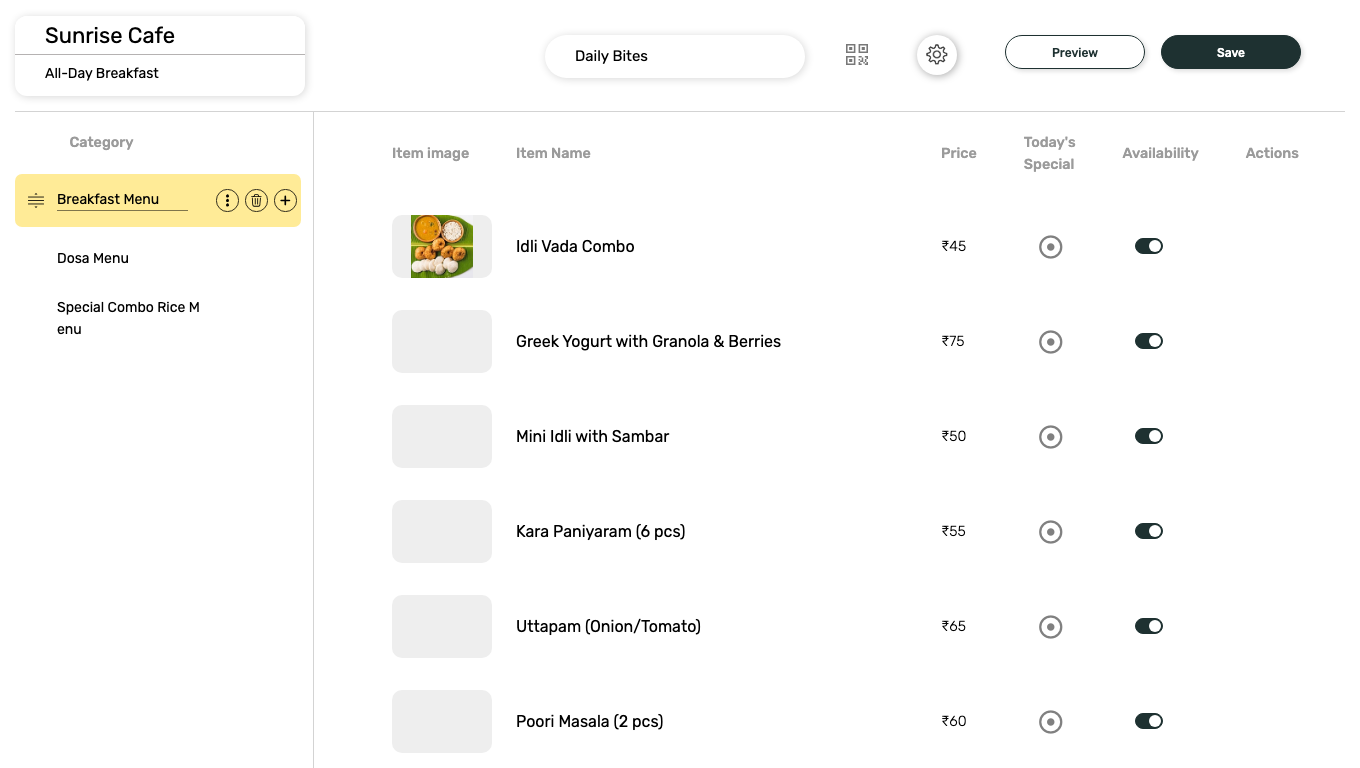
Every template loads with sample content so you can see how it looks. Replace the **Menu Title** and **Menu Subtitle** in the top-left with your own; we used **Sunrise Cafe** and **All-Day Breakfast**. Click a category name in the left rail to rename it, or use **Add category** and the trash icon to add or remove sections.
The pill in the top-center (**Daily Bites** in the screenshot below) is the **App Instance Name**, separate from the on-screen **Menu Title**. It's how this app is identified later in **Media**, so rename it too if you want something more recognizable than the template's default name.
Need full control over layout instead of a preset design? Use [Create Your Own Design](/apps/digital-menu-board-custom-design) to build a menu from a blank canvas.
Every template loads with sample content so you can see how it looks. Replace the **Menu Title** and **Menu Subtitle** in the top-left with your own; we used **Sunrise Cafe** and **All-Day Breakfast**. Click a category name in the left rail to rename it, or use **Add category** and the trash icon to add or remove sections.
The pill in the top-center (**Daily Bites** in the screenshot below) is the **App Instance Name**, separate from the on-screen **Menu Title**. It's how this app is identified later in **Media**, so rename it too if you want something more recognizable than the template's default name.
 Hover an item's image cell and click the folder icon to open the media picker. Search or scroll to find a photo from your **Media** library, select it, and click **Assign**.
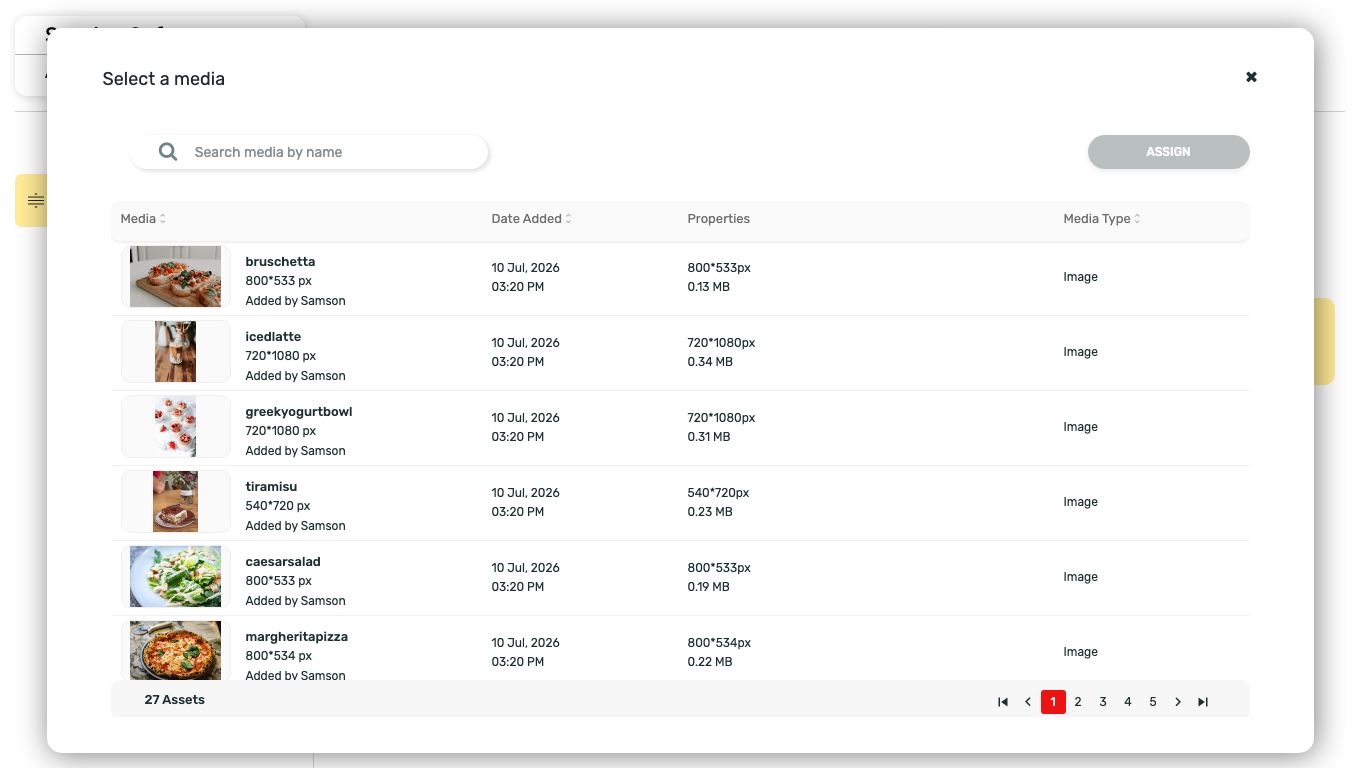 Only images already uploaded to **Media** appear here; there's no direct upload from this dialog. Go to **Content > Media** first if the photo you want isn't listed yet.
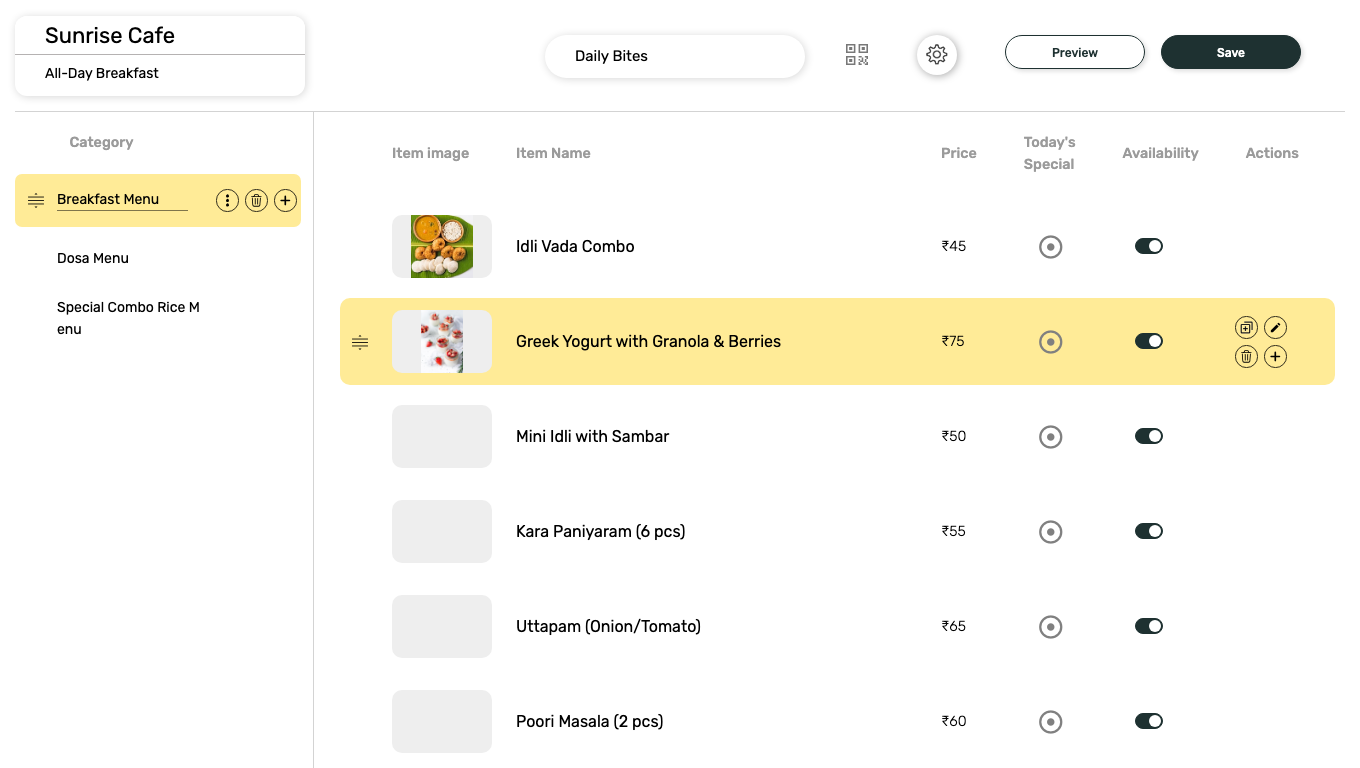 Hover any item row for its **Actions** icons: copy, edit, delete, and add another item below it.
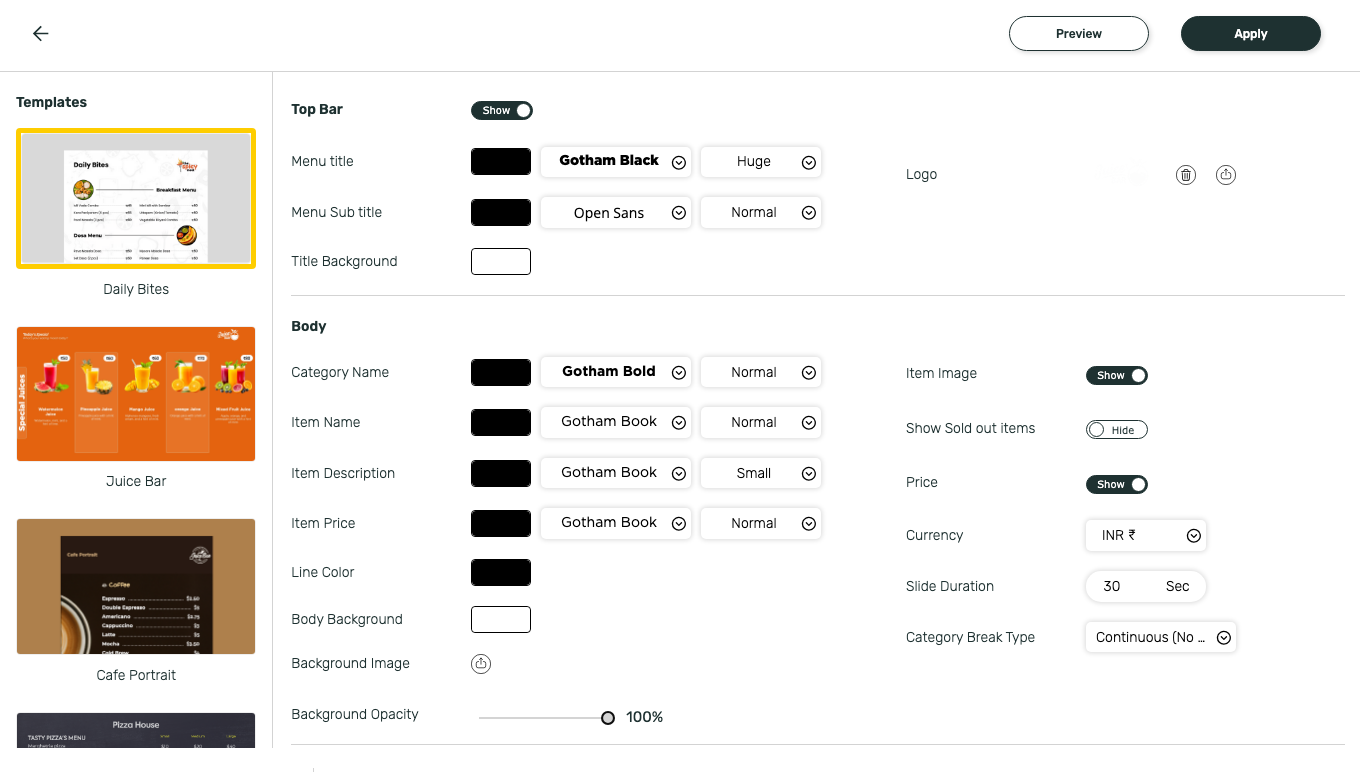
Click the settings icon next to **Preview**. Each template ships with its own font and color defaults, all of which you can override:
* **Top Bar**: menu title and subtitle fonts, colors, and background
* **Body**: fonts and colors for category names, item names, descriptions, and prices
* **Item Image**, **Show Sold out items**, and **Price** toggles, plus **Currency**, **Slide Duration**, and **Category Break Type**
You can also switch to a different template from the rail on the left without losing your categories and items. Click **Apply** when you're done.
Hover any item row for its **Actions** icons: copy, edit, delete, and add another item below it.
Click the settings icon next to **Preview**. Each template ships with its own font and color defaults, all of which you can override:
* **Top Bar**: menu title and subtitle fonts, colors, and background
* **Body**: fonts and colors for category names, item names, descriptions, and prices
* **Item Image**, **Show Sold out items**, and **Price** toggles, plus **Currency**, **Slide Duration**, and **Category Break Type**
You can also switch to a different template from the rail on the left without losing your categories and items. Click **Apply** when you're done.
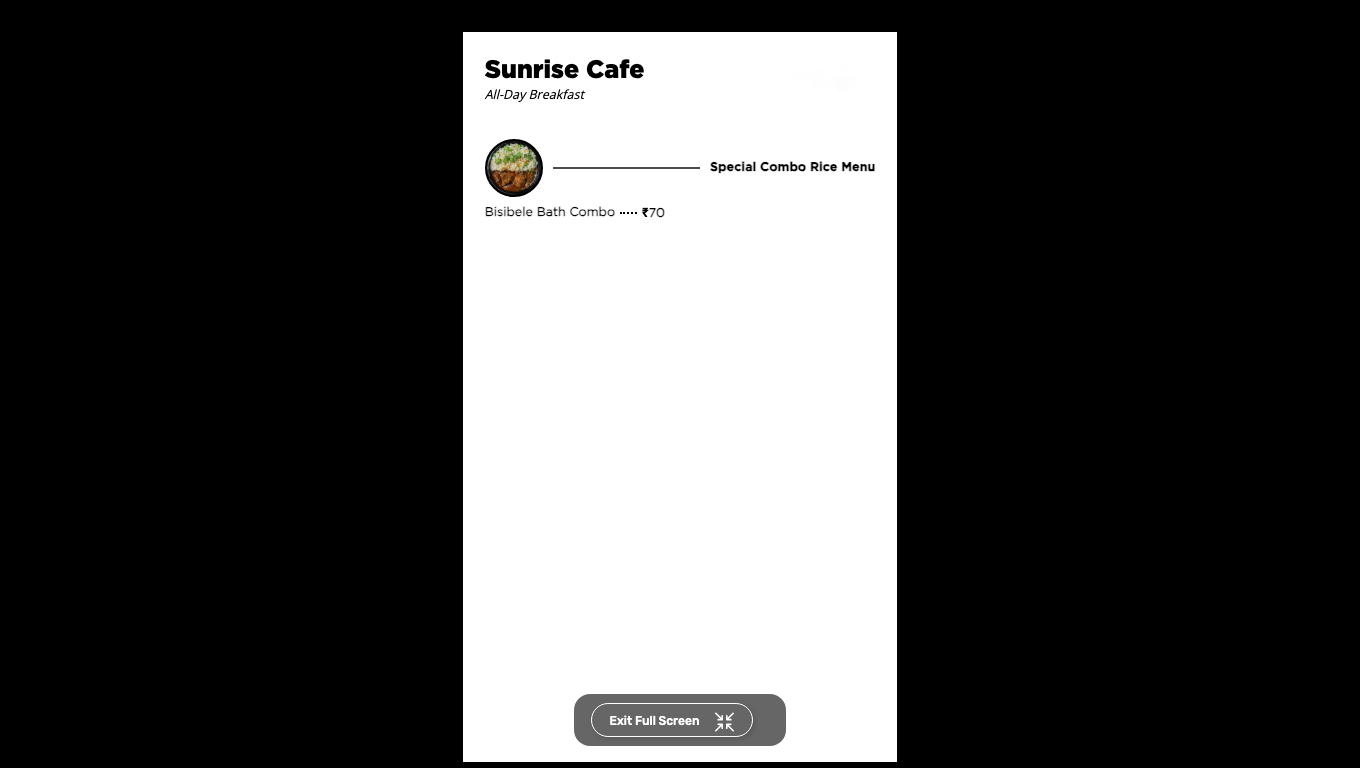
 Click **Preview** to see the board exactly as it will play on screen, including every category rotating through in turn.
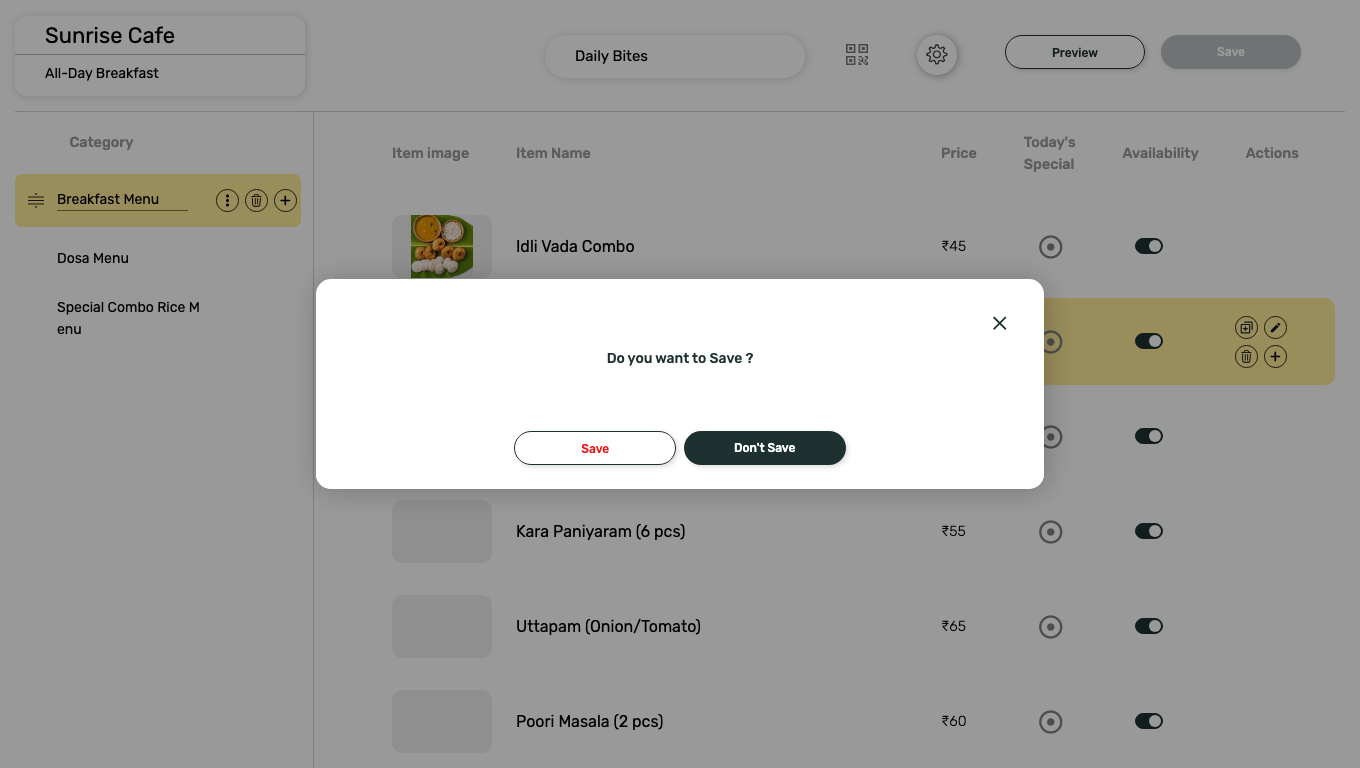
 Click **Save**, then confirm in the **Do you want to Save?** dialog.
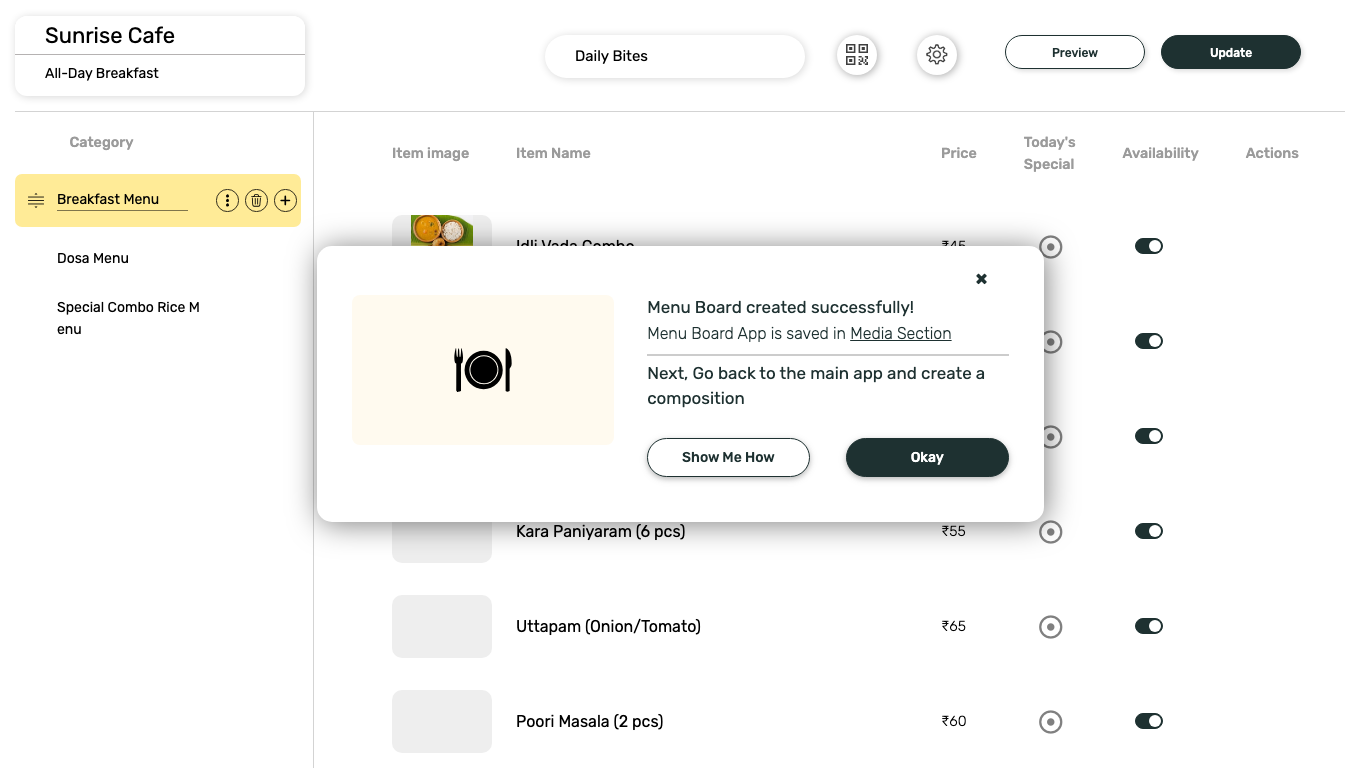
 A success dialog confirms the app was created and offers to walk you through adding it to a composition. The app is stored in **Content > Media** under its App Instance Name, with type **App**.
 ## What's Next?
* Add the menu to a multi-zone layout: [Compositions](/compositions/compositions)
* Send it to your screens: [Publish or Schedule Content](/schedule-and-publish/publish-overview)
## What's Next?
* Add the menu to a multi-zone layout: [Compositions](/compositions/compositions)
* Send it to your screens: [Publish or Schedule Content](/schedule-and-publish/publish-overview)