> ## Documentation Index
> Fetch the complete documentation index at: https://docs.pickcel.com/llms.txt
> Use this file to discover all available pages before exploring further.
# How to Use the Dashboard Screen Mapper Chrome Extension?
> Learn how to display a specific portion of your dashboard instead of the entire webpage using the Dashboard Screen Mapper Chrome Extension
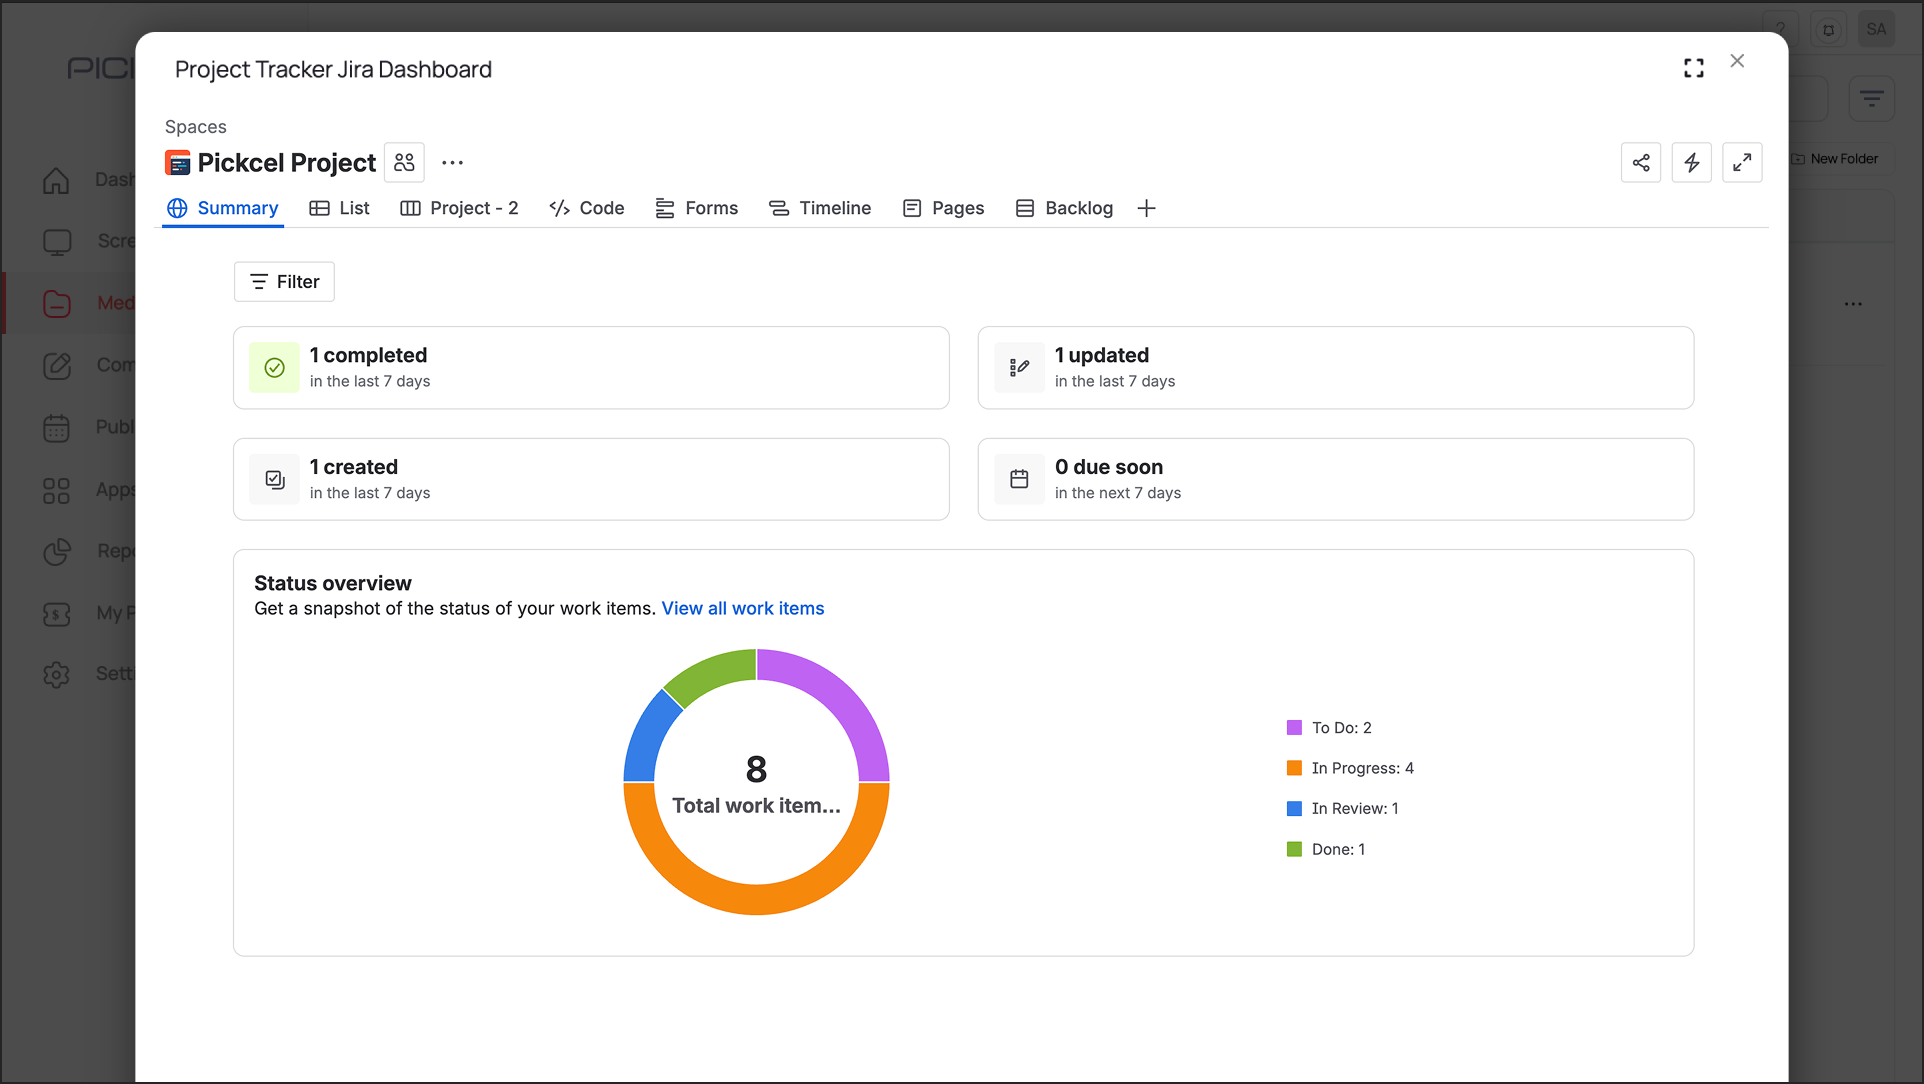
The Dashboard Screen Mapper allows you to display a specific portion of your dashboard instead of the entire webpage. This is perfect for displaying the key metrics from your dashboard and removing unnecessary menus or sidebars.
## Installing the Extension
Open the Chrome Web Store page for the Pickcel Dashboard Screen Mapper extension:
Click here to install the Pickcel Dashboard Screen Mapper extension
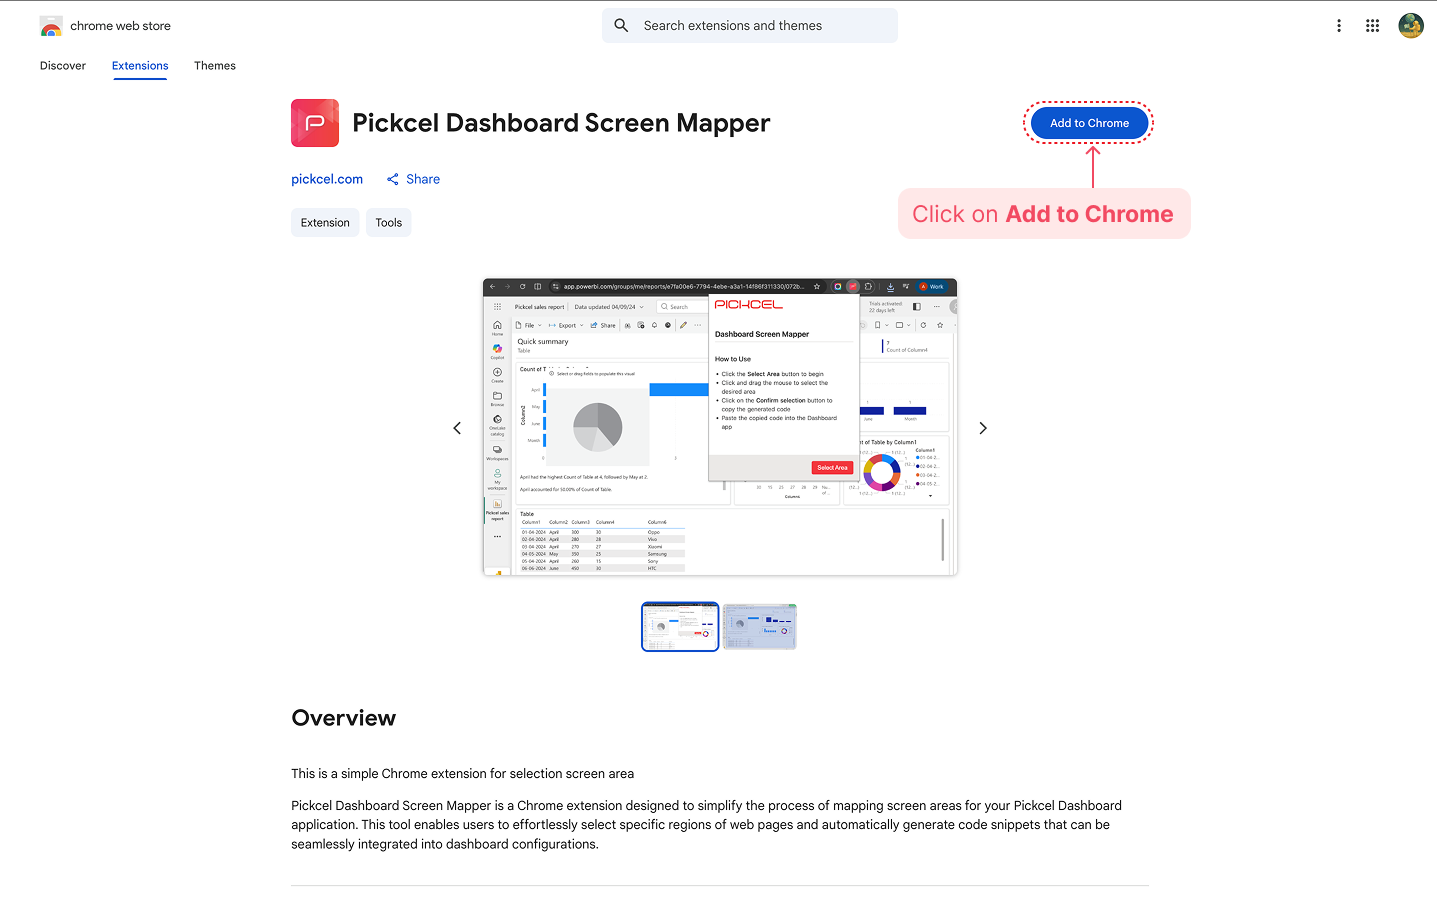
Click the **Add to Chrome** button on the extension page.
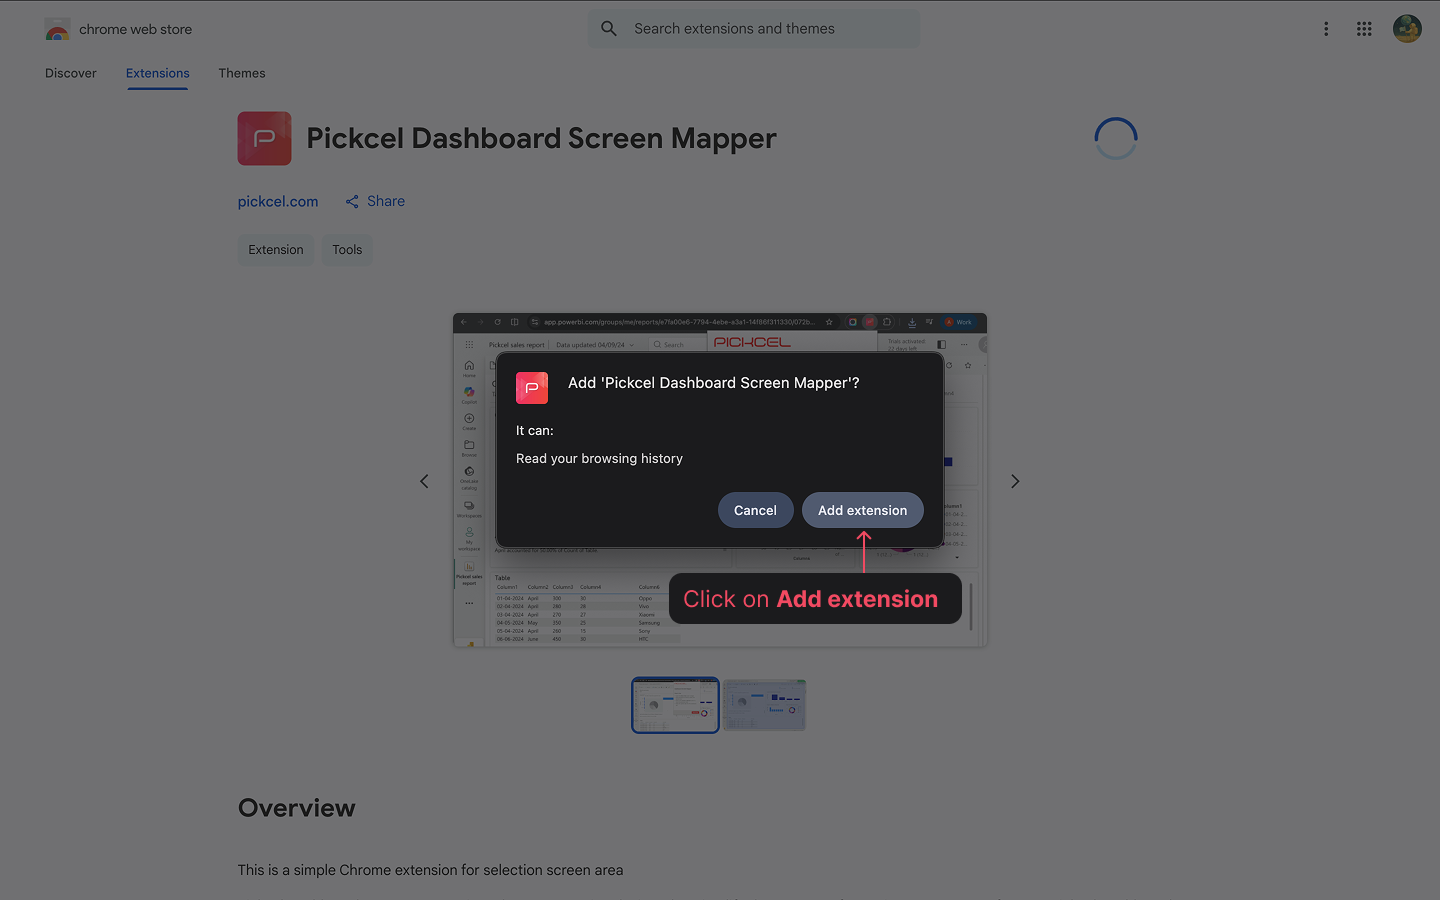
 When prompted, click **Add extension** to confirm the installation. The extension will be installed and ready to use.
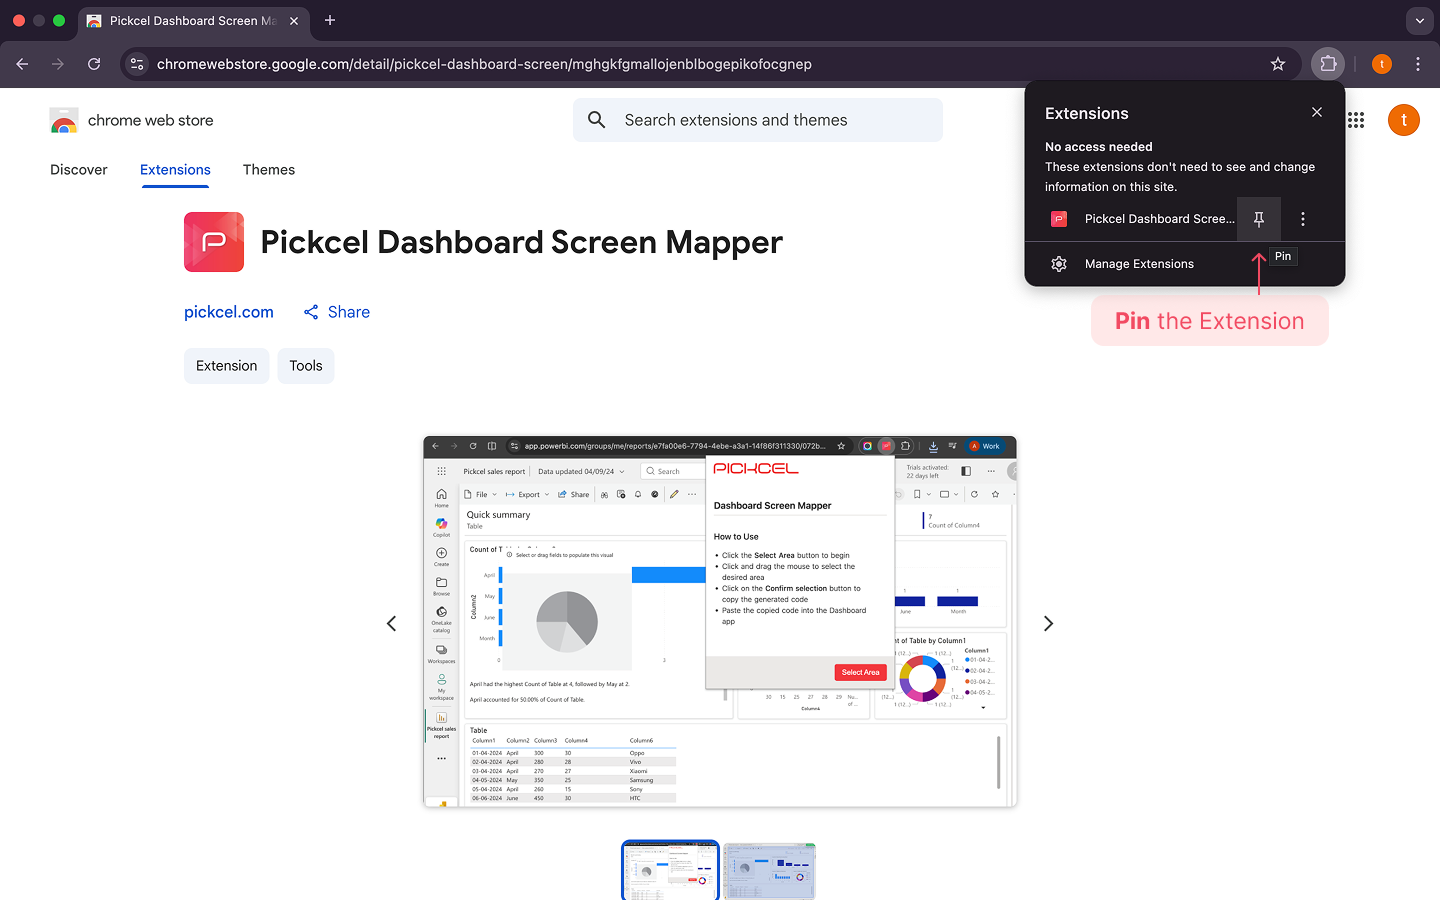
 Click the puzzle icon in your Chrome toolbar and pin the Pickcel Dashboard Screen Mapper Extension for quicker access.
 ## Using the Extension to Capture an Area
Open the dashboard page (e.g., in Jira, Power BI, etc.) you want to display.
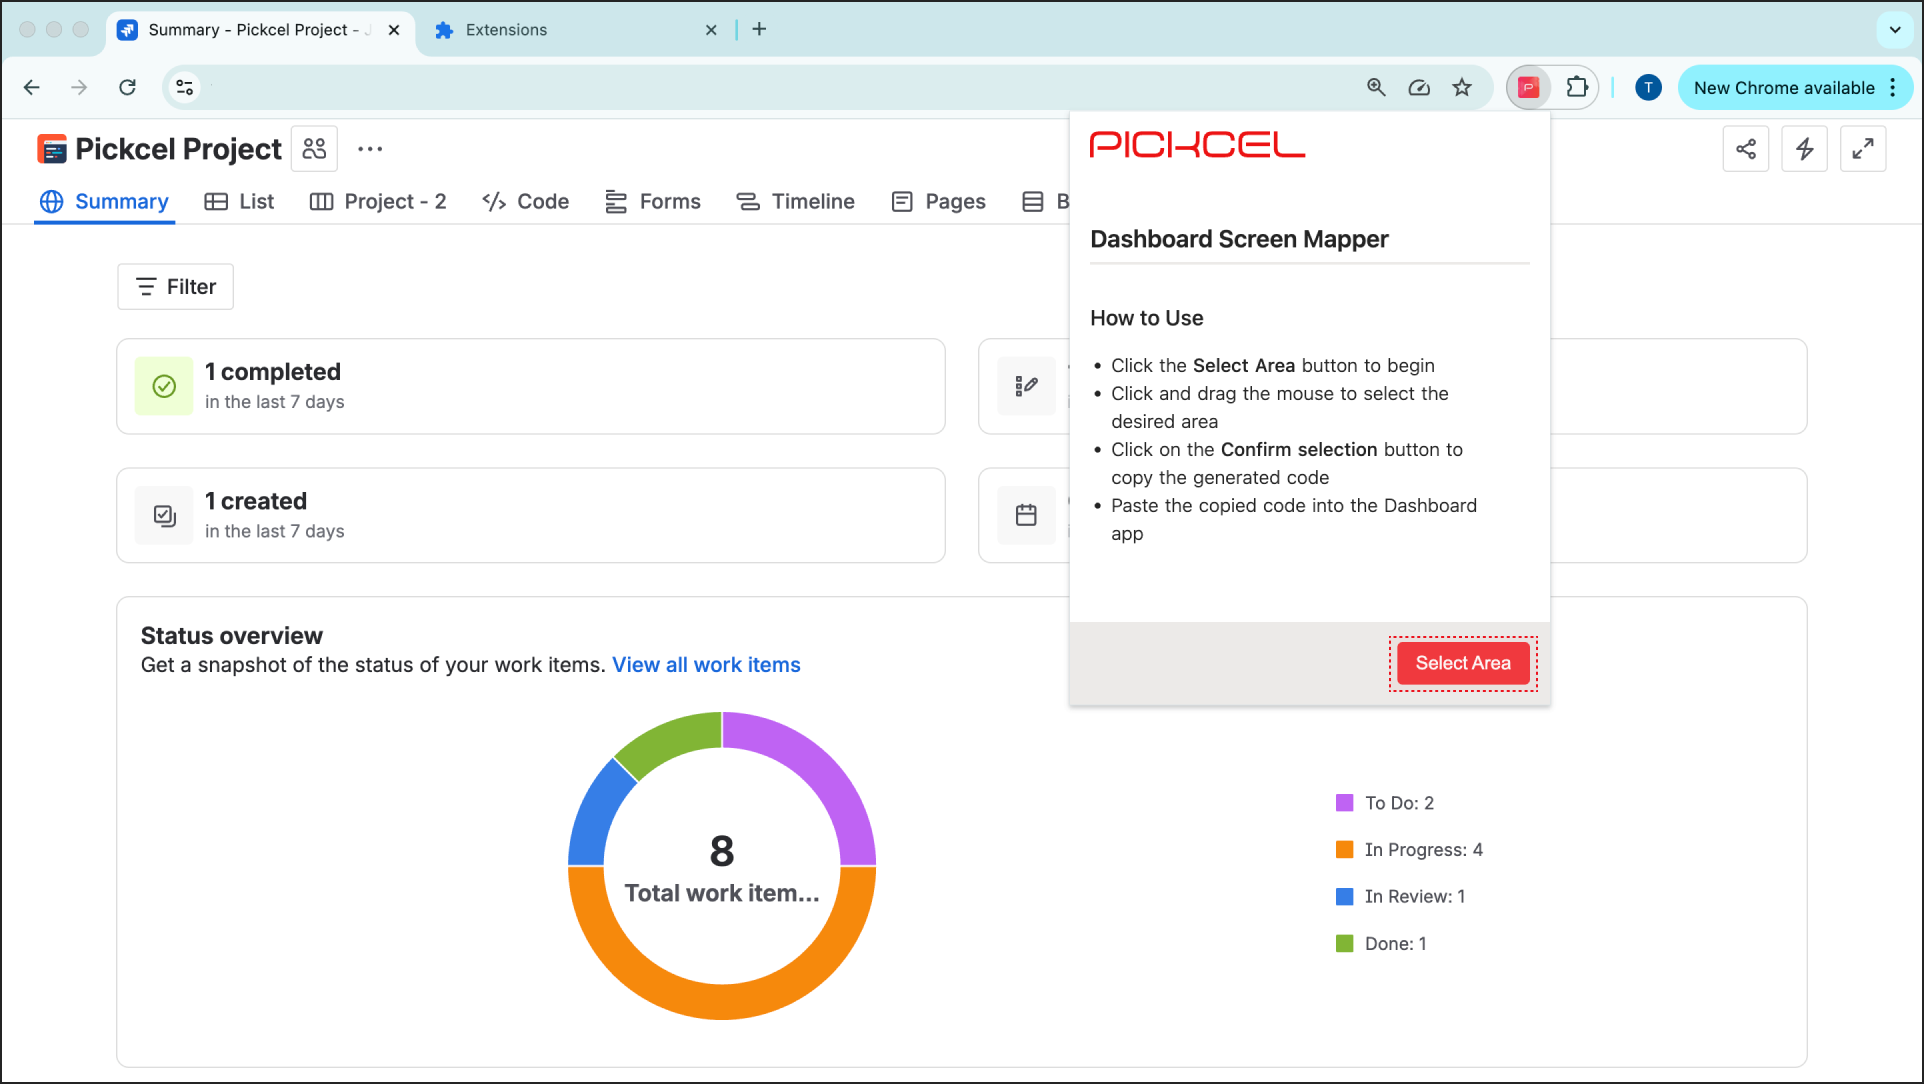
Click on the Screen Mapper extension icon from your Chrome toolbar. Click the **Select Area** button.
## Using the Extension to Capture an Area
Open the dashboard page (e.g., in Jira, Power BI, etc.) you want to display.
Click on the Screen Mapper extension icon from your Chrome toolbar. Click the **Select Area** button.
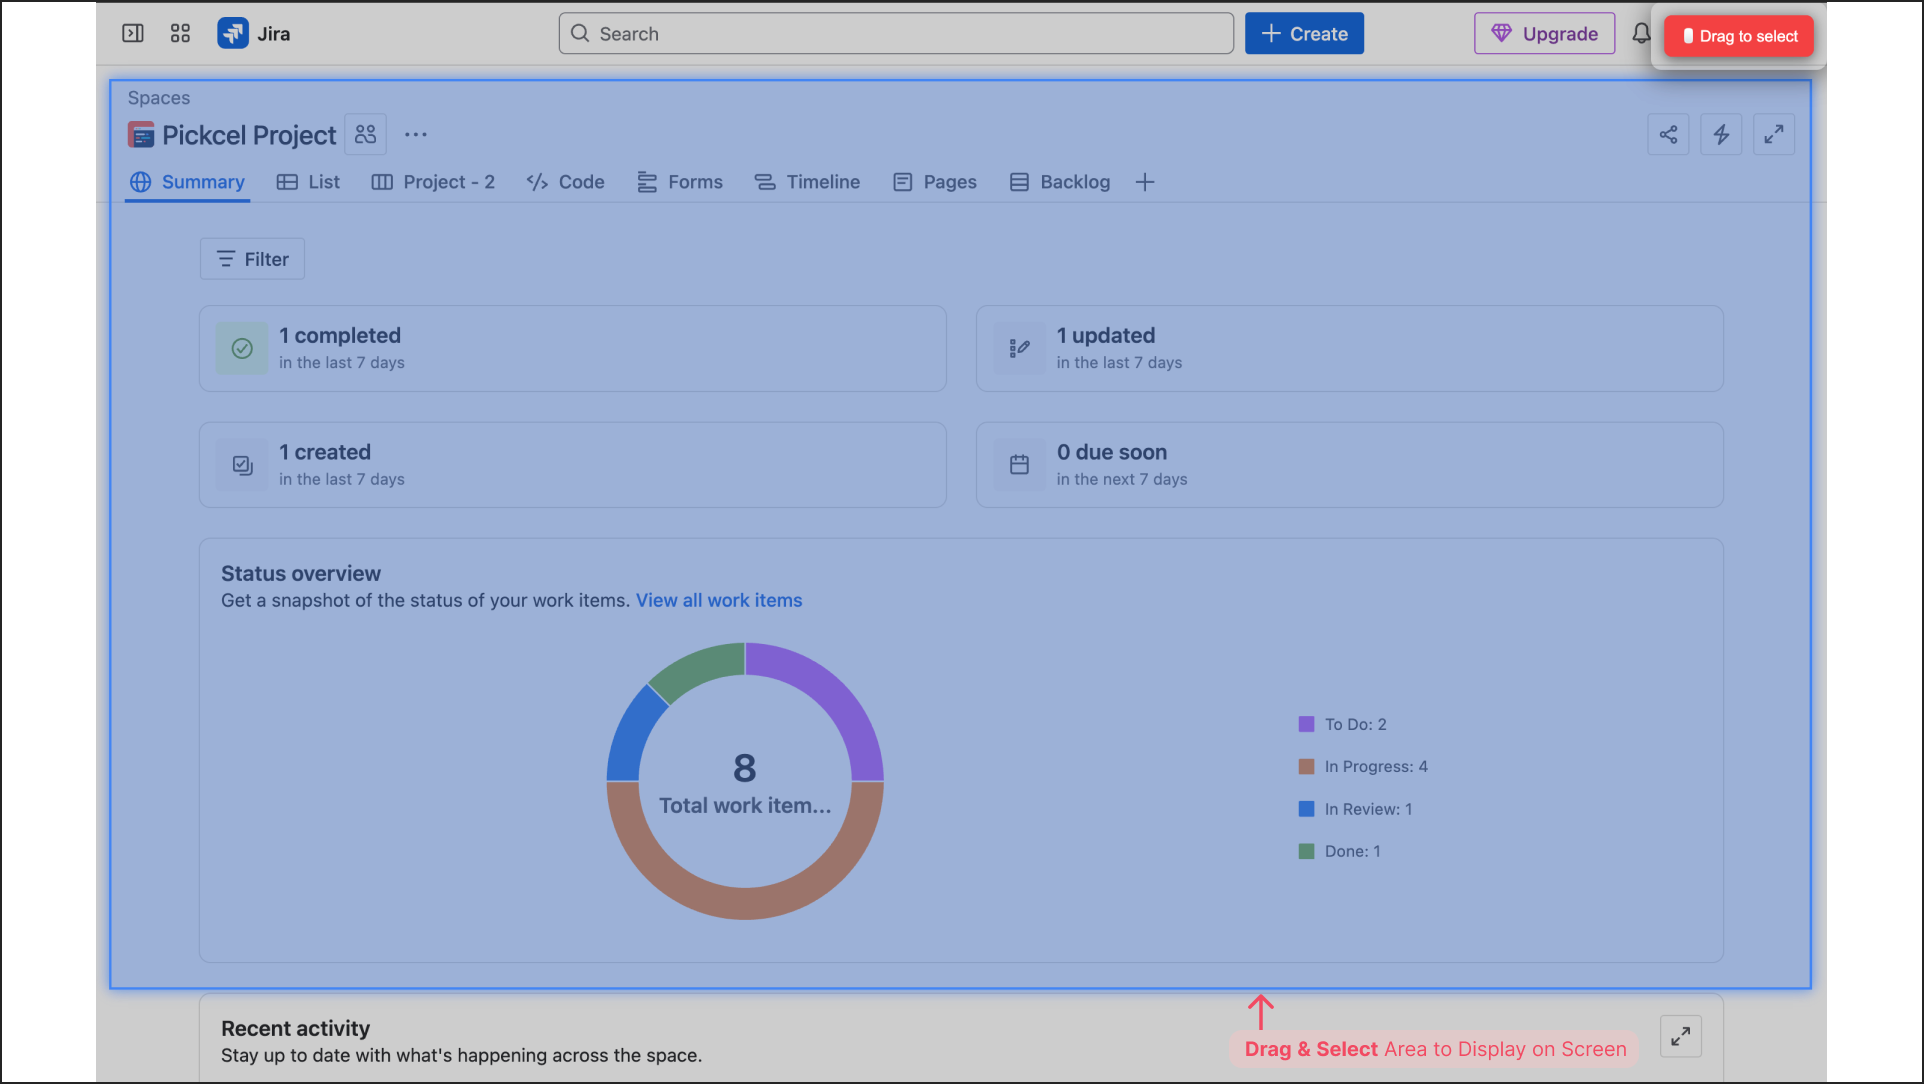
 Your mouse pointer will change into a area selector (+). Click and drag your mouse to select the exact portion of the dashboard you want to capture and display on your signage screen.
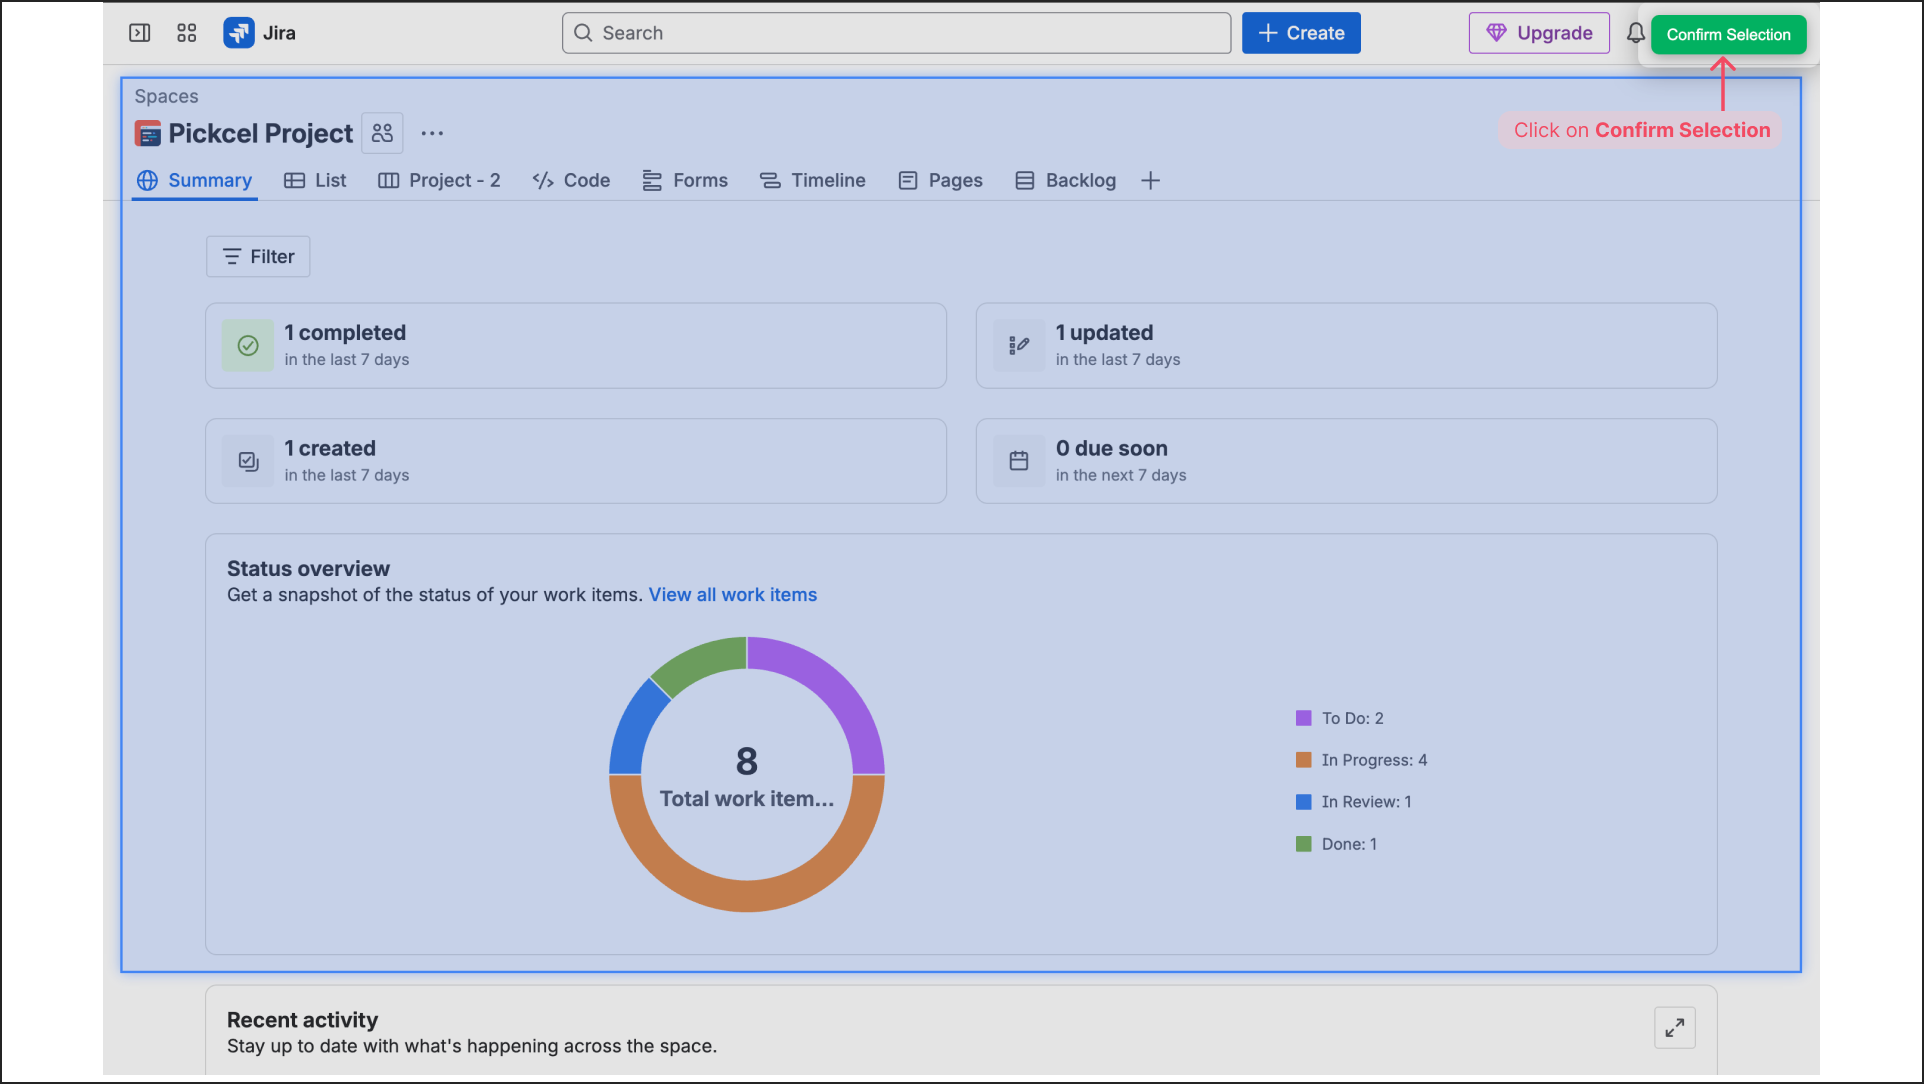
 Once you are happy with the selected area, click the **Confirm Selection** button.
A confirmation message will appear, and the necessary selection code will be **automatically copied to your clipboard**.
Once you are happy with the selected area, click the **Confirm Selection** button.
A confirmation message will appear, and the necessary selection code will be **automatically copied to your clipboard**.
 Go back to your Dashboard App configuration in Pickcel Console and paste this code into the **Screen Selection Code** field.
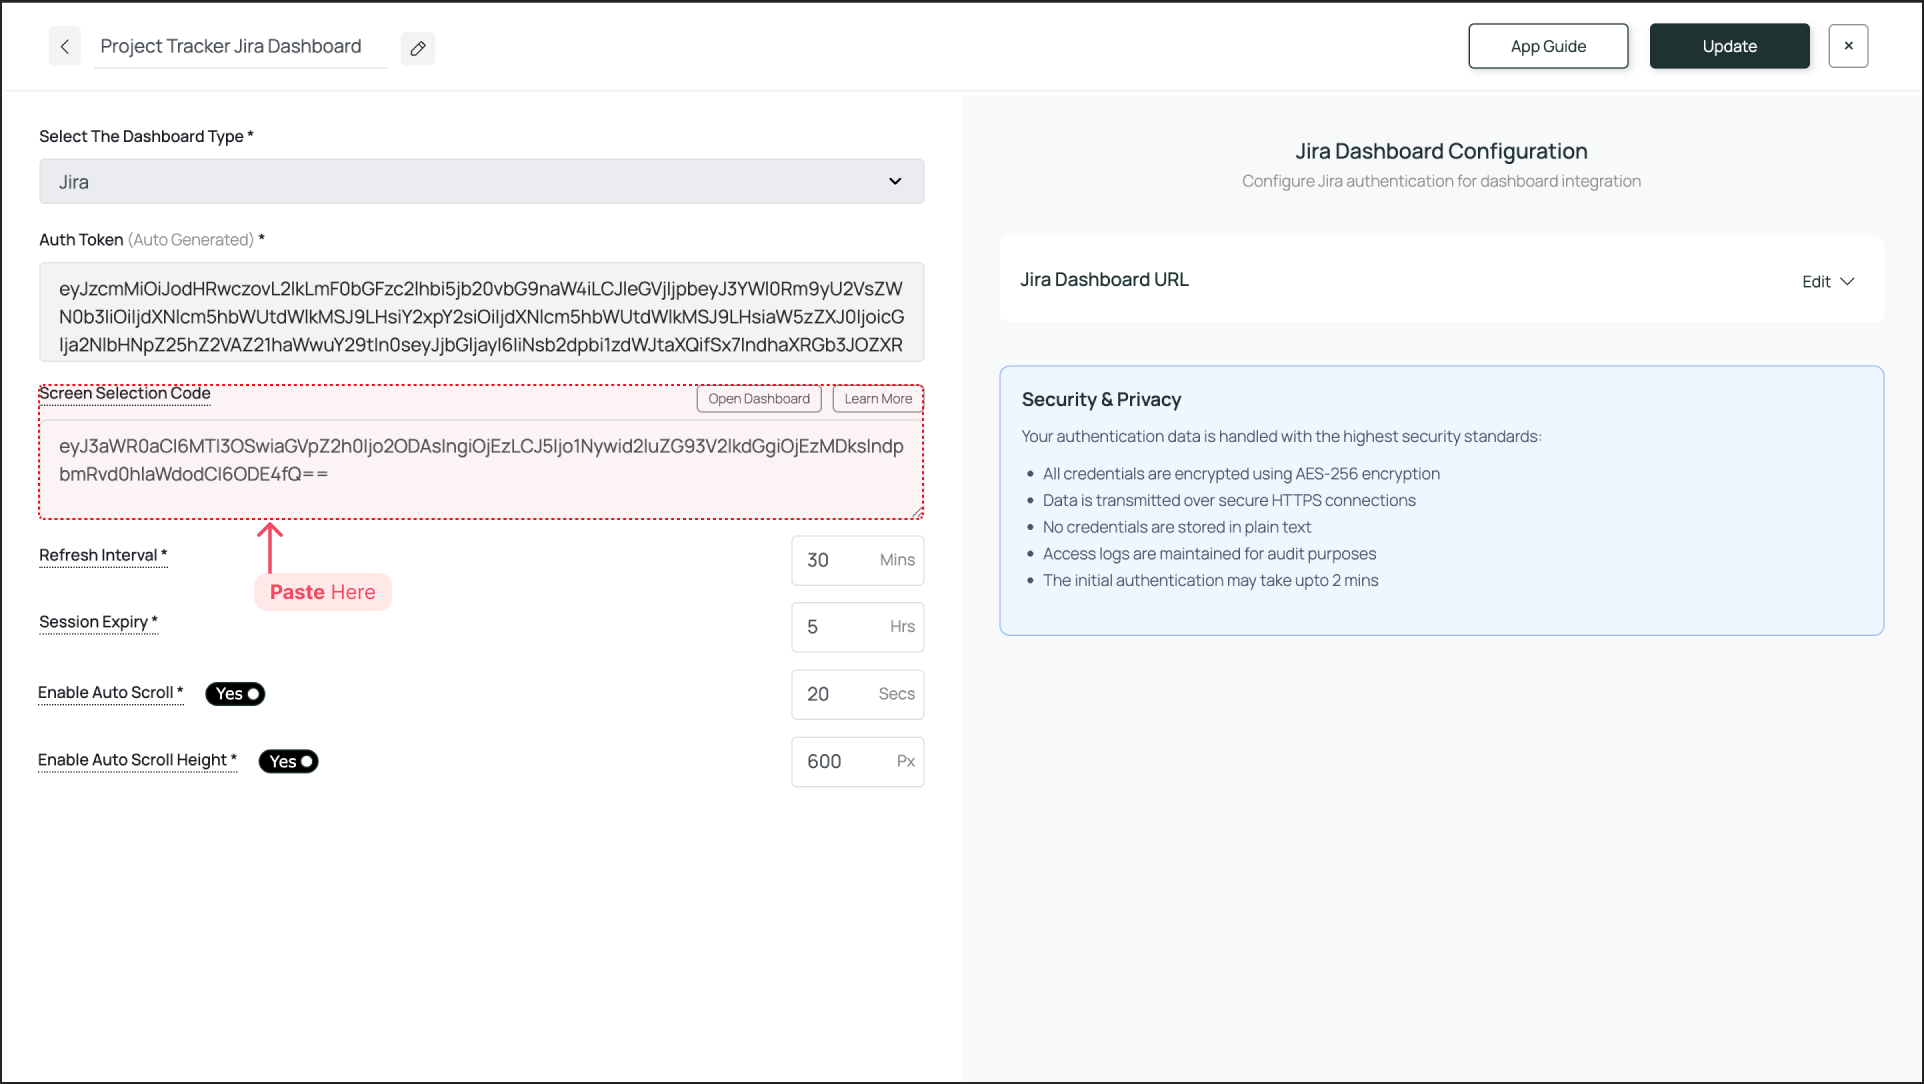 If this field is left blank, the entire dashboard will be shown. We recommend enabling the **scroll functionality** so that everything on the screen is visible.
***
That's a wrap 🎉. After successful configuration, the selected area of your desired dashboard will be visible on your signage screen.
If this field is left blank, the entire dashboard will be shown. We recommend enabling the **scroll functionality** so that everything on the screen is visible.
***
That's a wrap 🎉. After successful configuration, the selected area of your desired dashboard will be visible on your signage screen.